
The calendar is the first screen after logging in to RecurPost. It shows what is scheduled next, what already gone out, and what is saved as a draft.
What is on the Calendar screen
The Calendar has three tabs: Queue, History, and Drafts. Use them to switch between upcoming posts, past posts, and saved drafts.
On the same screen, there are also:
- Social profiles list (left panel): pick one profile, or use a group
- Search: find a profile faster by text
- Filters: narrow results (History includes date filtering)

Queue
The queue shows posts that are scheduled to publish next. Queue lists scheduled posts and shows which social account each post is tied to, plus the order they are lined up in.
View the queue for one profile or a group
Pick a profile (or group) from the left panel to filter the Queue. This limits the view to only that selection.
What to do from the queue
A queue is used to review what is lined up next. Typical actions from the post row/card:
- Open the post to review the copy and media
- Adjust the scheduled time/date (use the schedule control shown on the post)
- Remove a scheduled item if it is no longer needed
Queue views

Queue supports multiple views for the same scheduled content.
- Month (Monthly Calendar View)
- Week (Weekly Calendar View)
- List (List View)
- IG Grid (Grid View for Instagram feed layout planning)
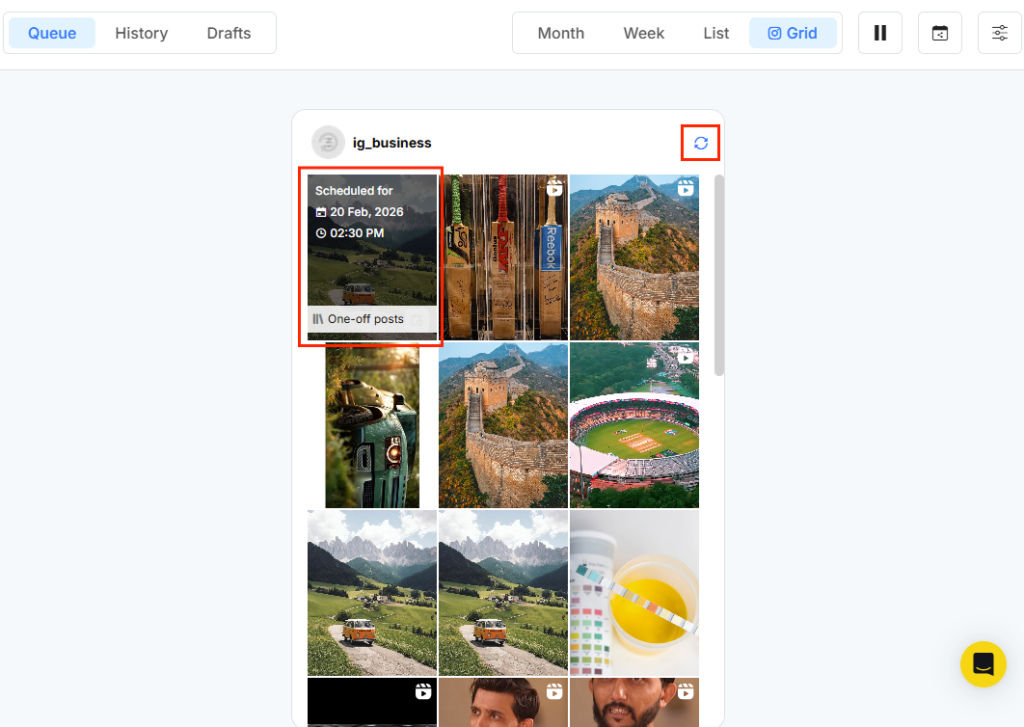
Instagram Grid view
Instagram Grid view shows scheduled Instagram posts next to recent posts from the Instagram account, so the grid reflects the current profile layout.
What appears in the grid?
- Most recent 12–15 posts pulled from Instagram
- Posts shared directly on Instagram or through other tools (not only RecurPost posts)
- Scheduled posts marked with Scheduled for…
You can check all the above features in detail here.
Pause Queue
Pause Queue stops scheduled posts from going out until the Queue is resumed (manual resume or a resume date).
Shareable Calendar
Shareable Calendar creates a view-only calendar link that can be shared with clients or teammates. Comments can be turned on for feedback.
Filter by library
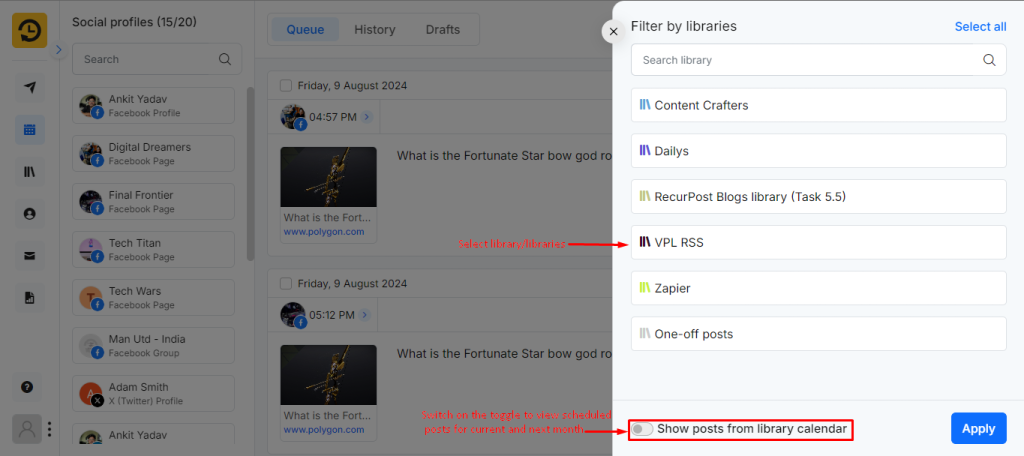
The Library Filter narrows the Queue to posts coming from selected libraries.
See future schedules
The queue shows upcoming schedules up to 2 months ahead via the “future schedules / Library Calendar” view.
Actions on a Queue post
Queue supports direct actions on posts.
- Preview (eye icon)
- Edit (pencil icon)
- Delete (trash icon)
- Post Now (publish instantly for a selected account)
- Drag and drop (move posts in Month/Week views)
History
History shows posts that are already published and also shows failed posts with a reason.
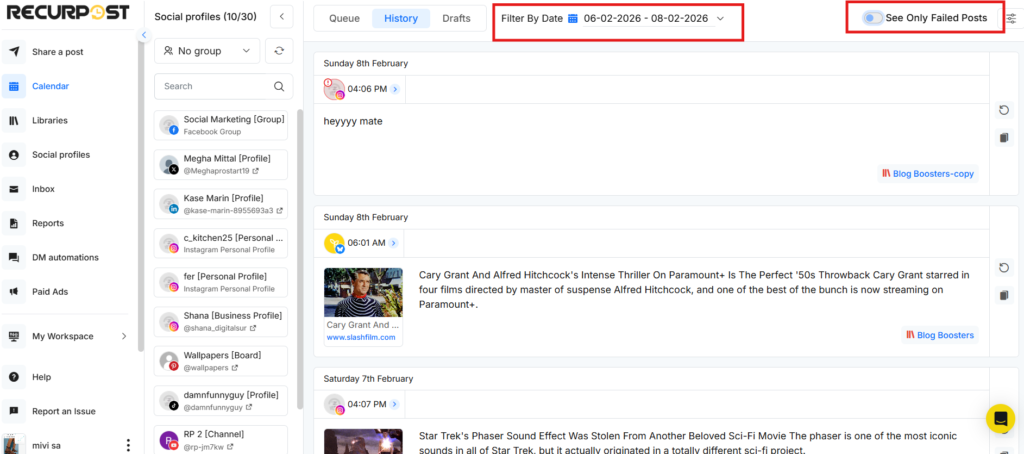
Date filters
History now has quick date selection ranges. Open Filter By Date, pick a range, then click Apply to load results.
Available ranges:
- Today
- Yesterday
- Last 7 Days
- Last 30 Days
- This Month
- Last Month
- Custom Range
You can view your posts up to two months in advance. This allows you to “look into the future” and gives you room to make improvements and optimize your posting strategy.
Read failed-post reasons
History lists the failure reason on the post when a platform rejects it. One example mentioned in the Knowledge Base is a Tweet over 280 characters.
Actions on History posts
History supports these actions.
- Reschedule
- Copy Content (copy a published post into libraries)
- Retry Now and Edit and Retry (for failed posts)
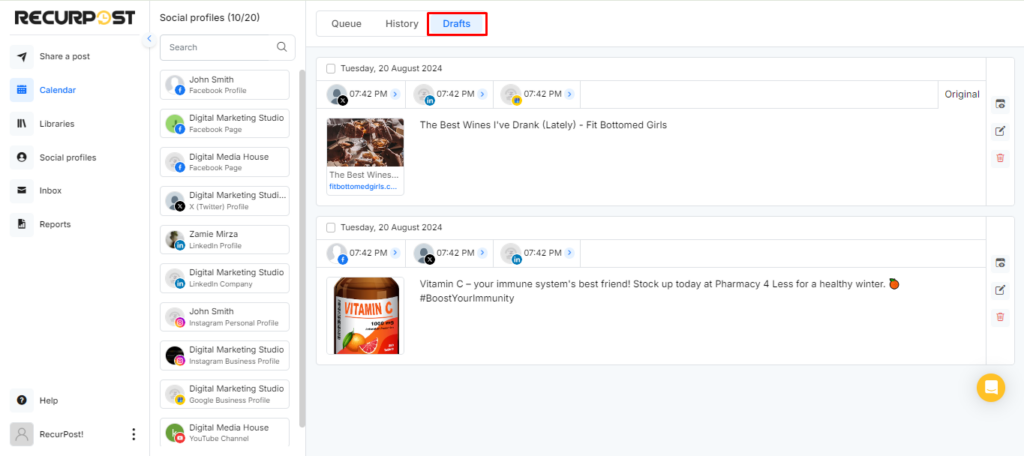
Drafts
Drafts store posts that are saved but not scheduled yet.
Use Drafts for unfinished work
Drafts are used to keep work-in-progress posts in one place. Common actions:
- Open a draft and continue editing
- Schedule the draft when it is ready
- Delete drafts that are no longer required
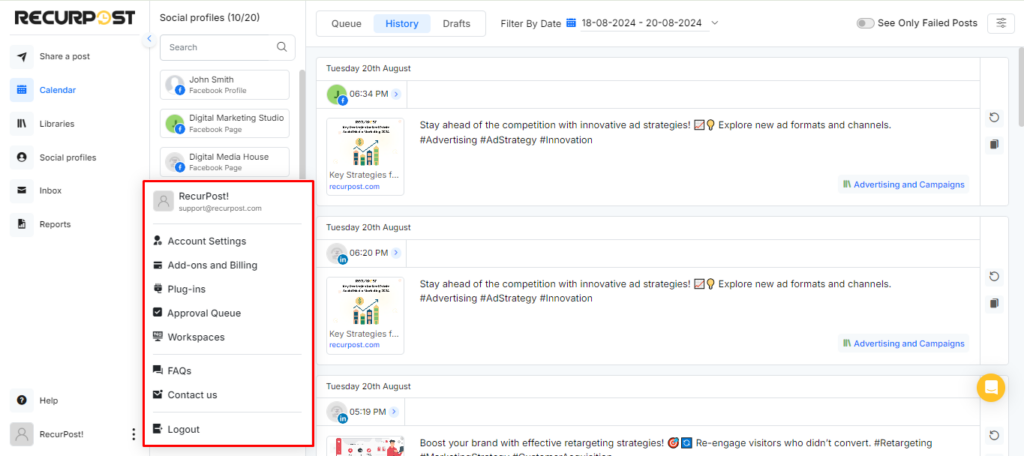
Other Features on the ‘Calendar’ Page
- Account Settings – You can manage your RecurPost account from here.
- Billing – You can check, manage your plan, invoices, and manage your add-ons from here.
- Plug-ins – You can manage your URL Shortner, Hashtags, Bag of Tags, Import from social media, and Custom Fields from here.
- Approval Queue – This option allows your team members to send the post for your approval, and as a team owner, you can approve the pending posts. In order to use the Approval Queue, you must set up the Workspace first.
We hope this information was helpful to you. In case you have any questions or need help with the Dashboard tab, please reach out to us at support@recurpost.com.
Frequently Asked Questions
A post is not showing in the queue. What happened?
Queue visibility depends on view + filters + status.
Check these:
1. Selected profile/group: the left panel limits what shows on screen.
2. Library Filter: remove filters to view all scheduled posts.
3. View range: switch Month/Week/List, or open future schedules to see content up to 2 months ahead.
4. Draft vs scheduled: saved-only posts appear in Drafts, not Queue.
5. Published/failed: posts that already ran (or failed) appear in History.
Scheduled posts are going out at the wrong time. What could be the reason?
Check the account time zone. Time zone settings can affect publish time.
Where are the failure reasons shown?
Failure reasons show in History. Review the note on the failed post, fix the issue, then schedule again.