It can get really difficult trying to invite and manage all your team members in one fully organized place. For the most part, such places aren’t always available either.
But with RecurPost, you no longer have to worry about it being a problem. It comes in handy when you have multiple people to manage and multiple accounts to handle.
With our Workspace feature, you will easily be able to invite team members and assign them libraries and accounts that they may be responsible for. You can check our article on ‘How To Use A Workspace Feature On RecurPost‘ from here to see how to create one. Once you have created a Workspace, the invitation itself is a two-step process, which we will be seeing below.
Step 1: Create a Workspace
To extend an invitation to a team member, simply begin by creating a Workspace.
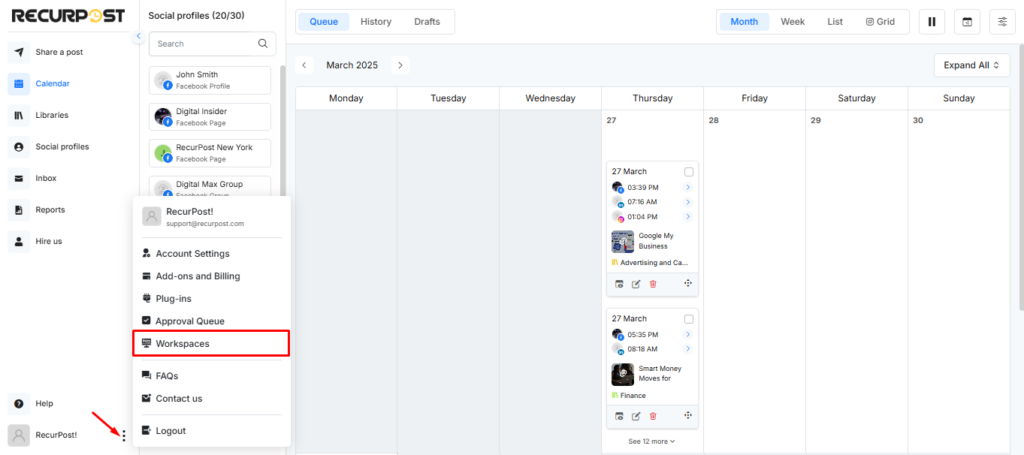


Step 2: Grant team members access to your social accounts and libraries
Once you’ve entered the name of your workspace.
- Select social accounts that you want your new team member(s) to have access to.
- Select the libraries that your team member(s) will be handling and will be responsible for.

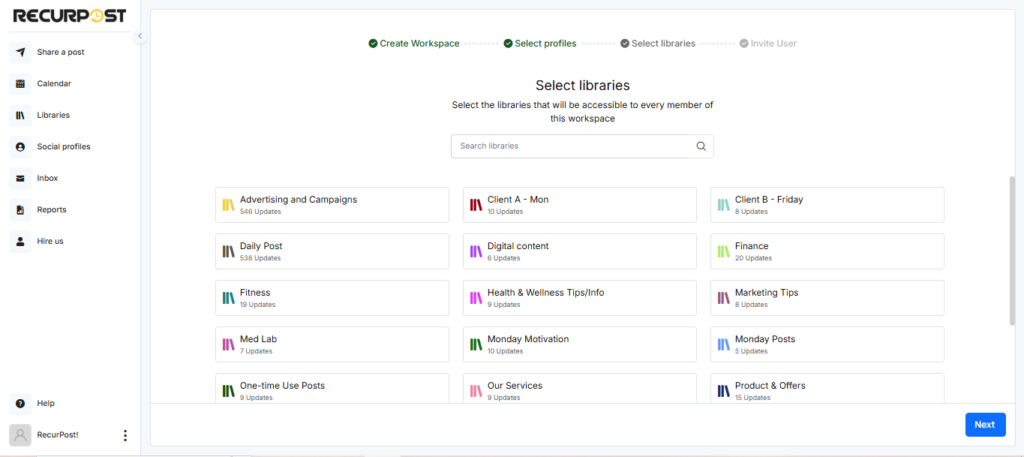
This will allow you to assign specific duties to each member and keep a check on their responsibilities individually. Also, this will ensure that they don’t accidentally post on the social accounts that they are not supposed to, as we know that’s usually not a great move to make in the attention industry.
Step 3: Invite the team member
To invite someone, enter their email address and hit ‘INVITE’. Once you do, they will get an email invitation request, which they must accept.

You can invite members according to the plan you have purchased. For example, if you are on the ‘Professional‘ plan, you can invite 1 member. However, if you wish to add additional members, you can do so at an additional cost of $20/month per member.
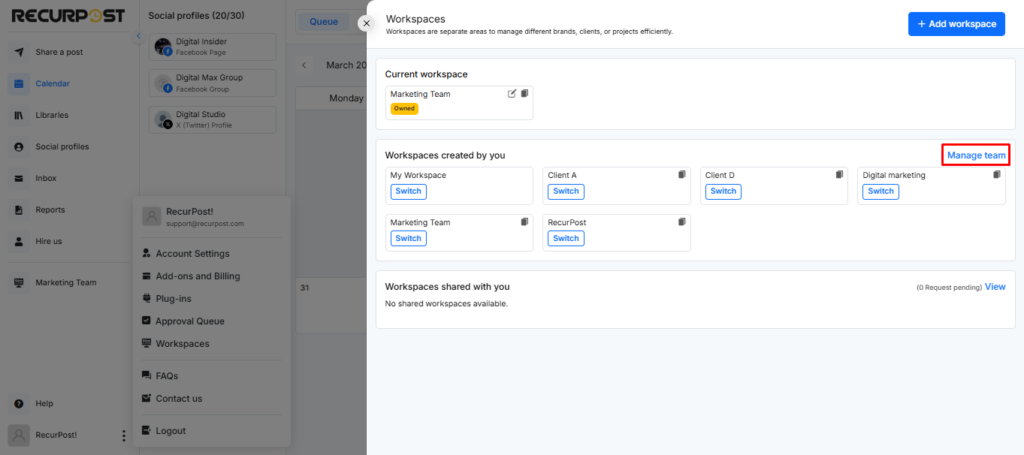
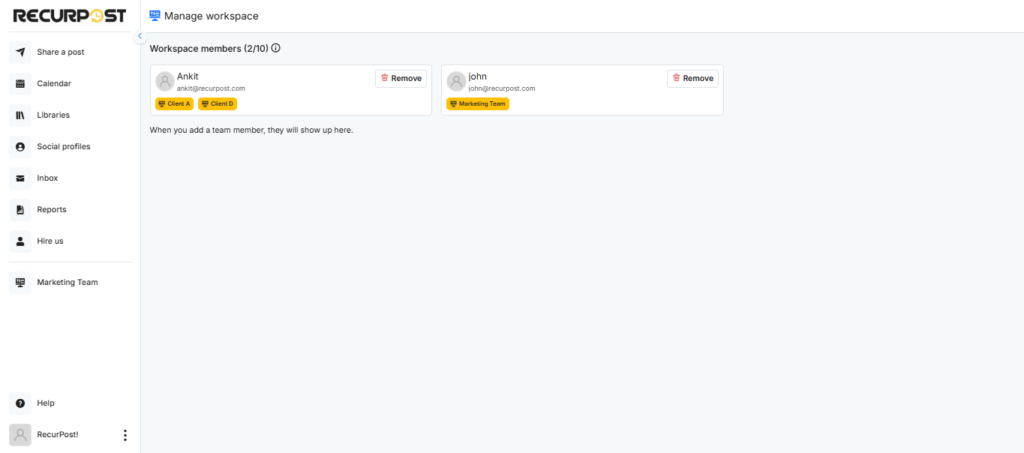
Once you’re done with all of the above steps, your Workspace management page will look something like this.

If you would like to see all the team members managing you workspaces, then click on the Manage team button under Workspace.
What Team Members See After Joining
Once your team member accepts the invitation and logs in, they’ll see something helpful right away. RecurPost shows them exactly what they have access to.
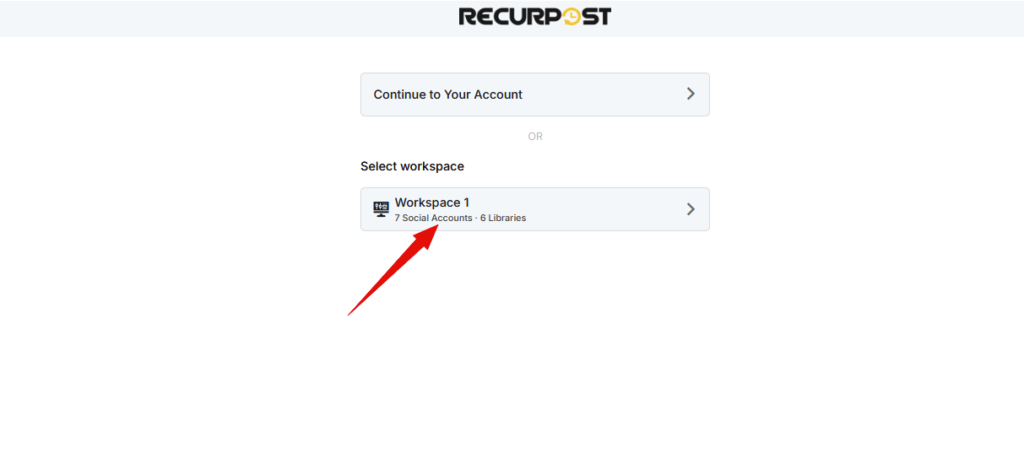
When they reach the workspace selection screen, each workspace displays key information. They’ll see the number of social accounts they can manage and how many libraries they can access.
For instance, if you assigned them 7 social accounts and 6 libraries, that’s what they’ll see listed. No guessing, no confusion about what they’re responsible for.
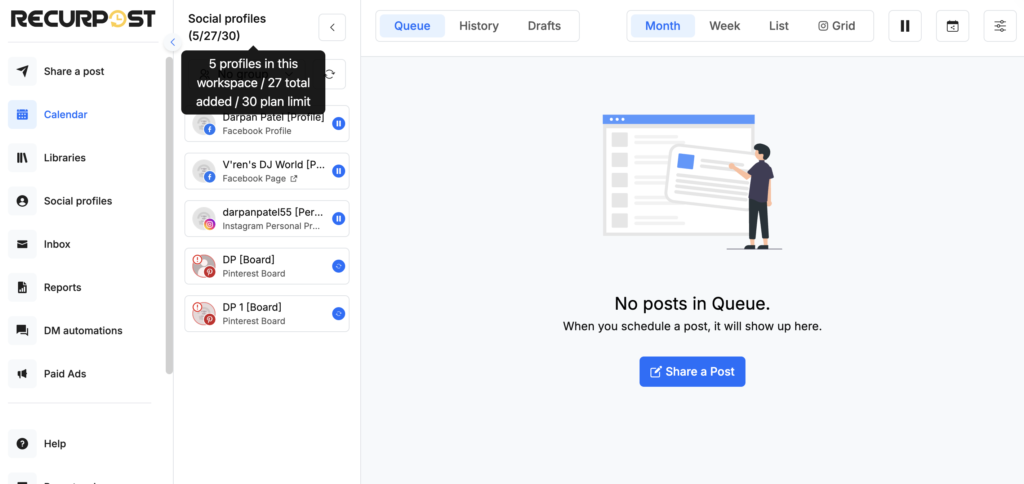
After entering the workspace, this information stays visible on their dashboard. The social accounts count remains on screen, helping them stay organized throughout their work session.
This transparency helps team members understand their scope of work immediately. They know exactly which accounts need their attention and which libraries contain their content.
It’s a simple way to keep everyone on the same page from day one.
We hope this guide helped you understand how to invite new team members and assign them their roles accordingly.
If you still have questions or need any clarification on something, please feel free to contact us at any time at support@recurpost.com.