
Keeping up with the latest trends seems almost impossible these days. Not to mention how the need to constantly post bulk content on social media is on an all-time high.
This is where RecurPost steps in. We know how hard it is to write and to post so many posts individually and the amount of time and effort it takes.
To help you with that, we have created a way for you to add posts in bulk, saving you a ton of time and energy.
Let’s see how to add content in bulk.
Step 1: Go to your Library
When you create an account, 3 libraries will be made by default. You can find it by going to the ‘Libraries‘ page. You can create new libraries by clicking on the ‘+ ADD LIBRARY’ button. Click on the library of your choice to add posts to it.
RecurPost supports uploading content in bulk in various ways, so you’ll get a lot of options to upload content inside the library. By selecting the ‘+ADD POST’ button at the top of the page, you can add one post at a time. Click on the ‘+ ADD A POST‘ button on the right corner to add your posts in bulk.
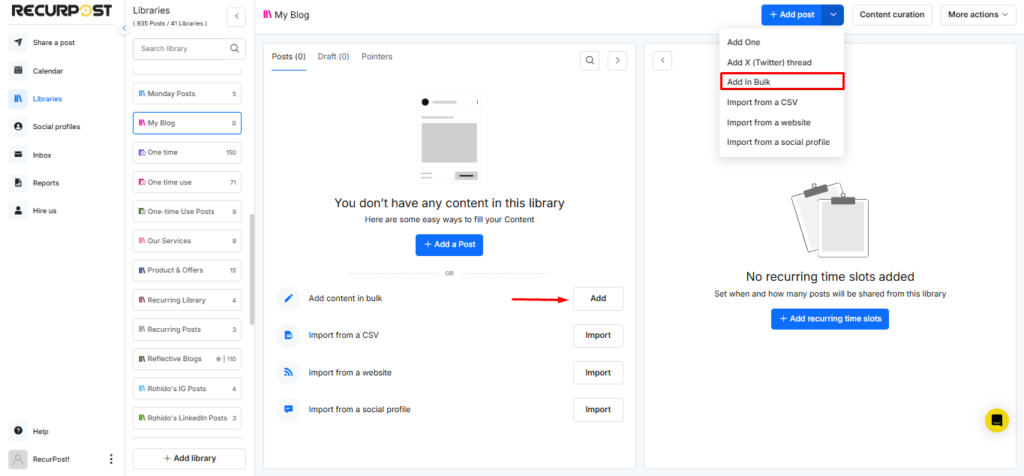
Here, you can add either text/link posts or image posts in bulk or you can also add posts in bulk through a CSV file.
Step 2: Add Your Content
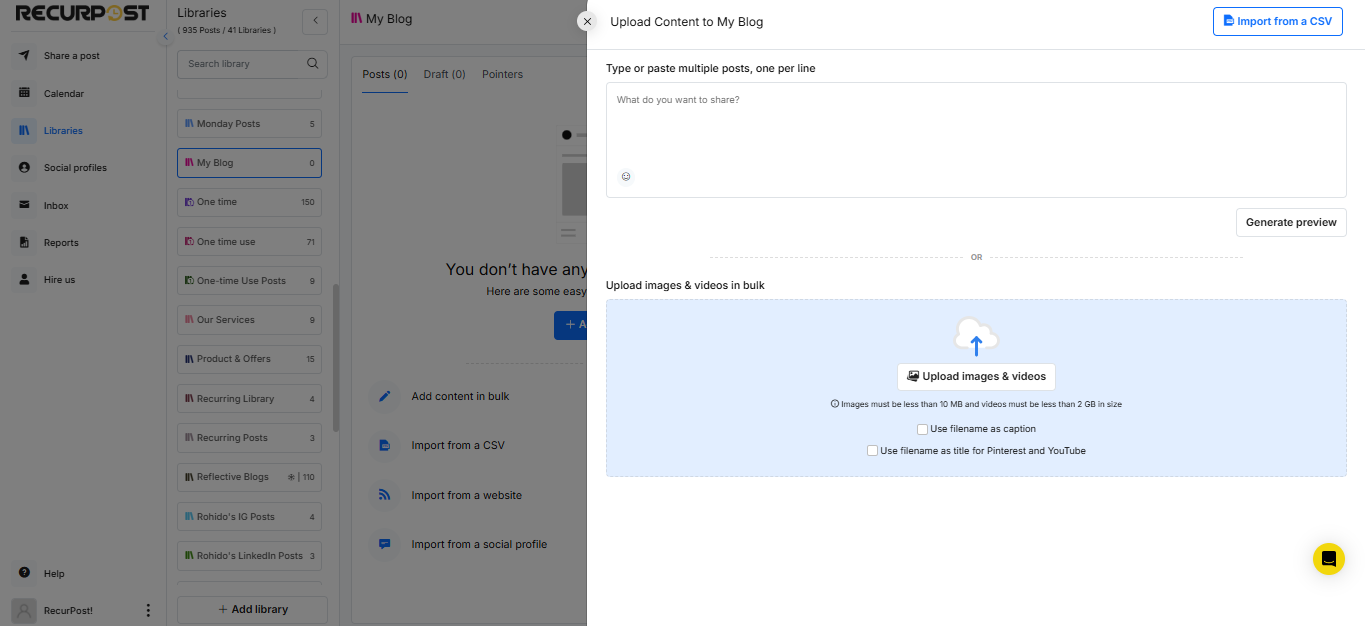
You can add two kinds of content in bulk: Text/Link posts or Image posts.
First, let’s see how to add text posts in bulk.
Bulk uploading for Text/Link posts
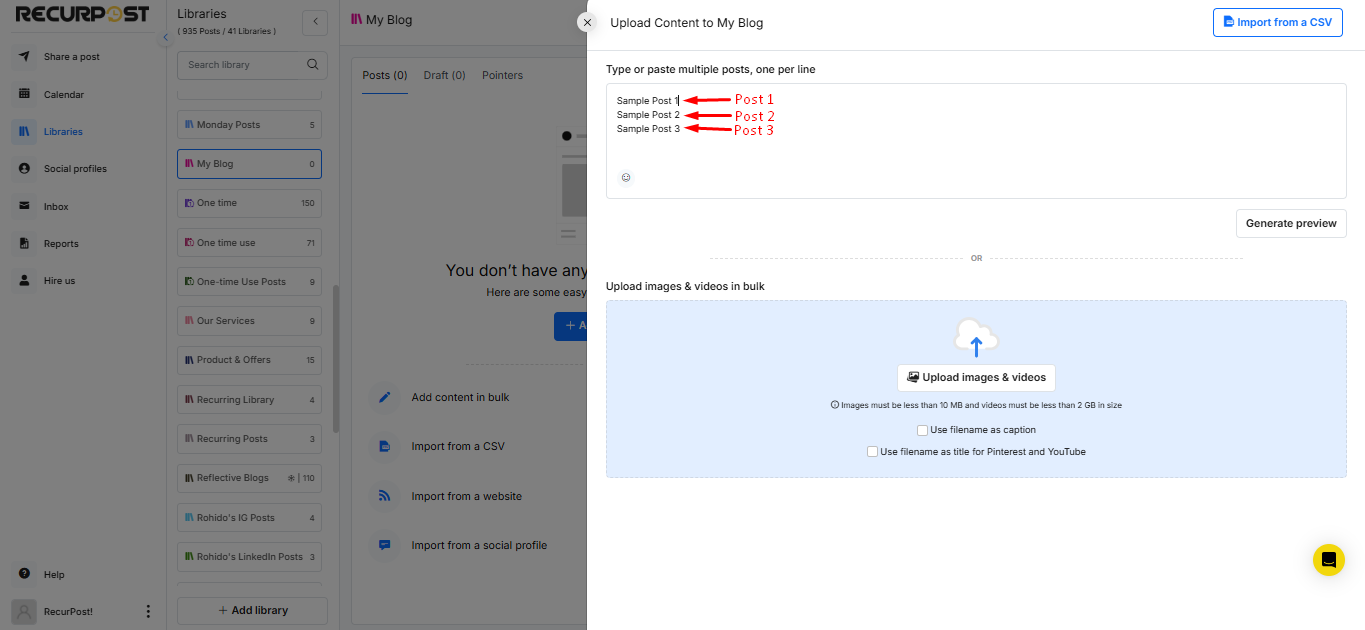
Next, I’ll be seeing a total of 3 posts. The preview allows you to see how your posts will look on each social media platform. You can still make changes to your content, save them as drafts, recycle them, or add media images for each post.
The first post will be the text post as Sample Post 1, Second will be the text post as Sample Post 2, and Third will be the text post as Sample Post 3. So, the message for each post will be separated by a new line as shown in the image above.
You can also add links instead of texts like so:
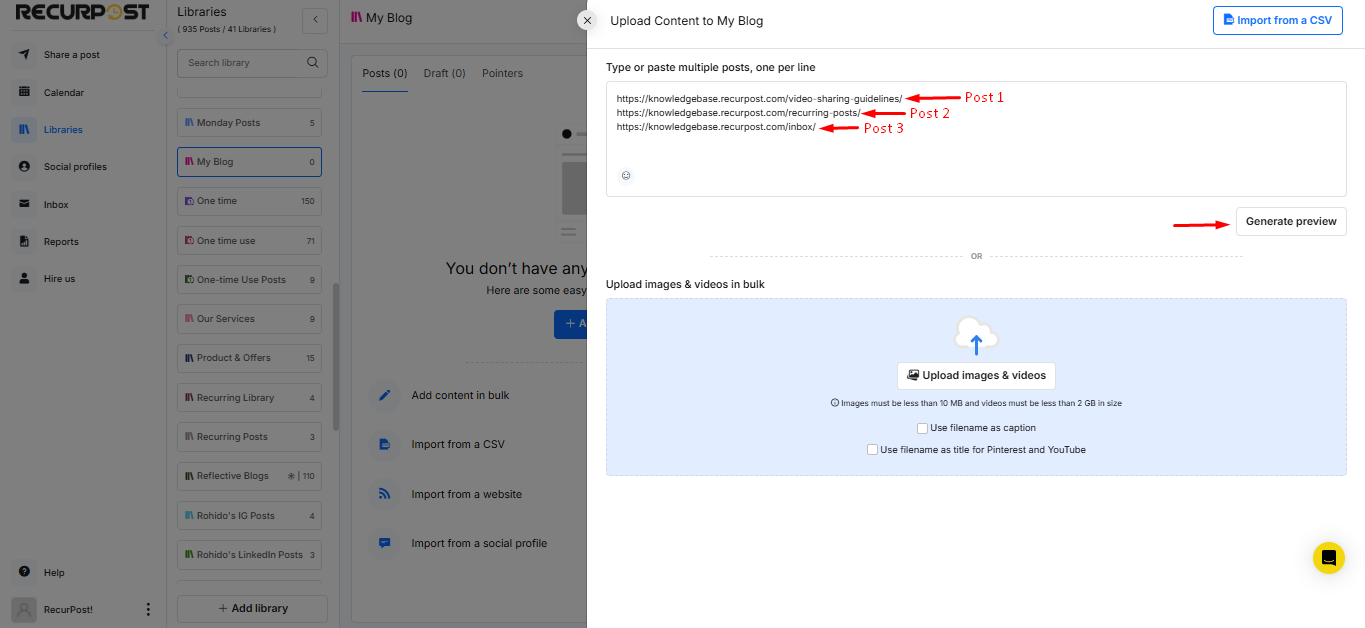
In this case, I’ll be creating 3 link posts.
Once you’re happy with your selected links, click on ‘Generate Preview‘.
The preview allows you to see how your posts will look on each social media platform. You can still make changes to your content, save them as drafts, recycle them, or add media images for each post.
Once you’ve previewed your post and are satisfied with how it looks, you can directly add those posts to your selected library. To do so, scroll down and click on the ‘ADD TO LIBRARY‘ button.
Bulk uploading for Image posts
Now let’s see how to add image posts in bulk. It’s almost the same procedure to add images as it is to add text.
On the ‘Upload Content in Bulk’ screen, click on ‘Upload Images & videos‘ button and select your images directly from your computer. Keep in mind that your images must be less than 10 MB in size.

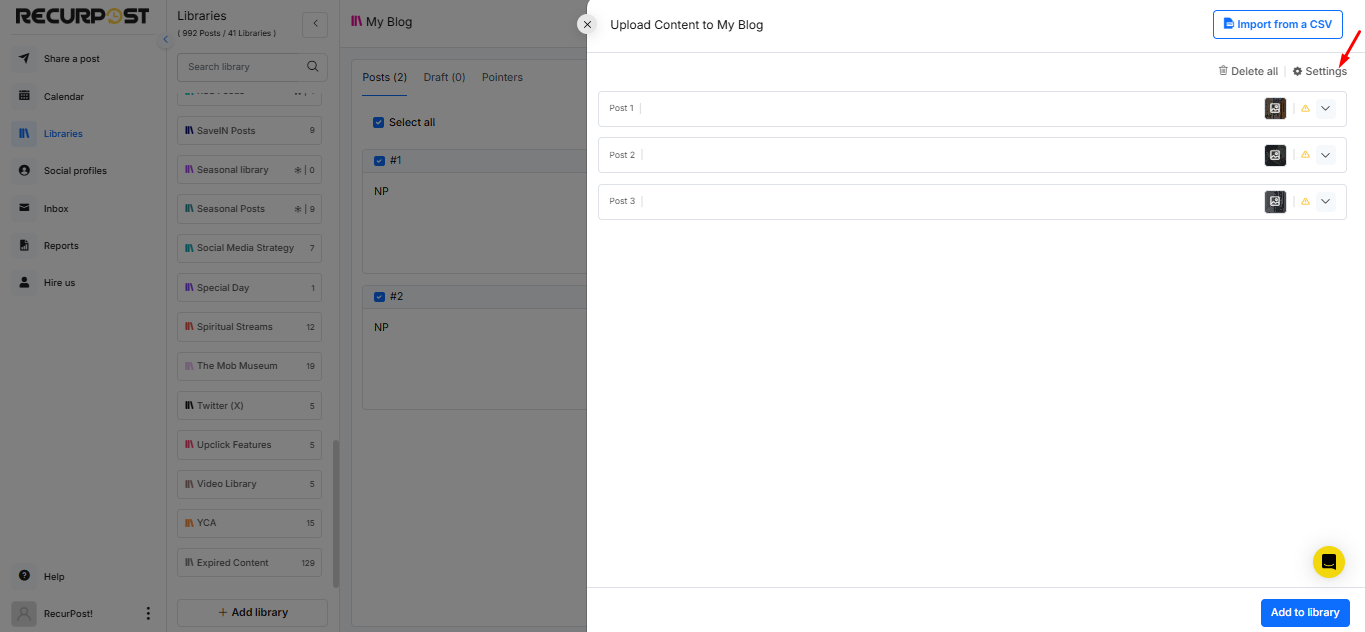
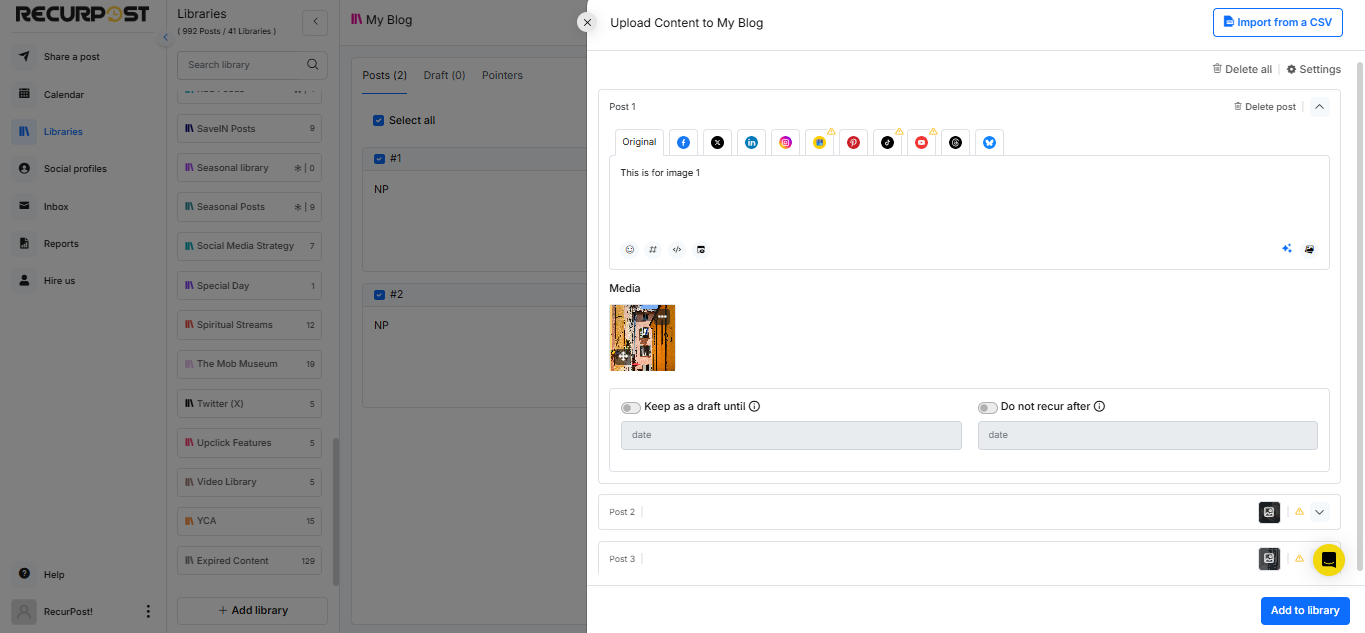
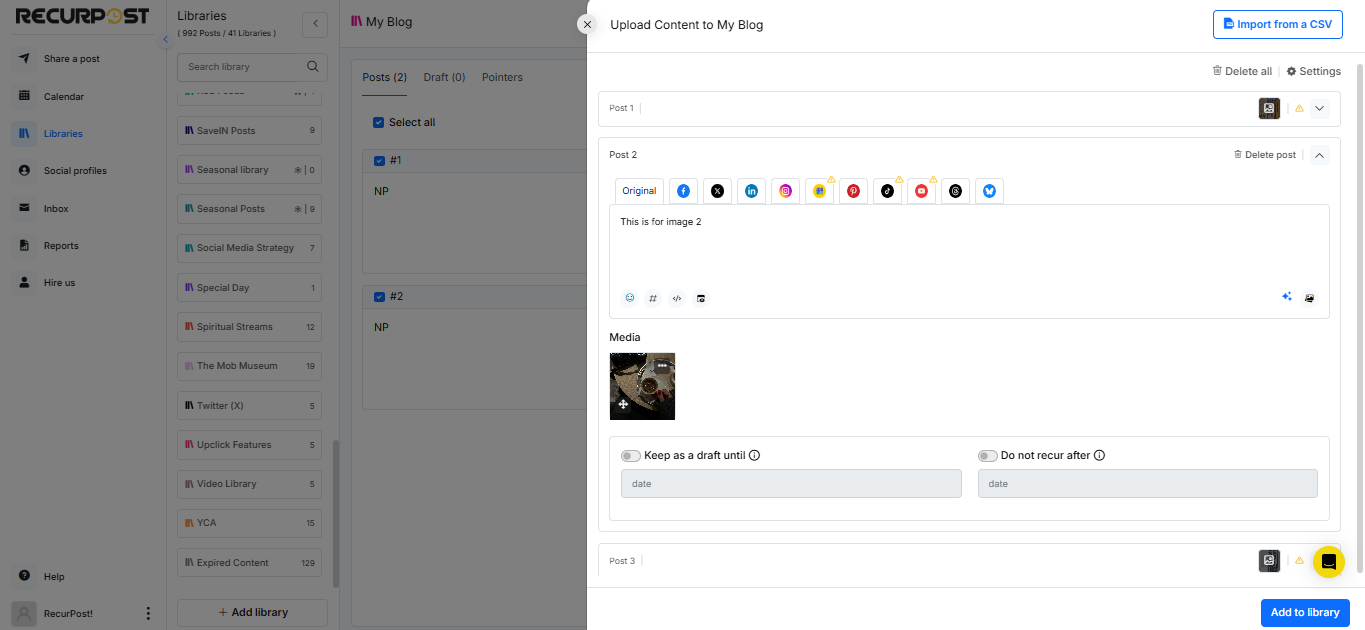
After adding your images, you’ll see them displayed one after the other. In this case, I have added 3 images so I’ll see them in the preview as ‘Update 1’, ‘Update 2’, and ‘Update 3’.
Now, You can click on settings to add a caption or customization to the bulk posts.
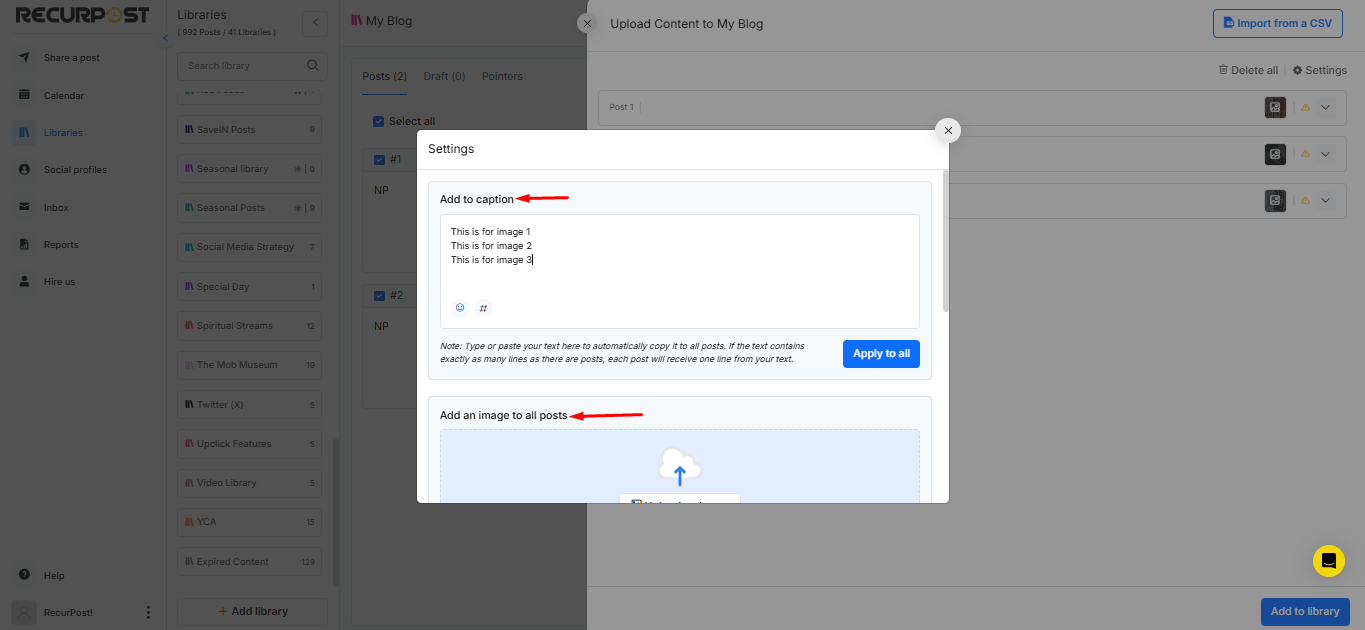
After adding your caption and customization, go ahead and click on the ‘APPLY TO ALL‘ button.
You’ll see the following pop-up:
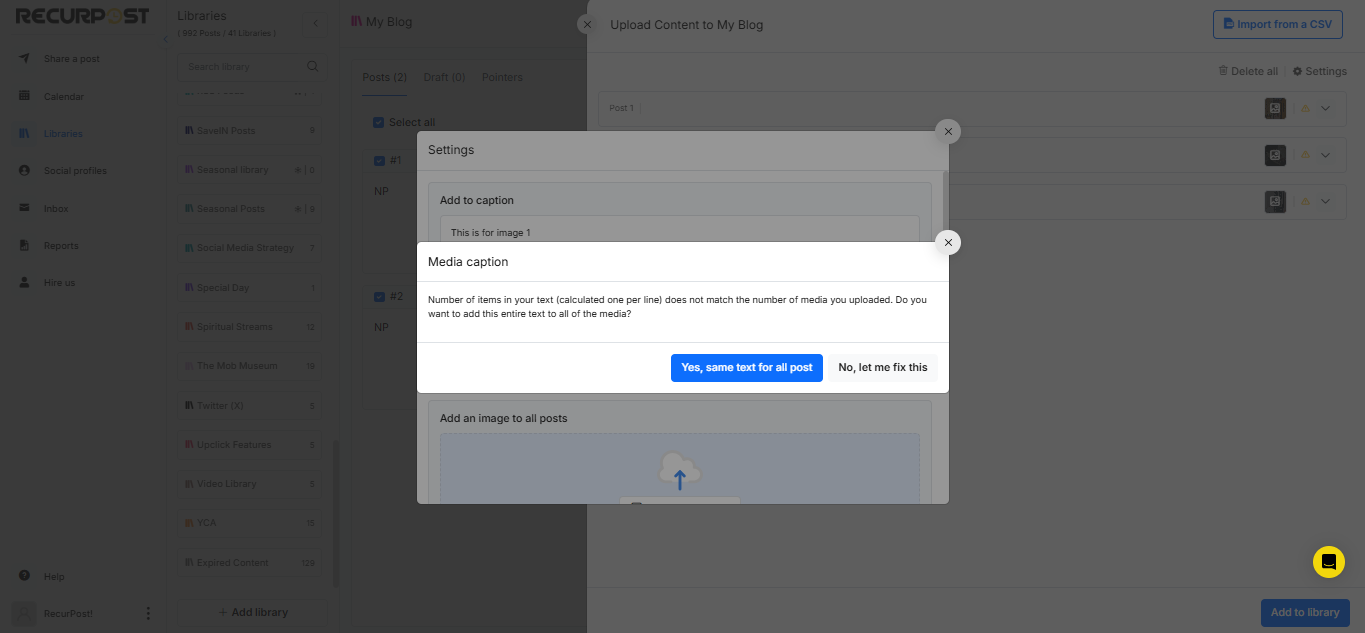
Let’s say I want my captions (3 messages) spread to the 3 images evenly, i.e. one caption for one image.
To do that, click on ‘ADD ONE ITEM TO ONE IMAGE‘. That way, you will distribute your content evenly among the different images like so:

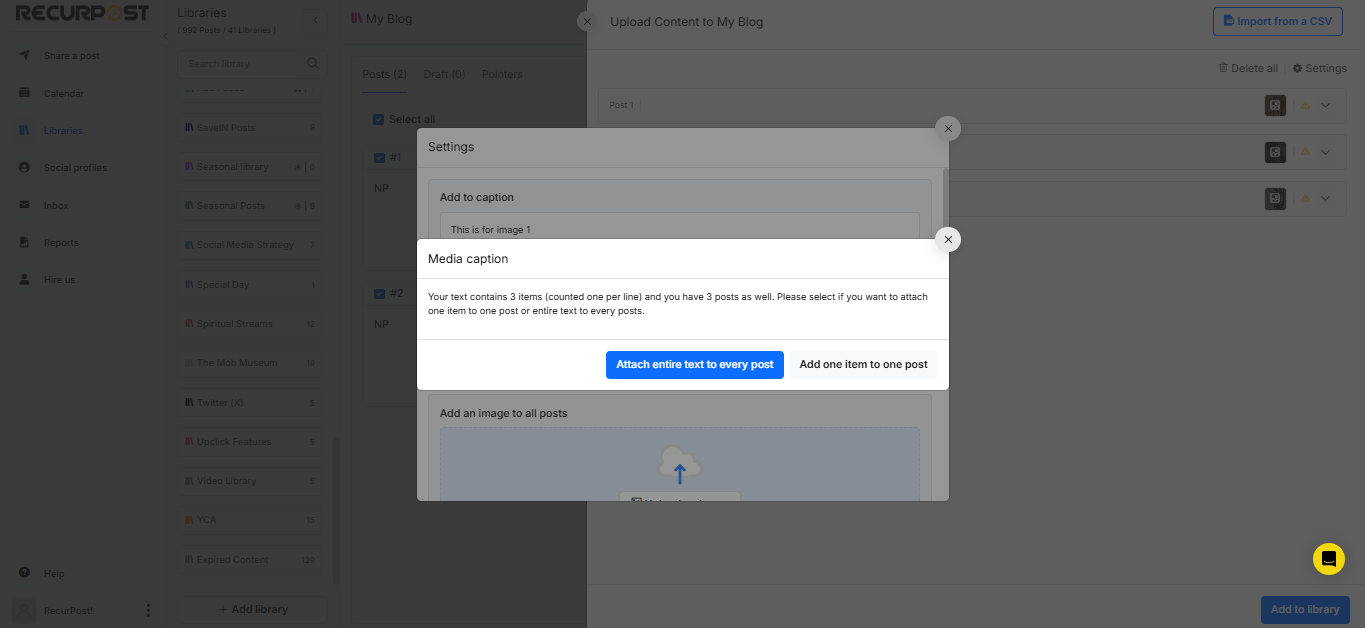
Keep in mind that if the number of captions (text lines) is not equal to the number of images, you’ll receive the following error pop-up:
If you have a lot of posts (contents), you don’t have to add them to your libraries one at a time. With RecurPost’s bulk uploader, you can add them all in one go.
Here is a quick tutorial showing you how to do that:
In this case, you have two options:
1. Add the entire text (all the captions) to every image
2. Add or remove some captions or images to equate each other
To add or remove, click on ‘NO, LET ME FIX THIS‘. To add the entire text to all images, click on ‘YES, SAME TEXT FOR ALL IMAGES’.
Now,
If the number of text lines equates to the number of images, and you still wish to add the entire text content to every image, you can do so by simply clicking on ‘APPLY TO ALL‘ and further clicking on ‘ATTACH ENTIRE TEXT TO EVERY IMAGE‘.
It will look a little something like this:

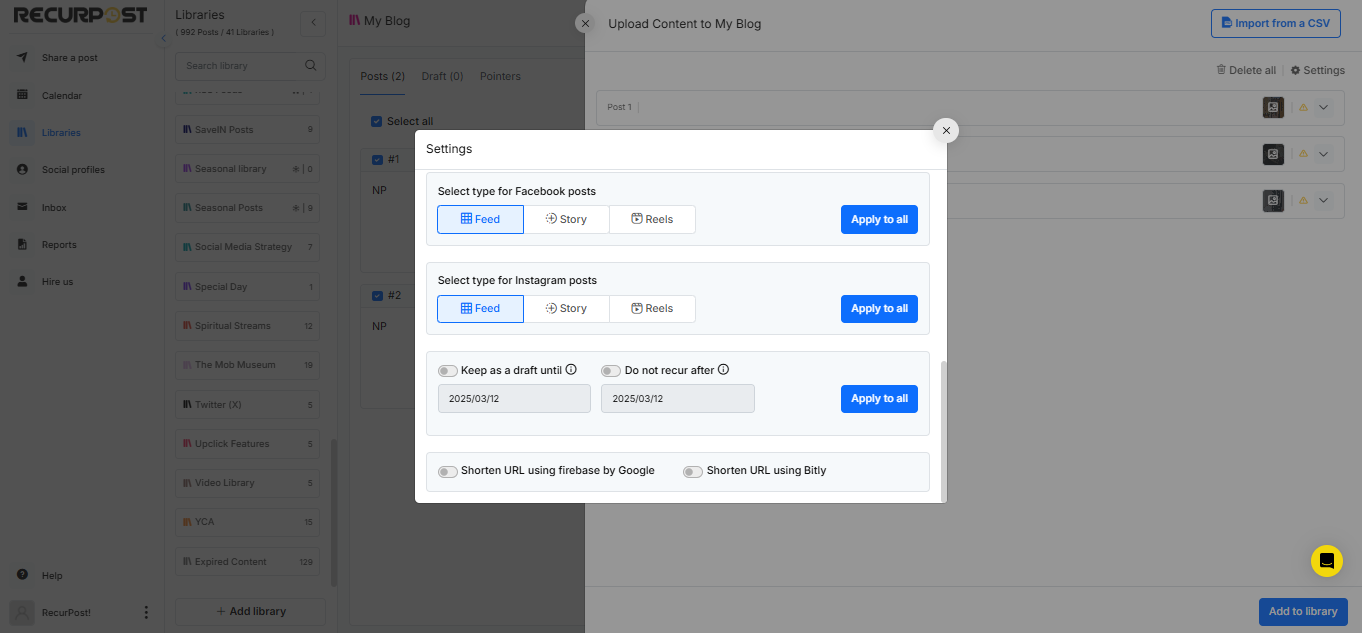
You can also keep your image posts as drafts until a particular date and stop recycling them after a certain date.
For more info on drafts and recycling, please read here.
Once you’ve made your settings and are happy with the entire layout, scroll down all the way and click on the ‘ADD TO LIBRARY’ button and you’ll see your posts in your selected library.
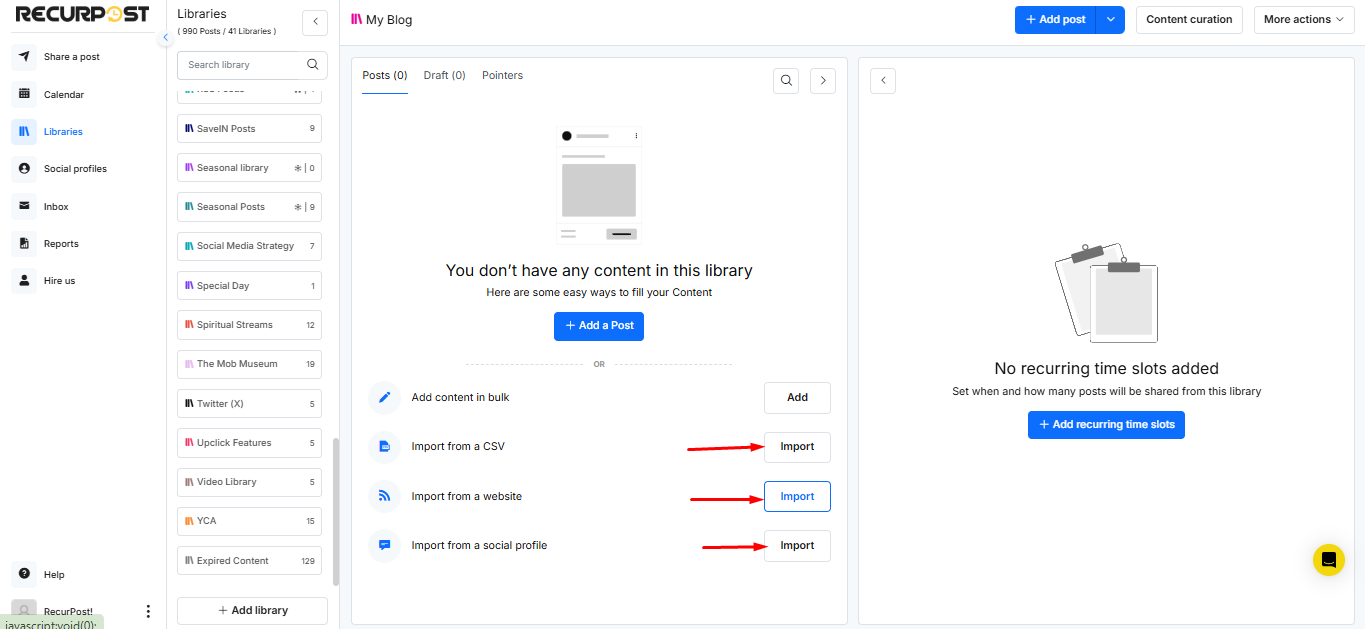
In addition to the above ways, you can add posts in 3 other ways.
Inside the library, you’ll see all these options: Add posts through ‘Import from a CSV‘, ‘Import from a website‘, and ‘Import from a social account‘.
That’s all! You’re good to go! You can now edit, schedule, or delete these posts according to your preferences.
Thanks for reading this guide. If you have any further queries, please feel free to reach out to us at support@recurpost.com.