
RecurPost allows you to add multiple kinds of content, giving you the freedom to have variety in your posts. Here is a list of different types of content supported by RecurPost:
- Text posts: Simply write your content in the form of text and add it to your library.
- Link posts: Simply copy and paste your desired webpage link in the message box. RecurPost will get the information including title, description, and image from that link. A Link Post typically looks like an image with an embedded link. When you click on the image, it opens a new browser window and takes you to the embedded link.
- Image posts: An image post contains an image and a caption. What you write in the message becomes the caption to go along with your image. You can include a link in your message as well. However, clicking on the image will open the image itself and not the link from the message.
- Video posts: RecurPost also supports uploading and posting of videos. Videos posted to your accounts via RecurPost will appear as if they were posted natively i.e. from that social platform’s interface.
Now, let’s see how to add new content.
You can choose to either add one-off posts that will go out to your account just once or you can create a post in your library for repeated use.
Let’s first see how to create one-off posts
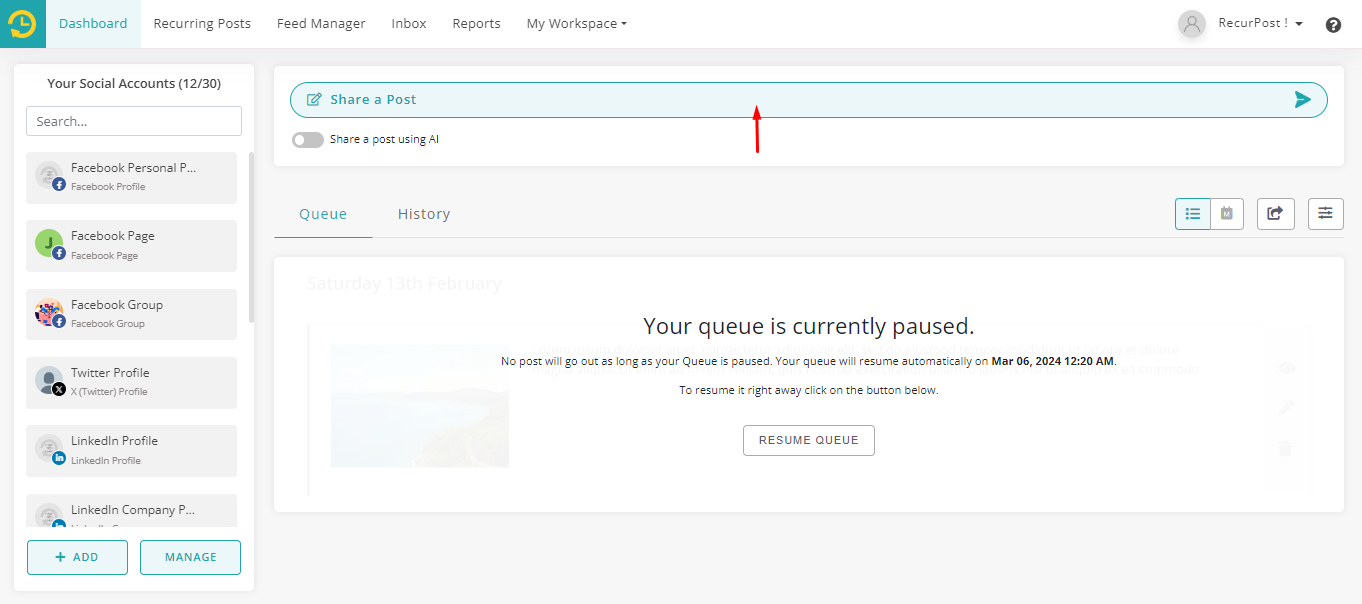
1. First, head over to your Dashboard page and simply click on the box saying ‘Share a Post‘.
2. A pop-up window will appear. This is where you’ll be adding all the details of your one-off post.
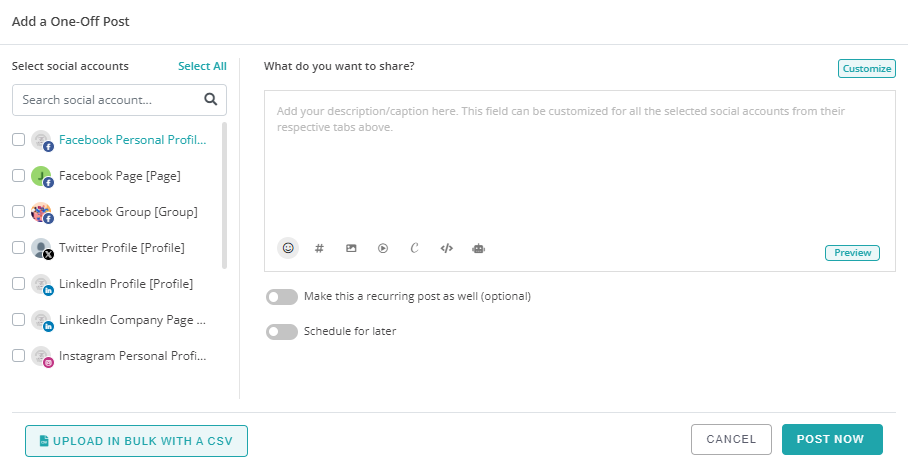
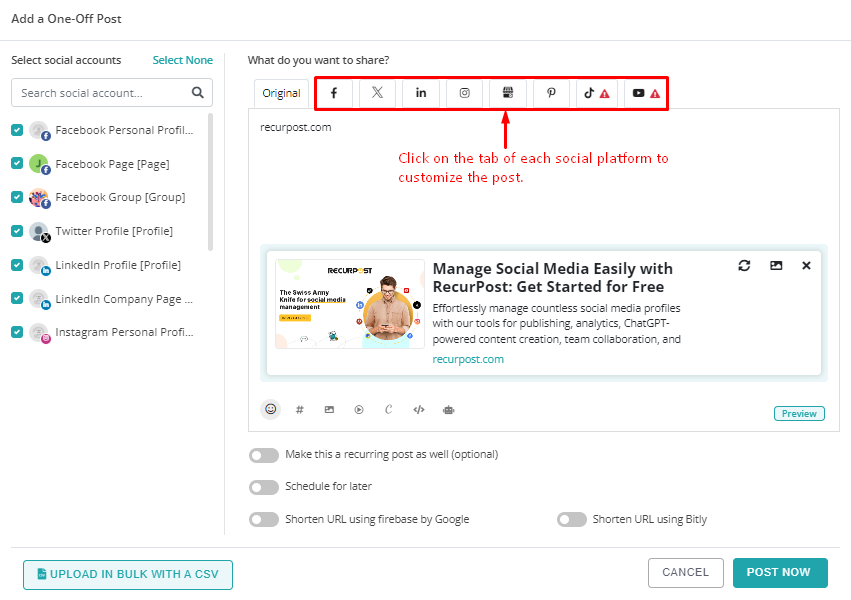
3. First, select all the social accounts on which you want to publish the post. Next, type in the message/description/caption in the area given below the icons of your social media accounts.
You can customize your post by using emojis, hashtags, uploading images, or adding videos.
If you include a link in your message and do not use any other image or video, a preview will automatically be generated using the link that you entered.
As you enter all the details of your post, a preview will be generated and you can see it by clicking on the ‘Preview‘ button, where you can see how your post will appear on all the social channels.
4. Now, in case you also want to add this post to your library as well for later use or editing, you can do so by ticking the ‘Make this a recurring post as well’ box. This means that your one-off post will also be copied to your selected libraries and it will be posted multiple times based on the schedules of those libraries.
5. Once you’re done with that, it’s now time to schedule your post. You can do so by ticking the ‘Schedule for later’ button and selecting your preferred date and time of posting like shown below:
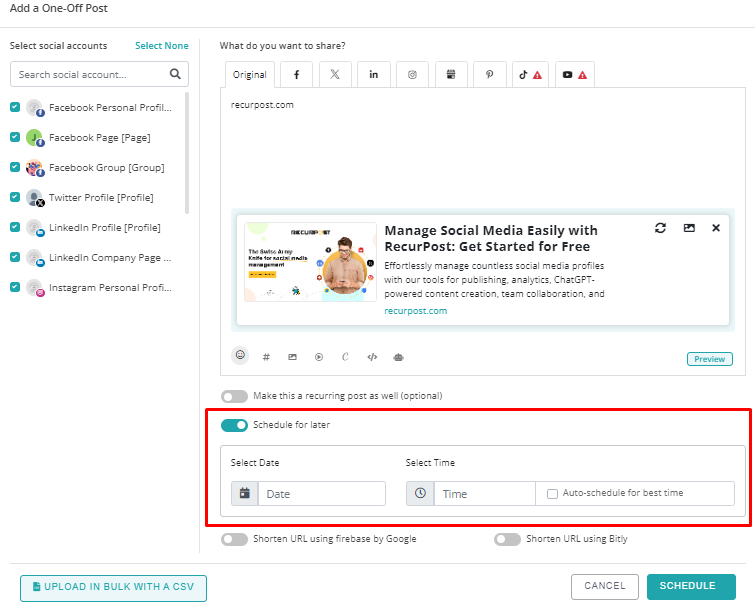
Click on the ‘Schedule’ button after entering all the details. If you don’t want to set up a schedule and want to publish your post instantly, uncheck the ‘Schedule for later’ button and click on ‘Post Now’.
6. You also have the option of auto-scheduling the post for the best times.
Just select the box saying ‘Auto-schedule for best time’ under the ‘Schedule for later’ section. RecurPost will then identify the unique best time for you to post on social media and upload your one-off post.
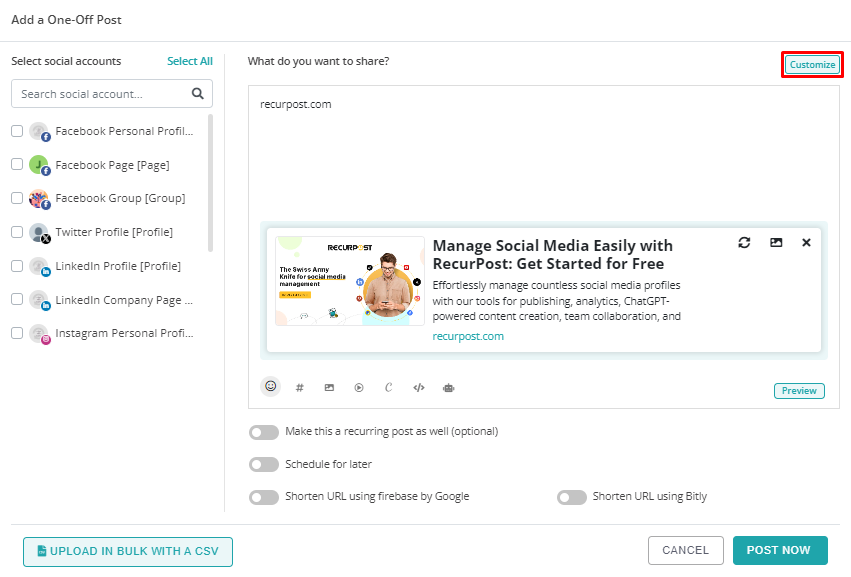
Note: If your post contains a link, you can also shorten your link and make it more readable by ticking the ‘Shorten URL’ button.
You can shorten your URL links automatically for your recurring schedules using either Firebase by Google or Bitly. If you haven’t yet connected your Bitly account to RecurPost, you can do it under the Plug-in menu.
Find it under the drop-down menu by clicking on your account name (top-right corner). From there, go to “Plug-ins” > click on ‘Manage’ under URL Shortener > select the social account for which you want to use the URL Shortener.
From here on, you can choose which URL Shortener you want to use. You can choose either Google URL Shortener (Firebase) or Bitly URL Shortener.
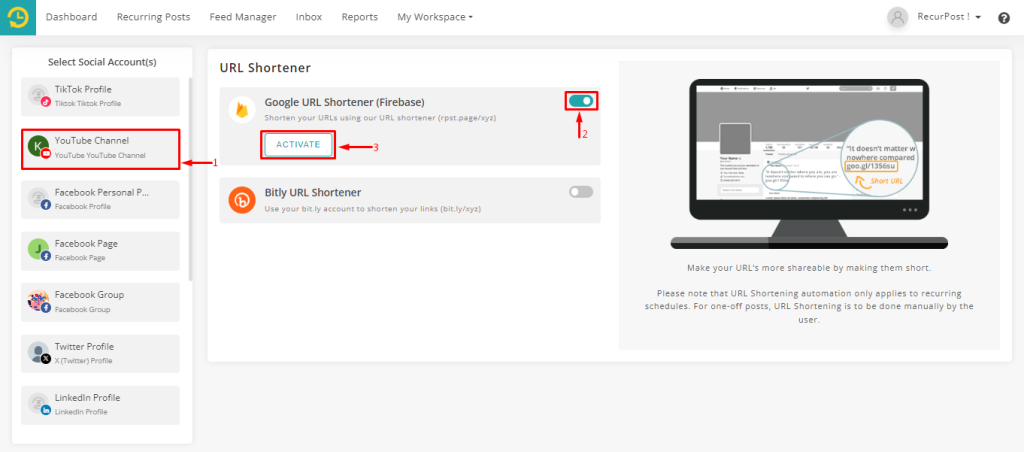
For example, let’s say that you select your Facebook Page. This means that whenever you share a post containing a link to this account, RecurPost will automatically shorten it.
Keep in mind that this automation of URL Shortening works only for recurring schedules. For one-off posts, you can do so manually while adding the post.
That’s all for one-off posts.
Now, let’s see how to add recurring posts in your library
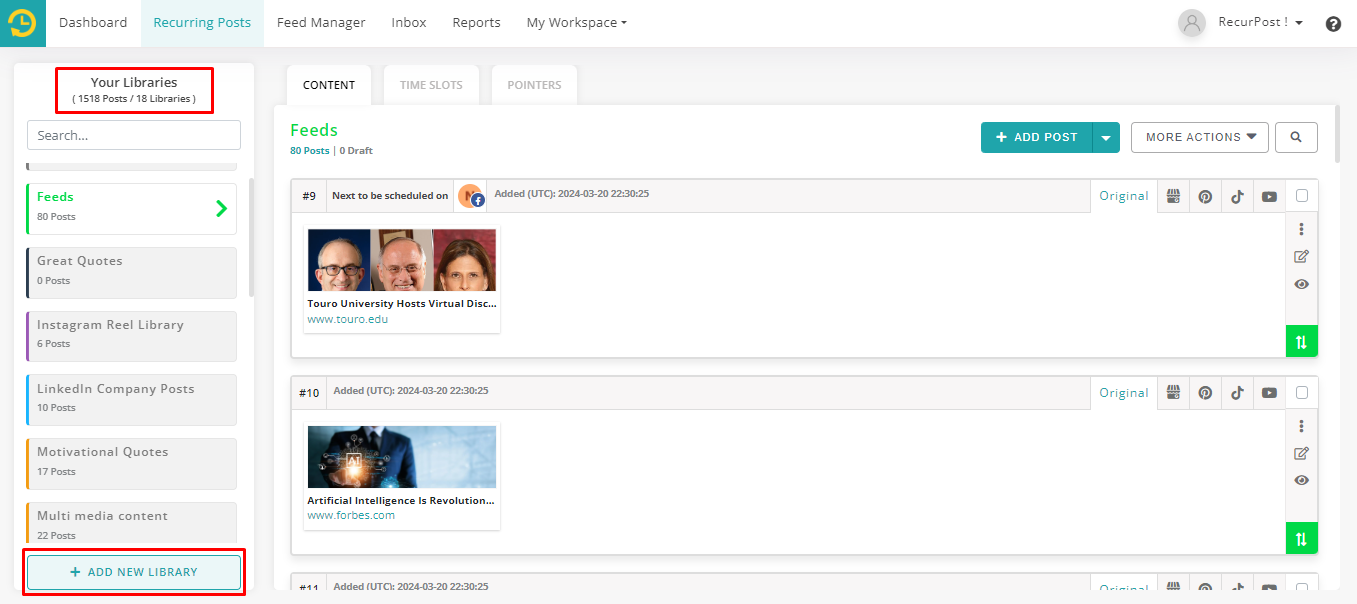
To add recurring posts, you can first go to the ‘Recurring Posts‘ page, create a library, and then add your recurring posts to the library.
When you go to the Recurring Posts page to add a post, you might see some libraries created by us. You can use them or create a new one by clicking on the ‘Add New Library’ button. In addition, you will see a list of your libraries and the total number of posts across total libraries on the same page.
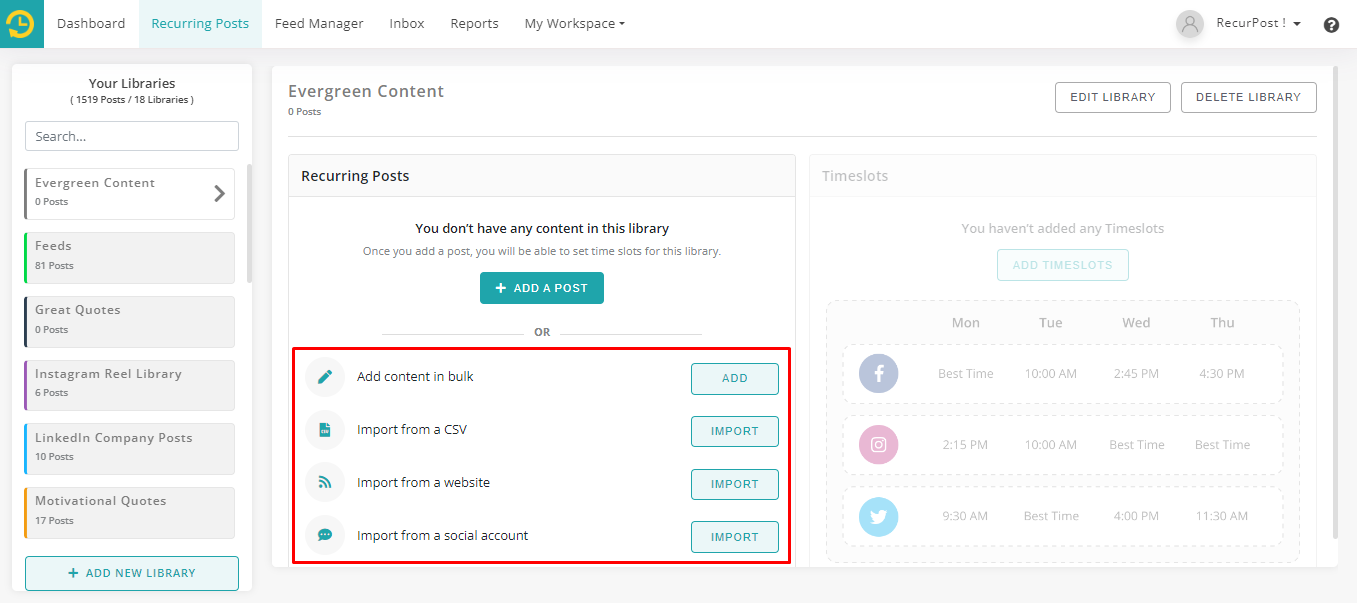
If the library is empty, you will see a number of options to add content to the empty library.
Single post:
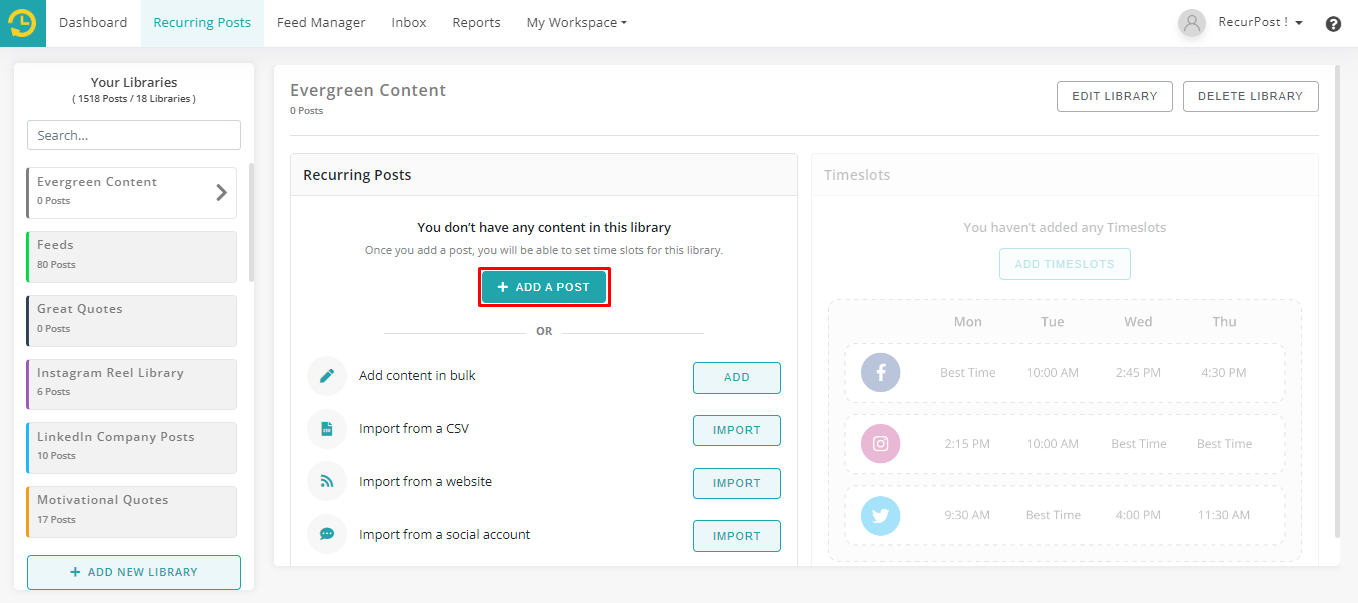
To add a single post, simply click on the ‘+ ADD A POST’ button located at the top. This will prompt the following window to appear:
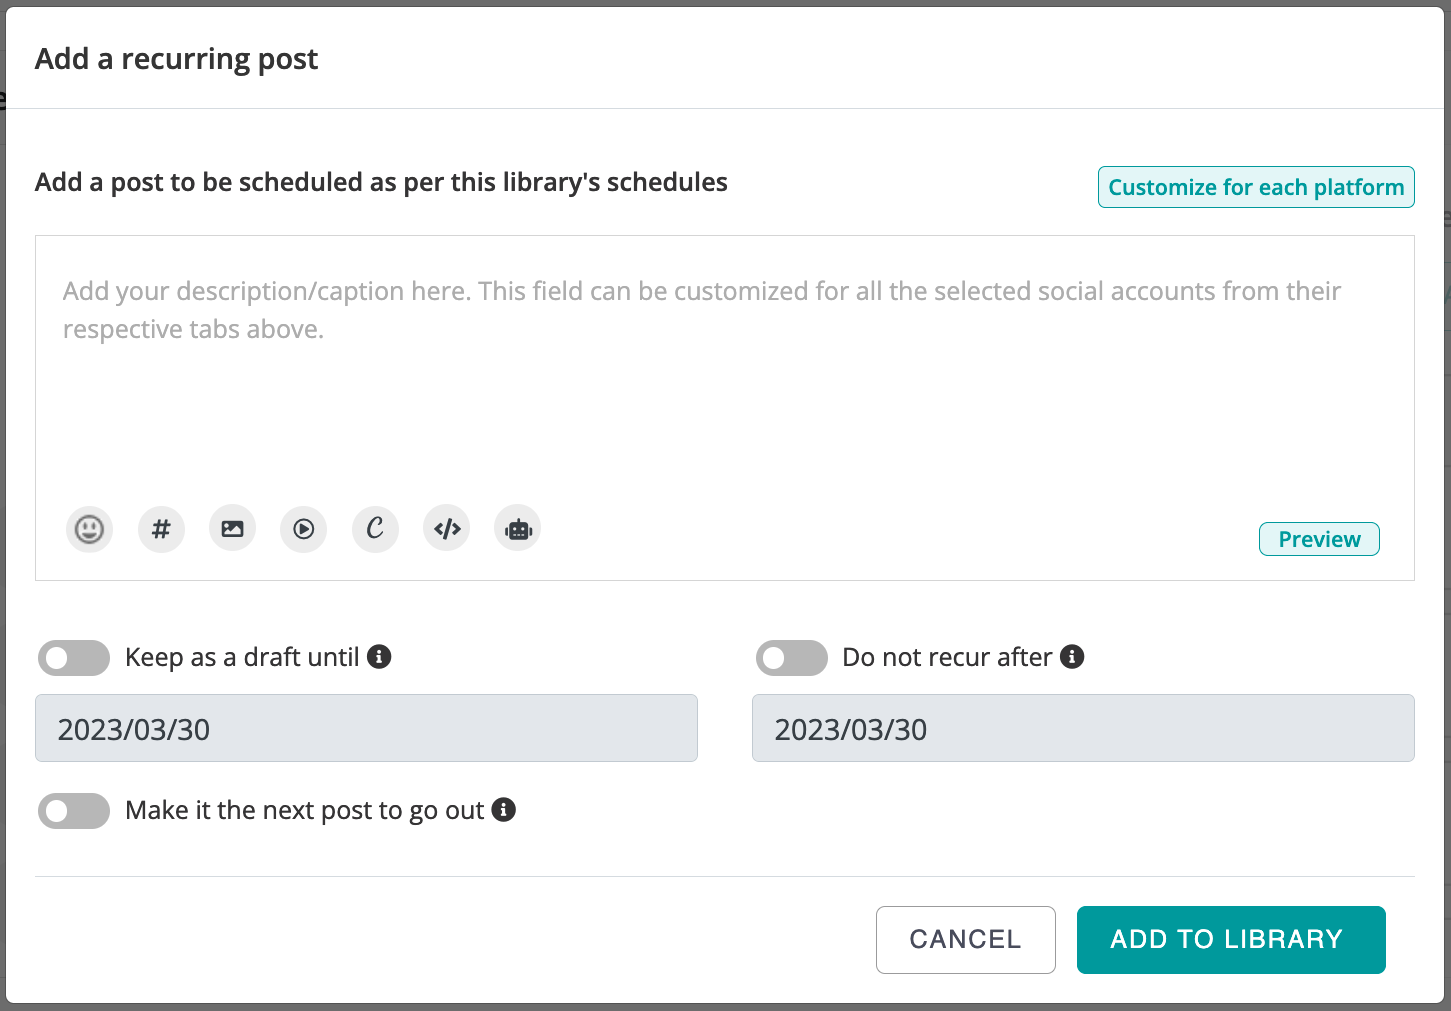
Add all the details in the post – description, images, videos, or links, etc. For the posts in your library, you can also select whether you want to keep them as drafts until a certain date. These posts will basically be on stand-by until their ‘release date’.
After the release date, they will start going out to your social accounts in a recurring manner according to your schedule. You can also choose to make these posts stop going out to your social accounts after a certain ‘expiry date’. This can be set by toggling the “Do not recur after” option.
Now, if you want this post to go out next before any other post from this library, you can click on the ‘Make it the next post to go out’ button. Clicking this button will set this post as a priority. Once you have set all of that up, go ahead and click on the ‘Add To Library’ button.
Add contents in Bulk:
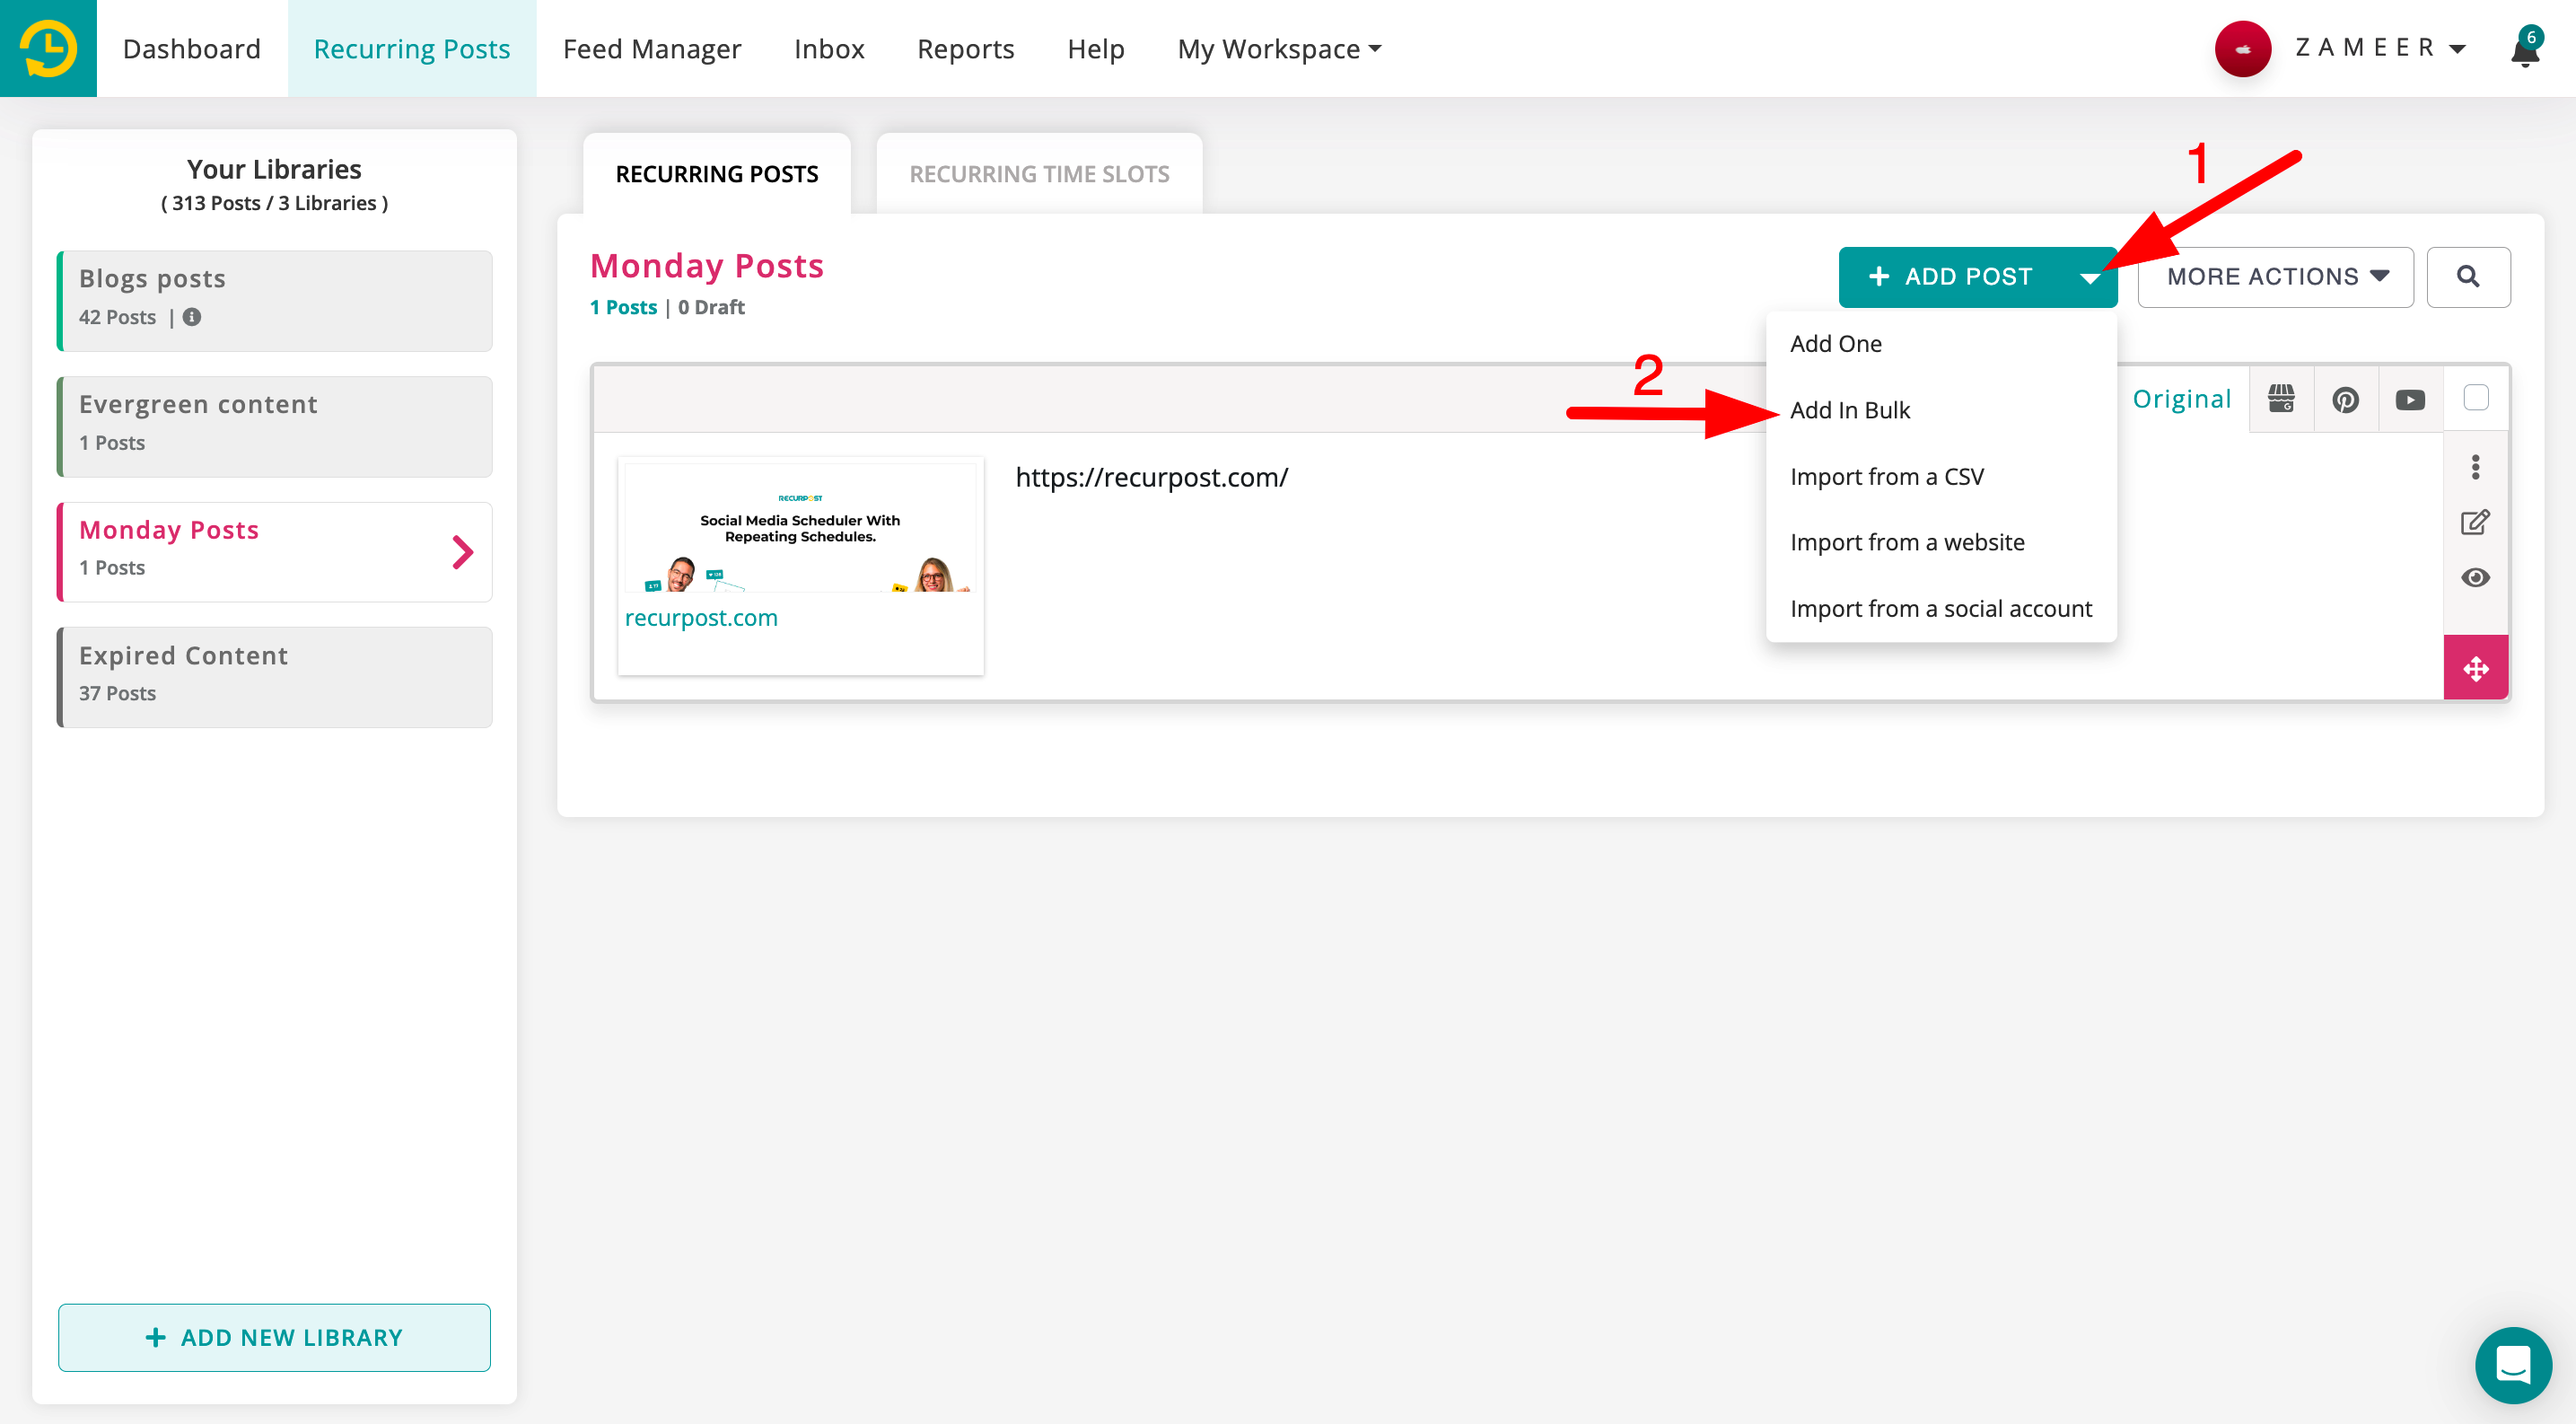
RecurPost supports uploading contents in bulk in various ways. Click on the drop-down option next to ‘Add Post‘ and then select ‘Add in Bulk’. Here, you can also create posts in bulk using other options like ‘Import from a CSV file’, ‘Import from a website’ and ‘Import from a social account’, etc.

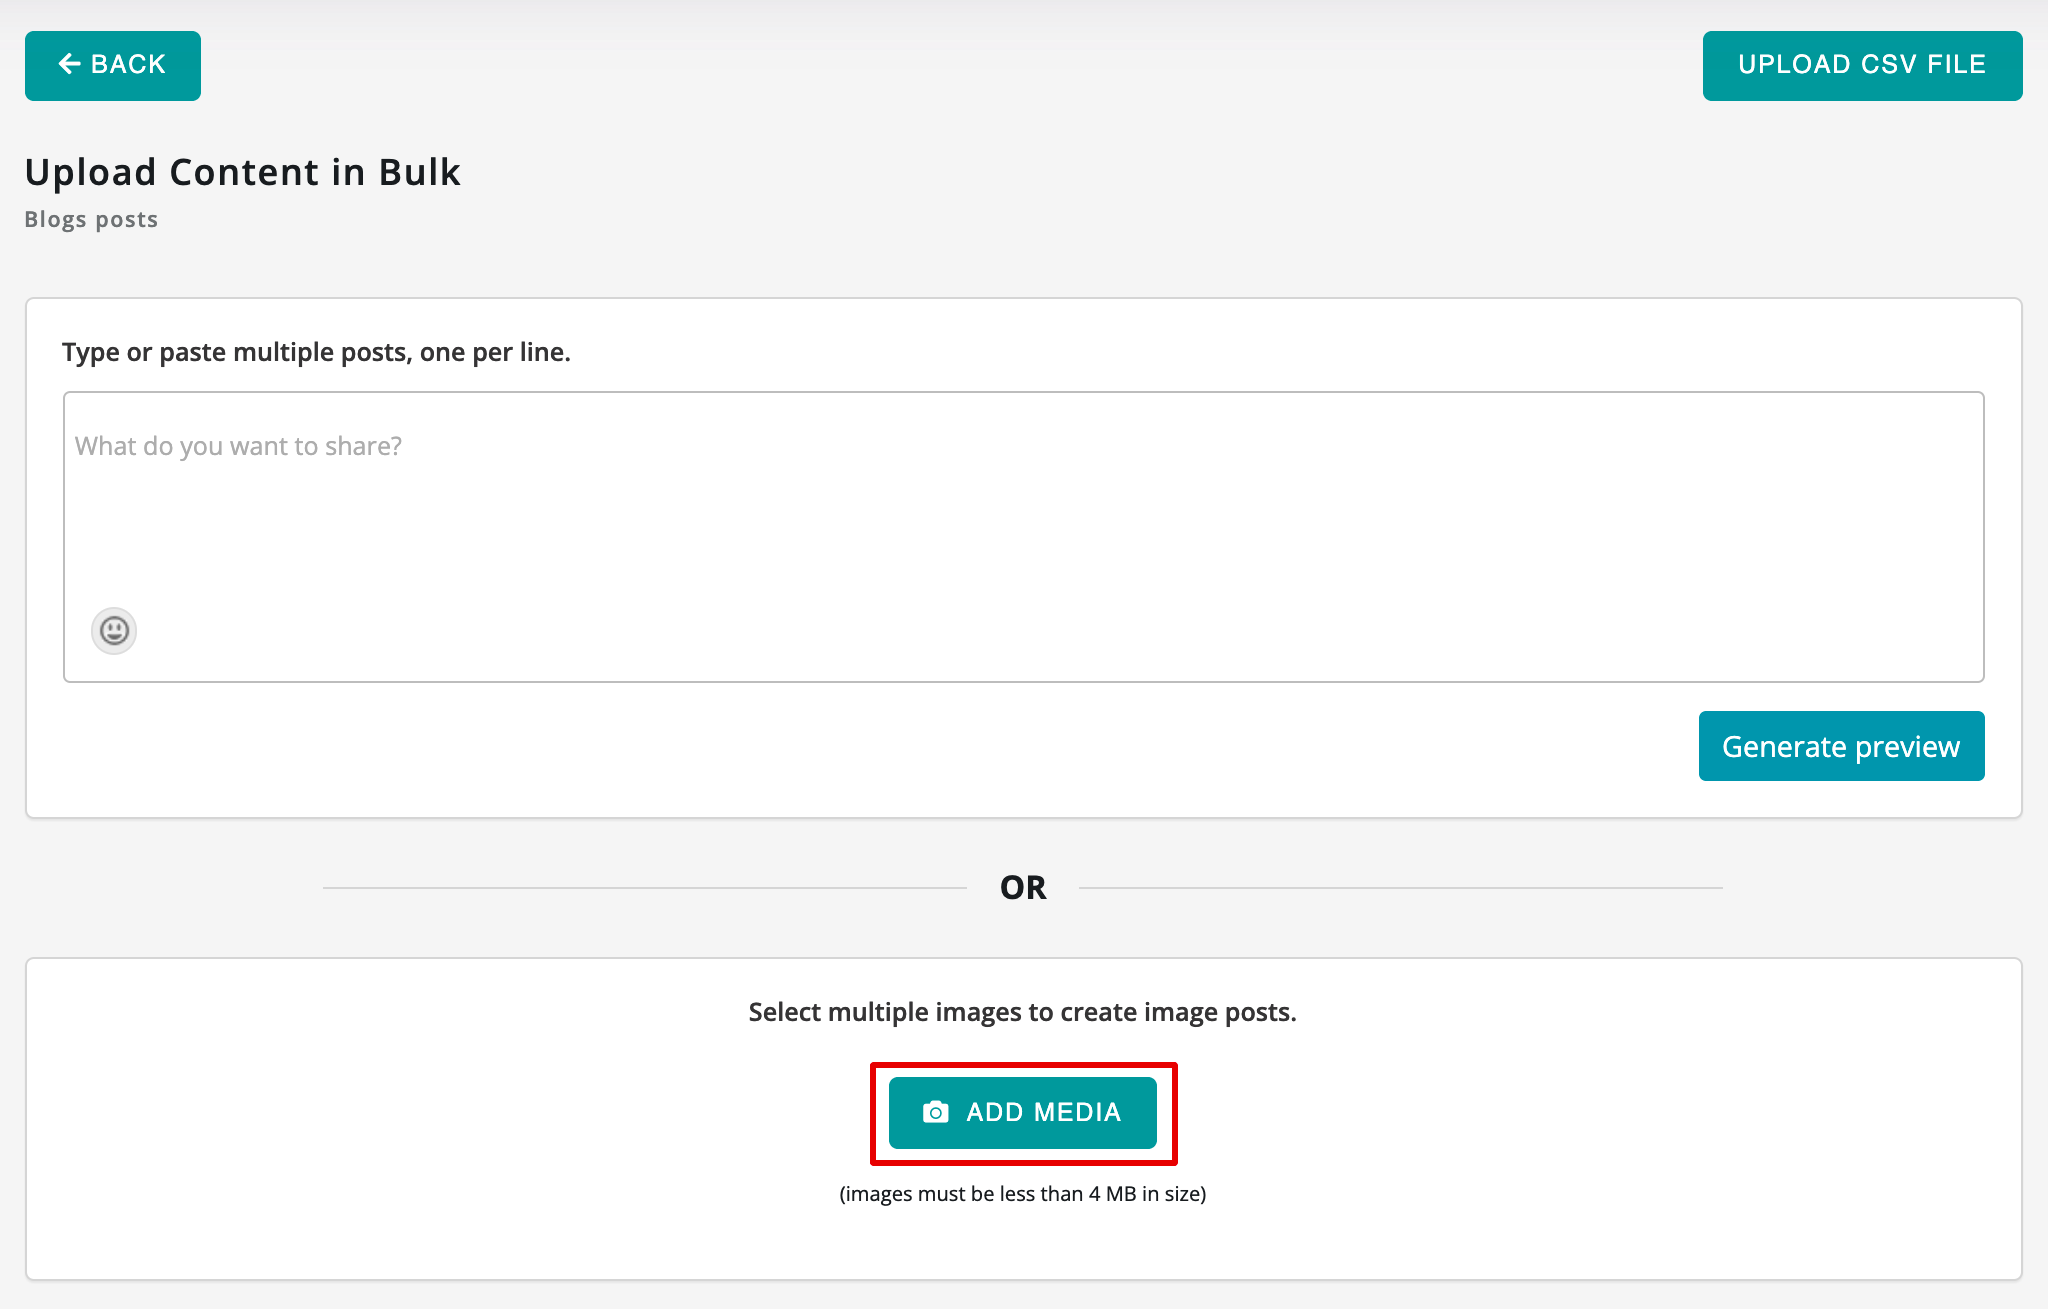
You can type in or paste multiple posts/captions that you want as a post, one per line, as shown in the image below:
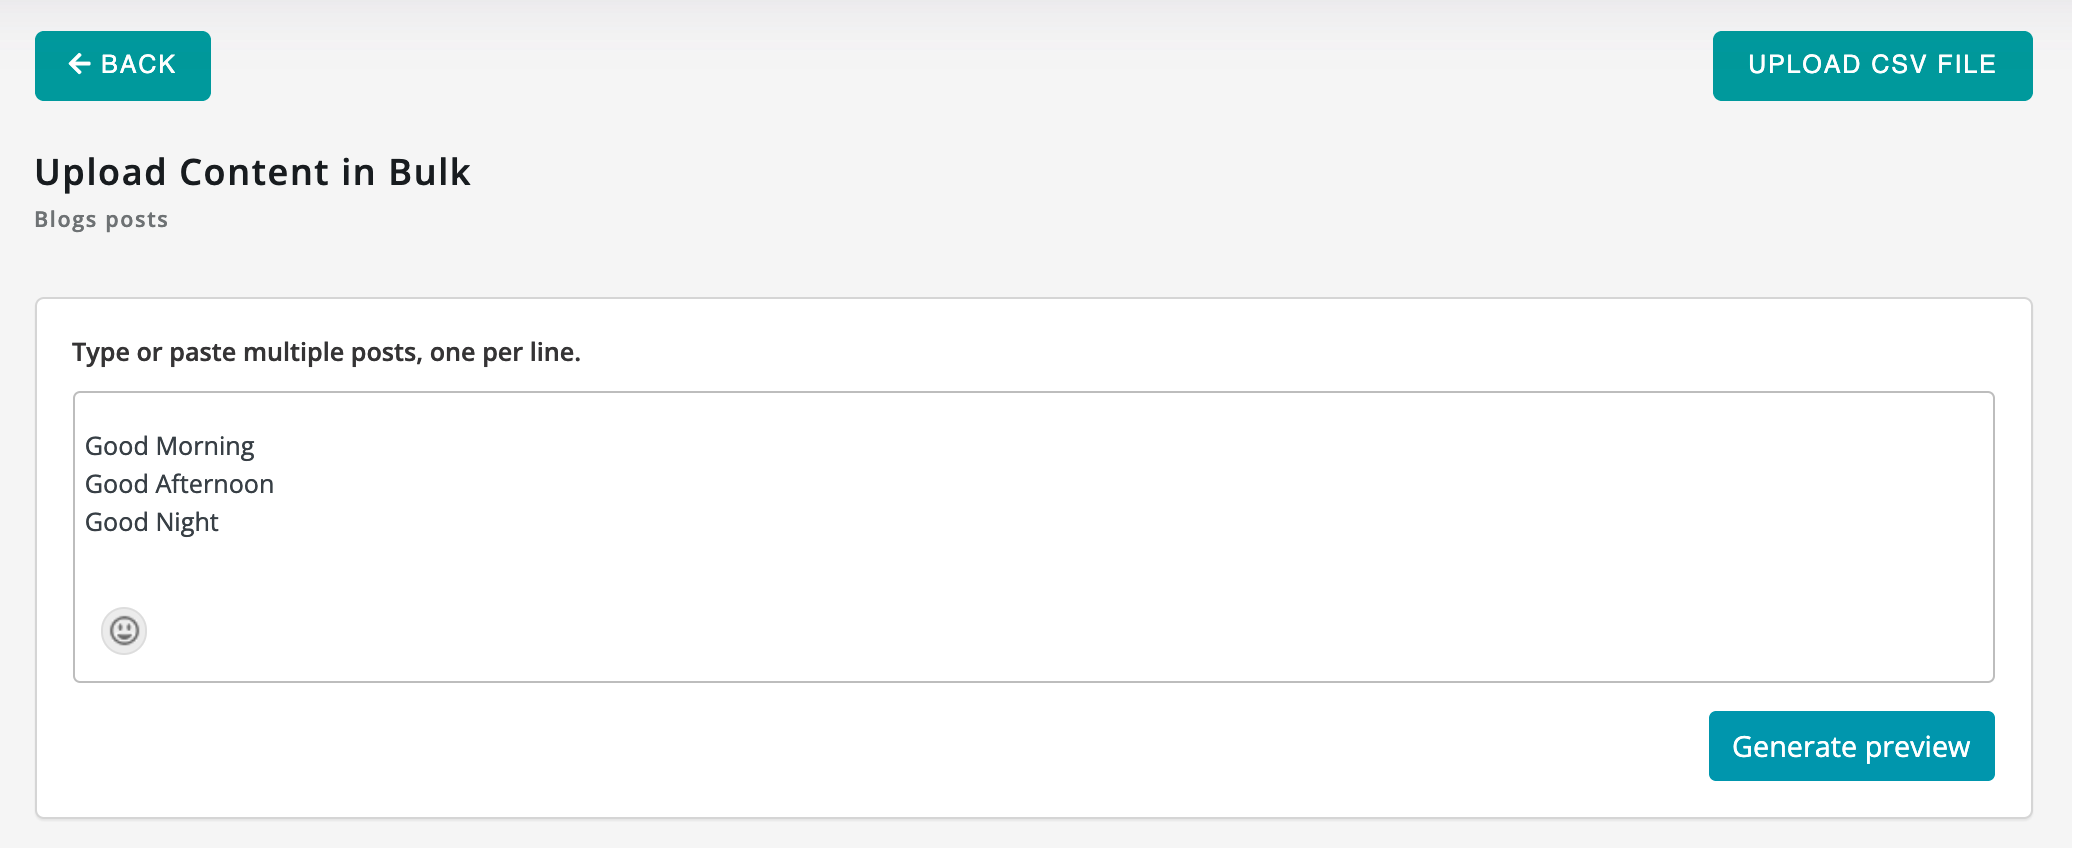
Now click on ‘Generate preview’ to add other details like images or links to each post. Each line you’ve written will be divided into an individual post, as shown in the images below:
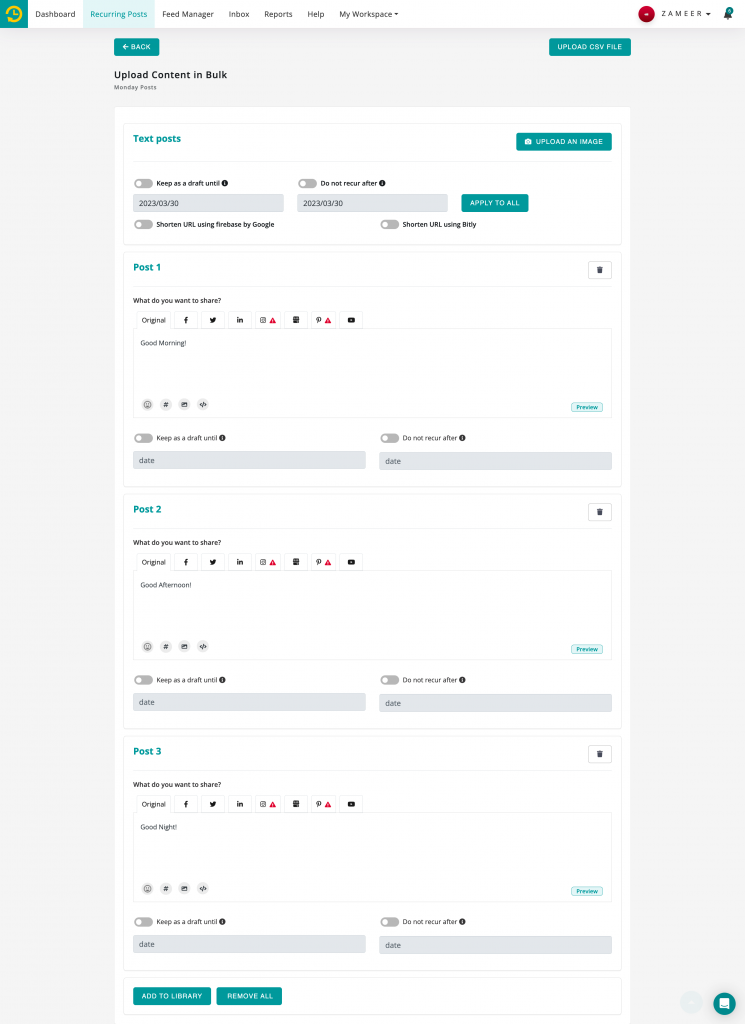
When you are done adding the detail of every post, click on ‘Add to Library’ and your posts will be added to your library in bulk.
Similarly, you can also upload multiple media (images, videos, or GIFs) by clicking on the ‘Add Media’ button, and a preview will be generated where you can add in other details like text or links in the message box.
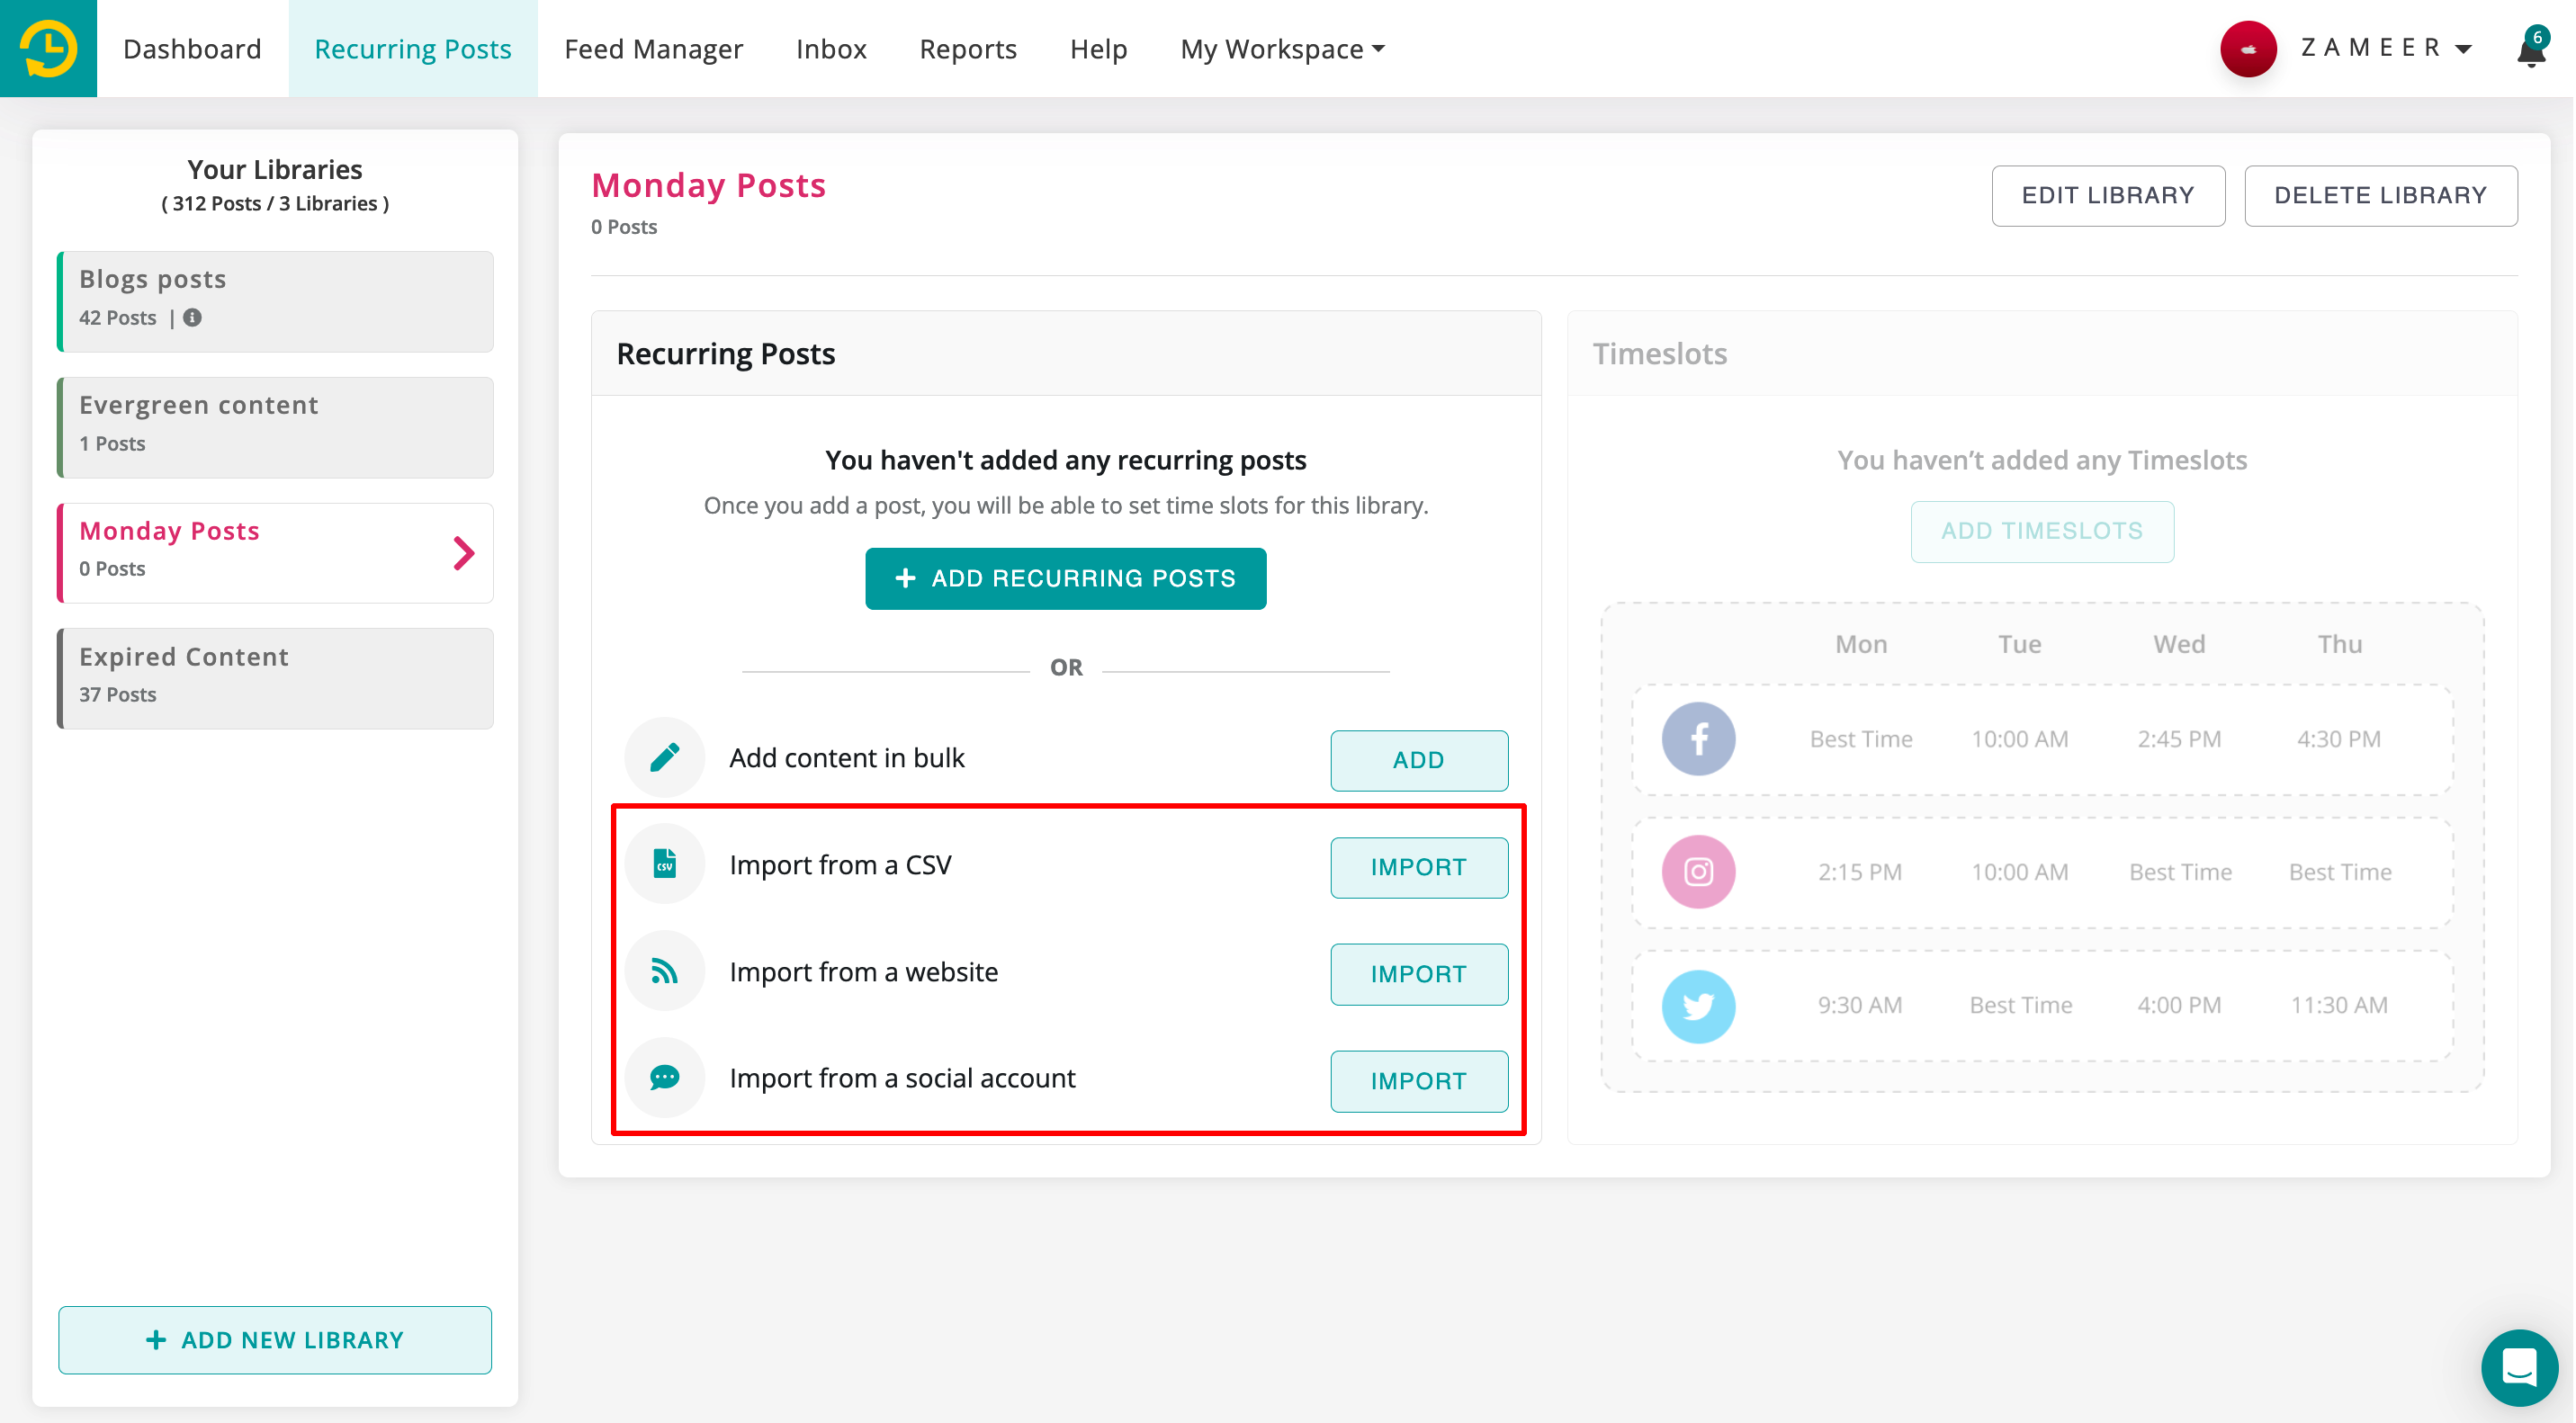
In addition to this, you can also upload content in bulk in 3 other ways inside the empty library. By clicking on the drop-down option next to ‘+ Add Recurring Posts‘, you’ll see all these options: Import from a CSV file, Import content from website, and Import from a social account.
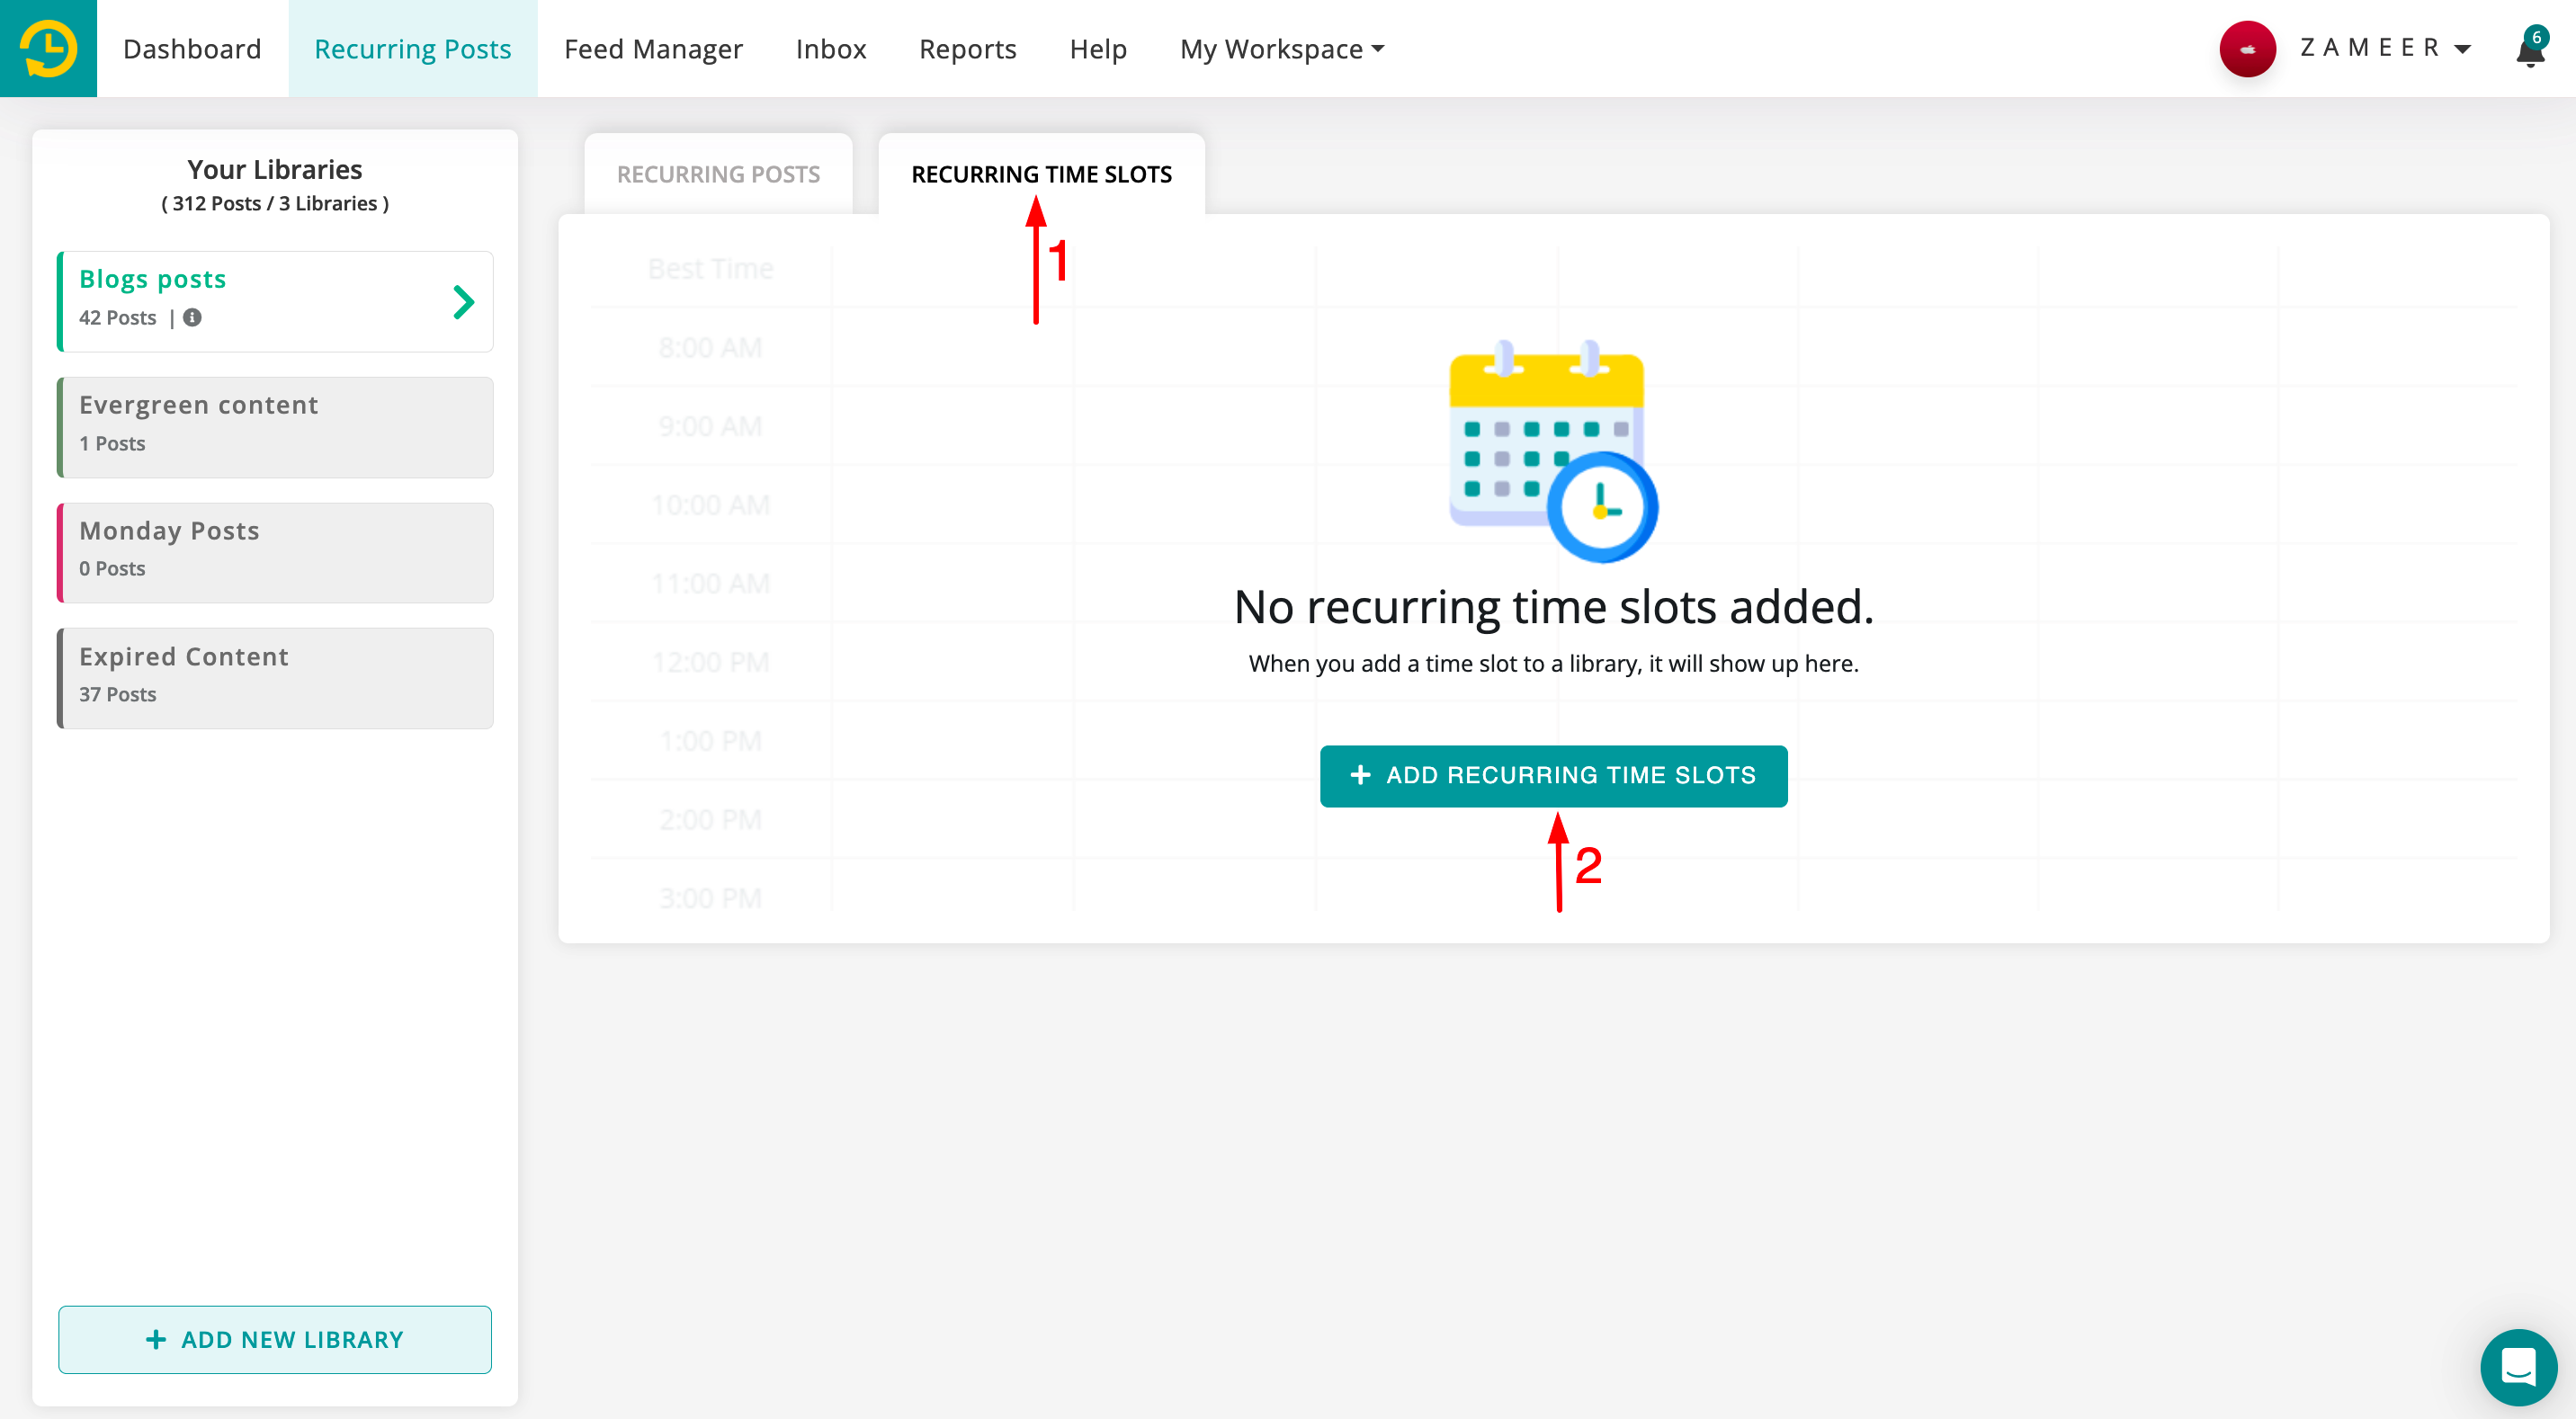
When you are done adding the posts, you need to set recurring schedules to share posts from this library in a recurring manner. Schedules can be added by going to the ‘RECURRING TIME SLOTS‘ tab for that library and clicking on the ‘Add Recurring Time Slots’ button.
Here, you can set the frequency in which you want to share the posts. For example, if you set the frequency to Monday at 5 PM, your posts will go one by one every Monday at 5 PM. When all the posts have been shared, the cycle will again start from the first one.
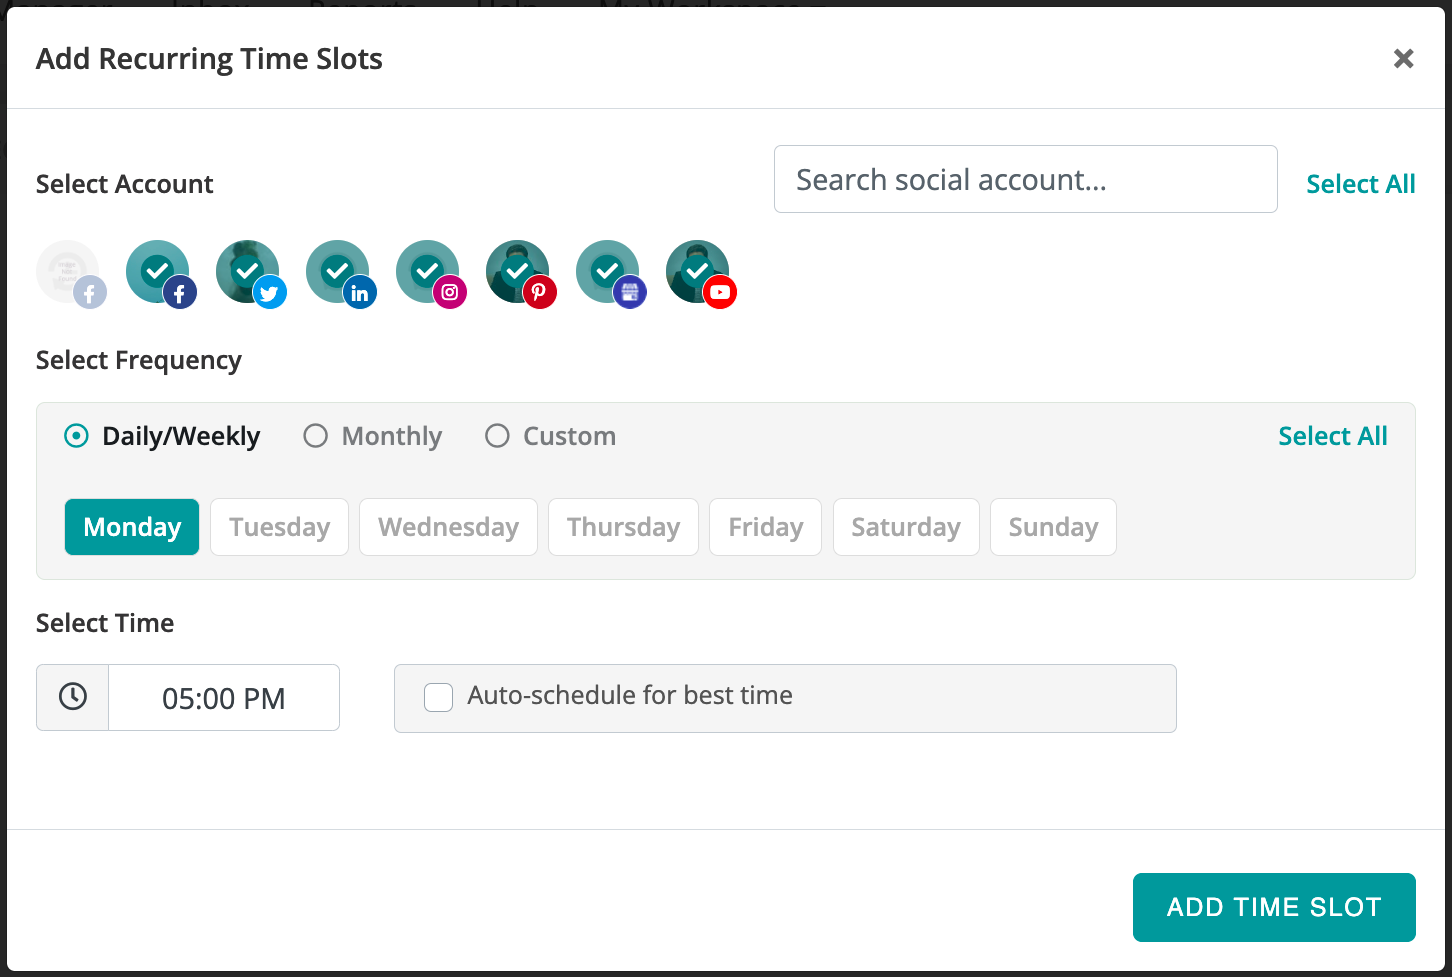
After setting the date, time and selecting the accounts on which you want to share the posts, click on ‘Add Schedule’.
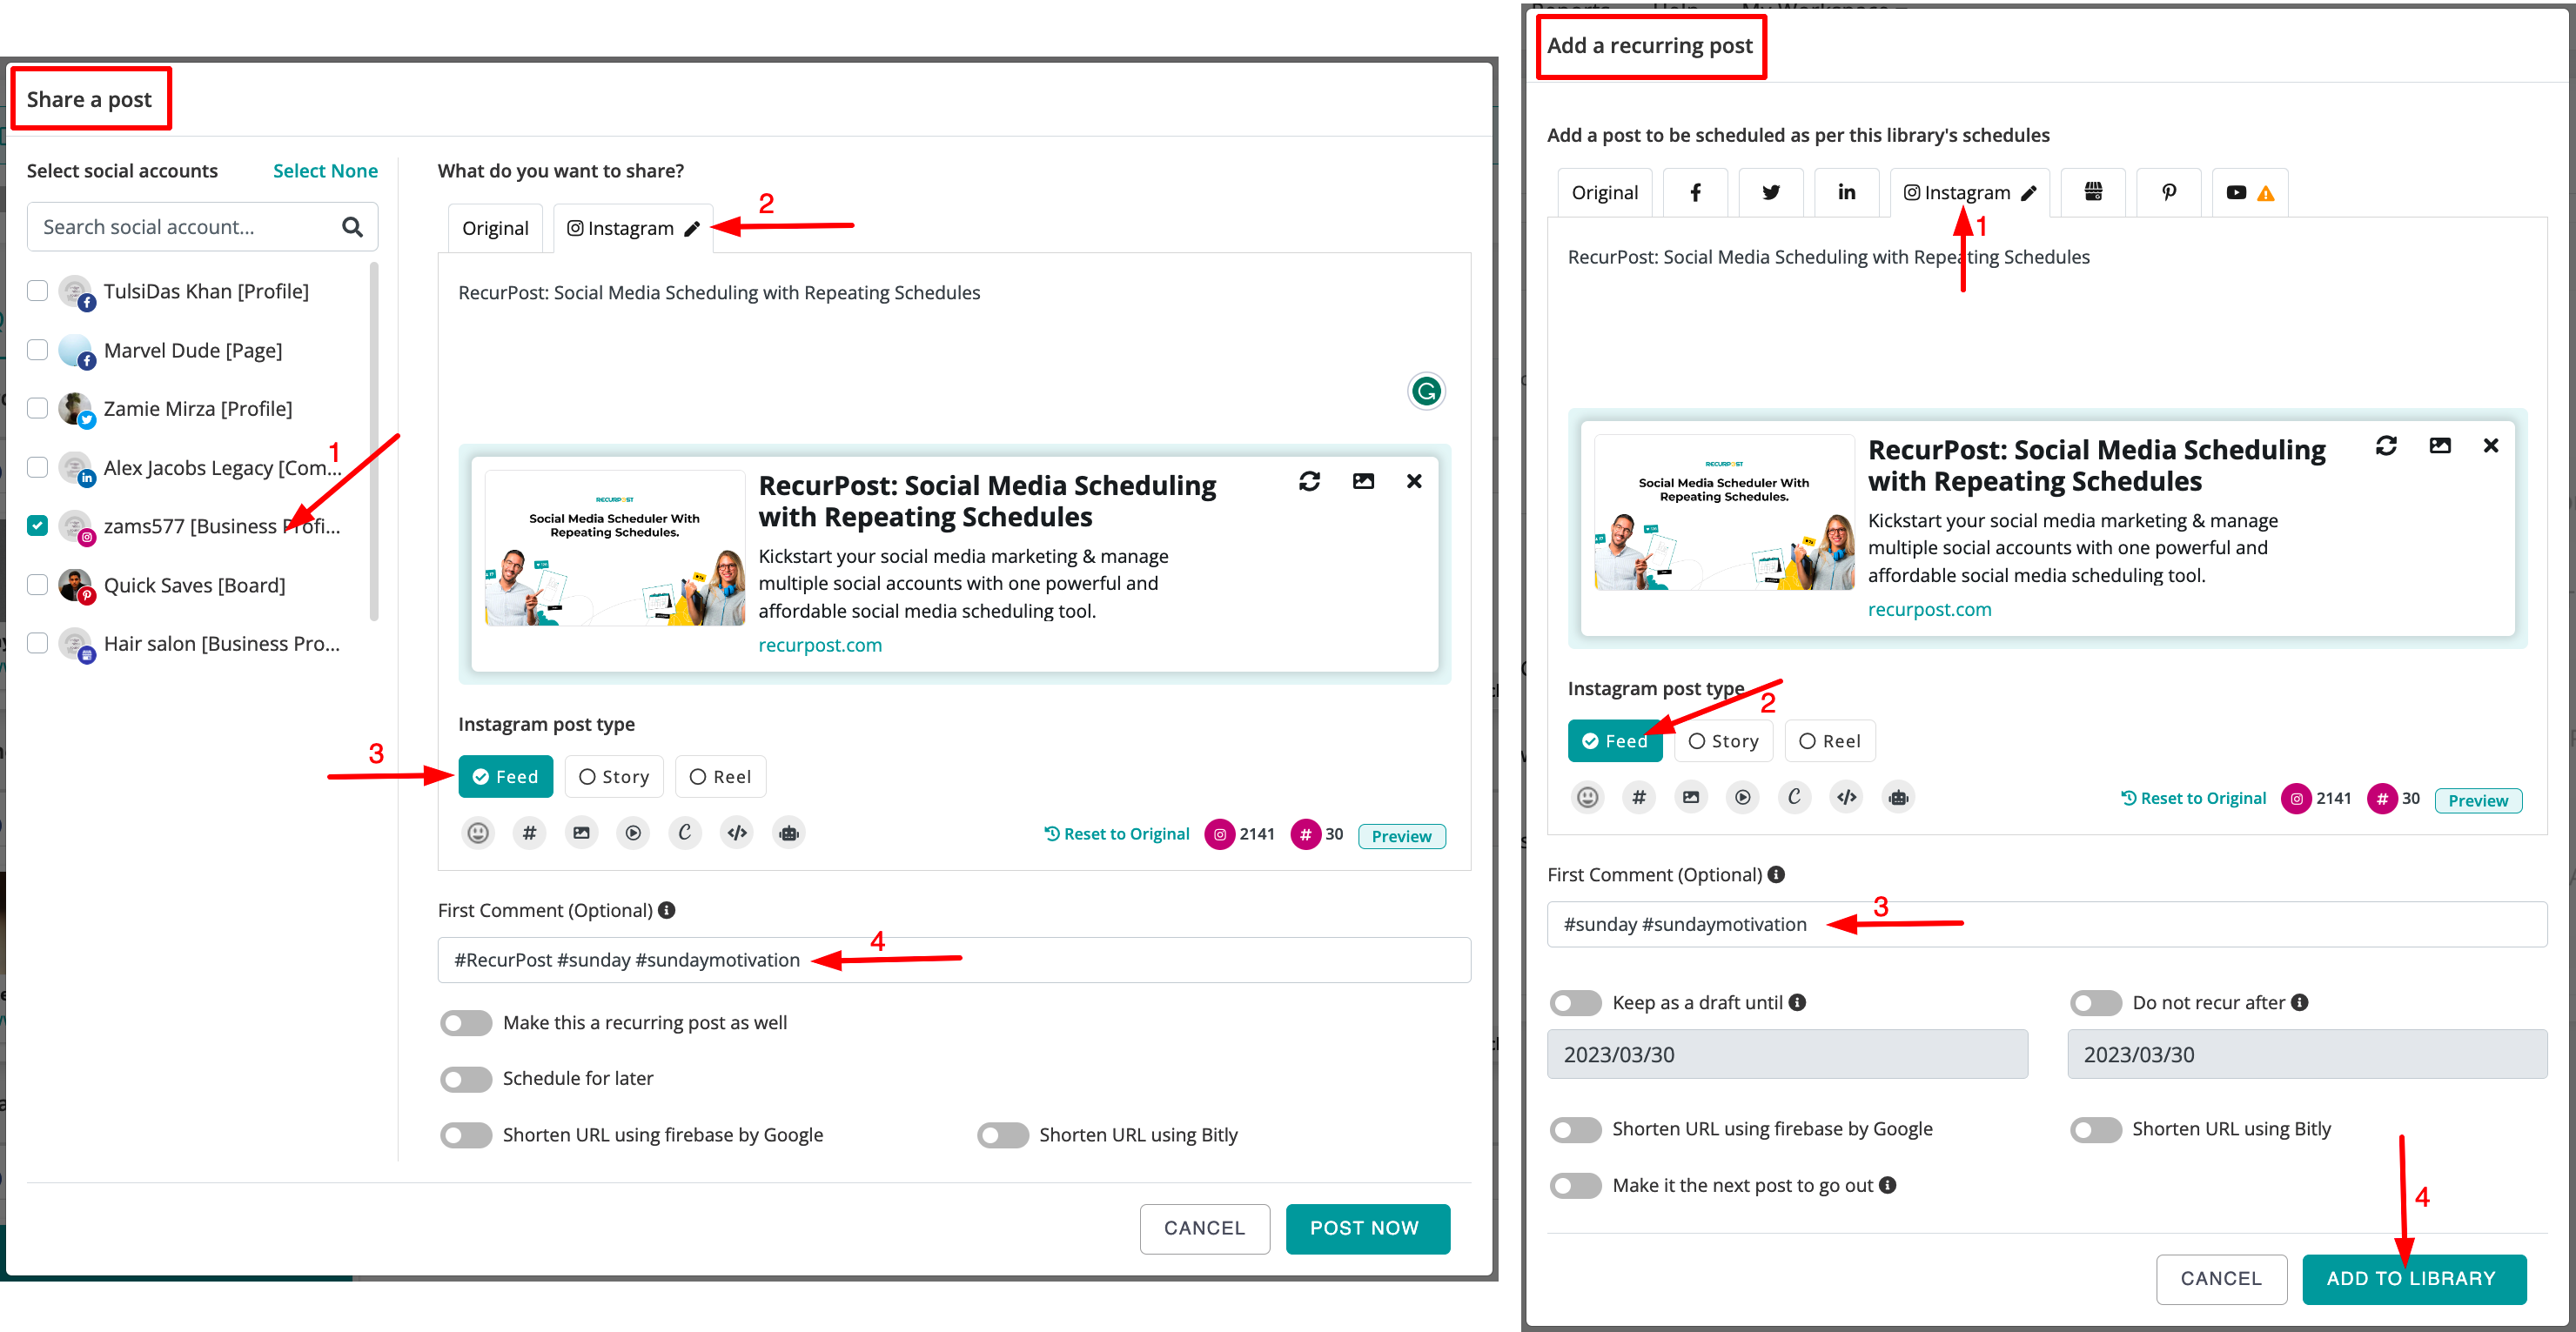
Add First Comment in the post
We allow you to publish auto-post on your accounts, tag people in your posts, and reply to comments via Inbox, as you are aware. However, you may now schedule your first comment for Facebook, Instagram, and LinkedIn. With the first comment feature, your posting improves and the caption/message of the post appears cleaner on your account.
If your post has a long message, you can write a portion of it in the message box and the rest in your first comment. In order to prevent clutter, you can also put your hashtags in the first comment rather than in the message. However, you are free to write whatever you like in your first comment.
The first comment function allows you to improve the reach of your post while also providing a nice and tidy caption.
Please keep in mind that the first comment in RecurPost is only available for the accounts on which we post directly. Out of all the direct publishing accounts, you can use the first comment for certain social media accounts, such as Facebook (Profile, Group, and Page), Instagram Business Profile, and LinkedIn (Profile & Company Page). For the Instagram Personal Profile, it will not work as it works via push notification.
Let’s see how to schedule First Comment in your post using RecurPost.
While scheduling a one-off post or adding a post in the library you need to go to the social media platform on which you want to add your first comment. Let’s say you want to add the first comment to your Instagram post then go Instagram tab and add the first comment as shown below.
How to use the first comment on the Desktop site:
Here’s how to use the first comment on RecurPost Mobile apps:
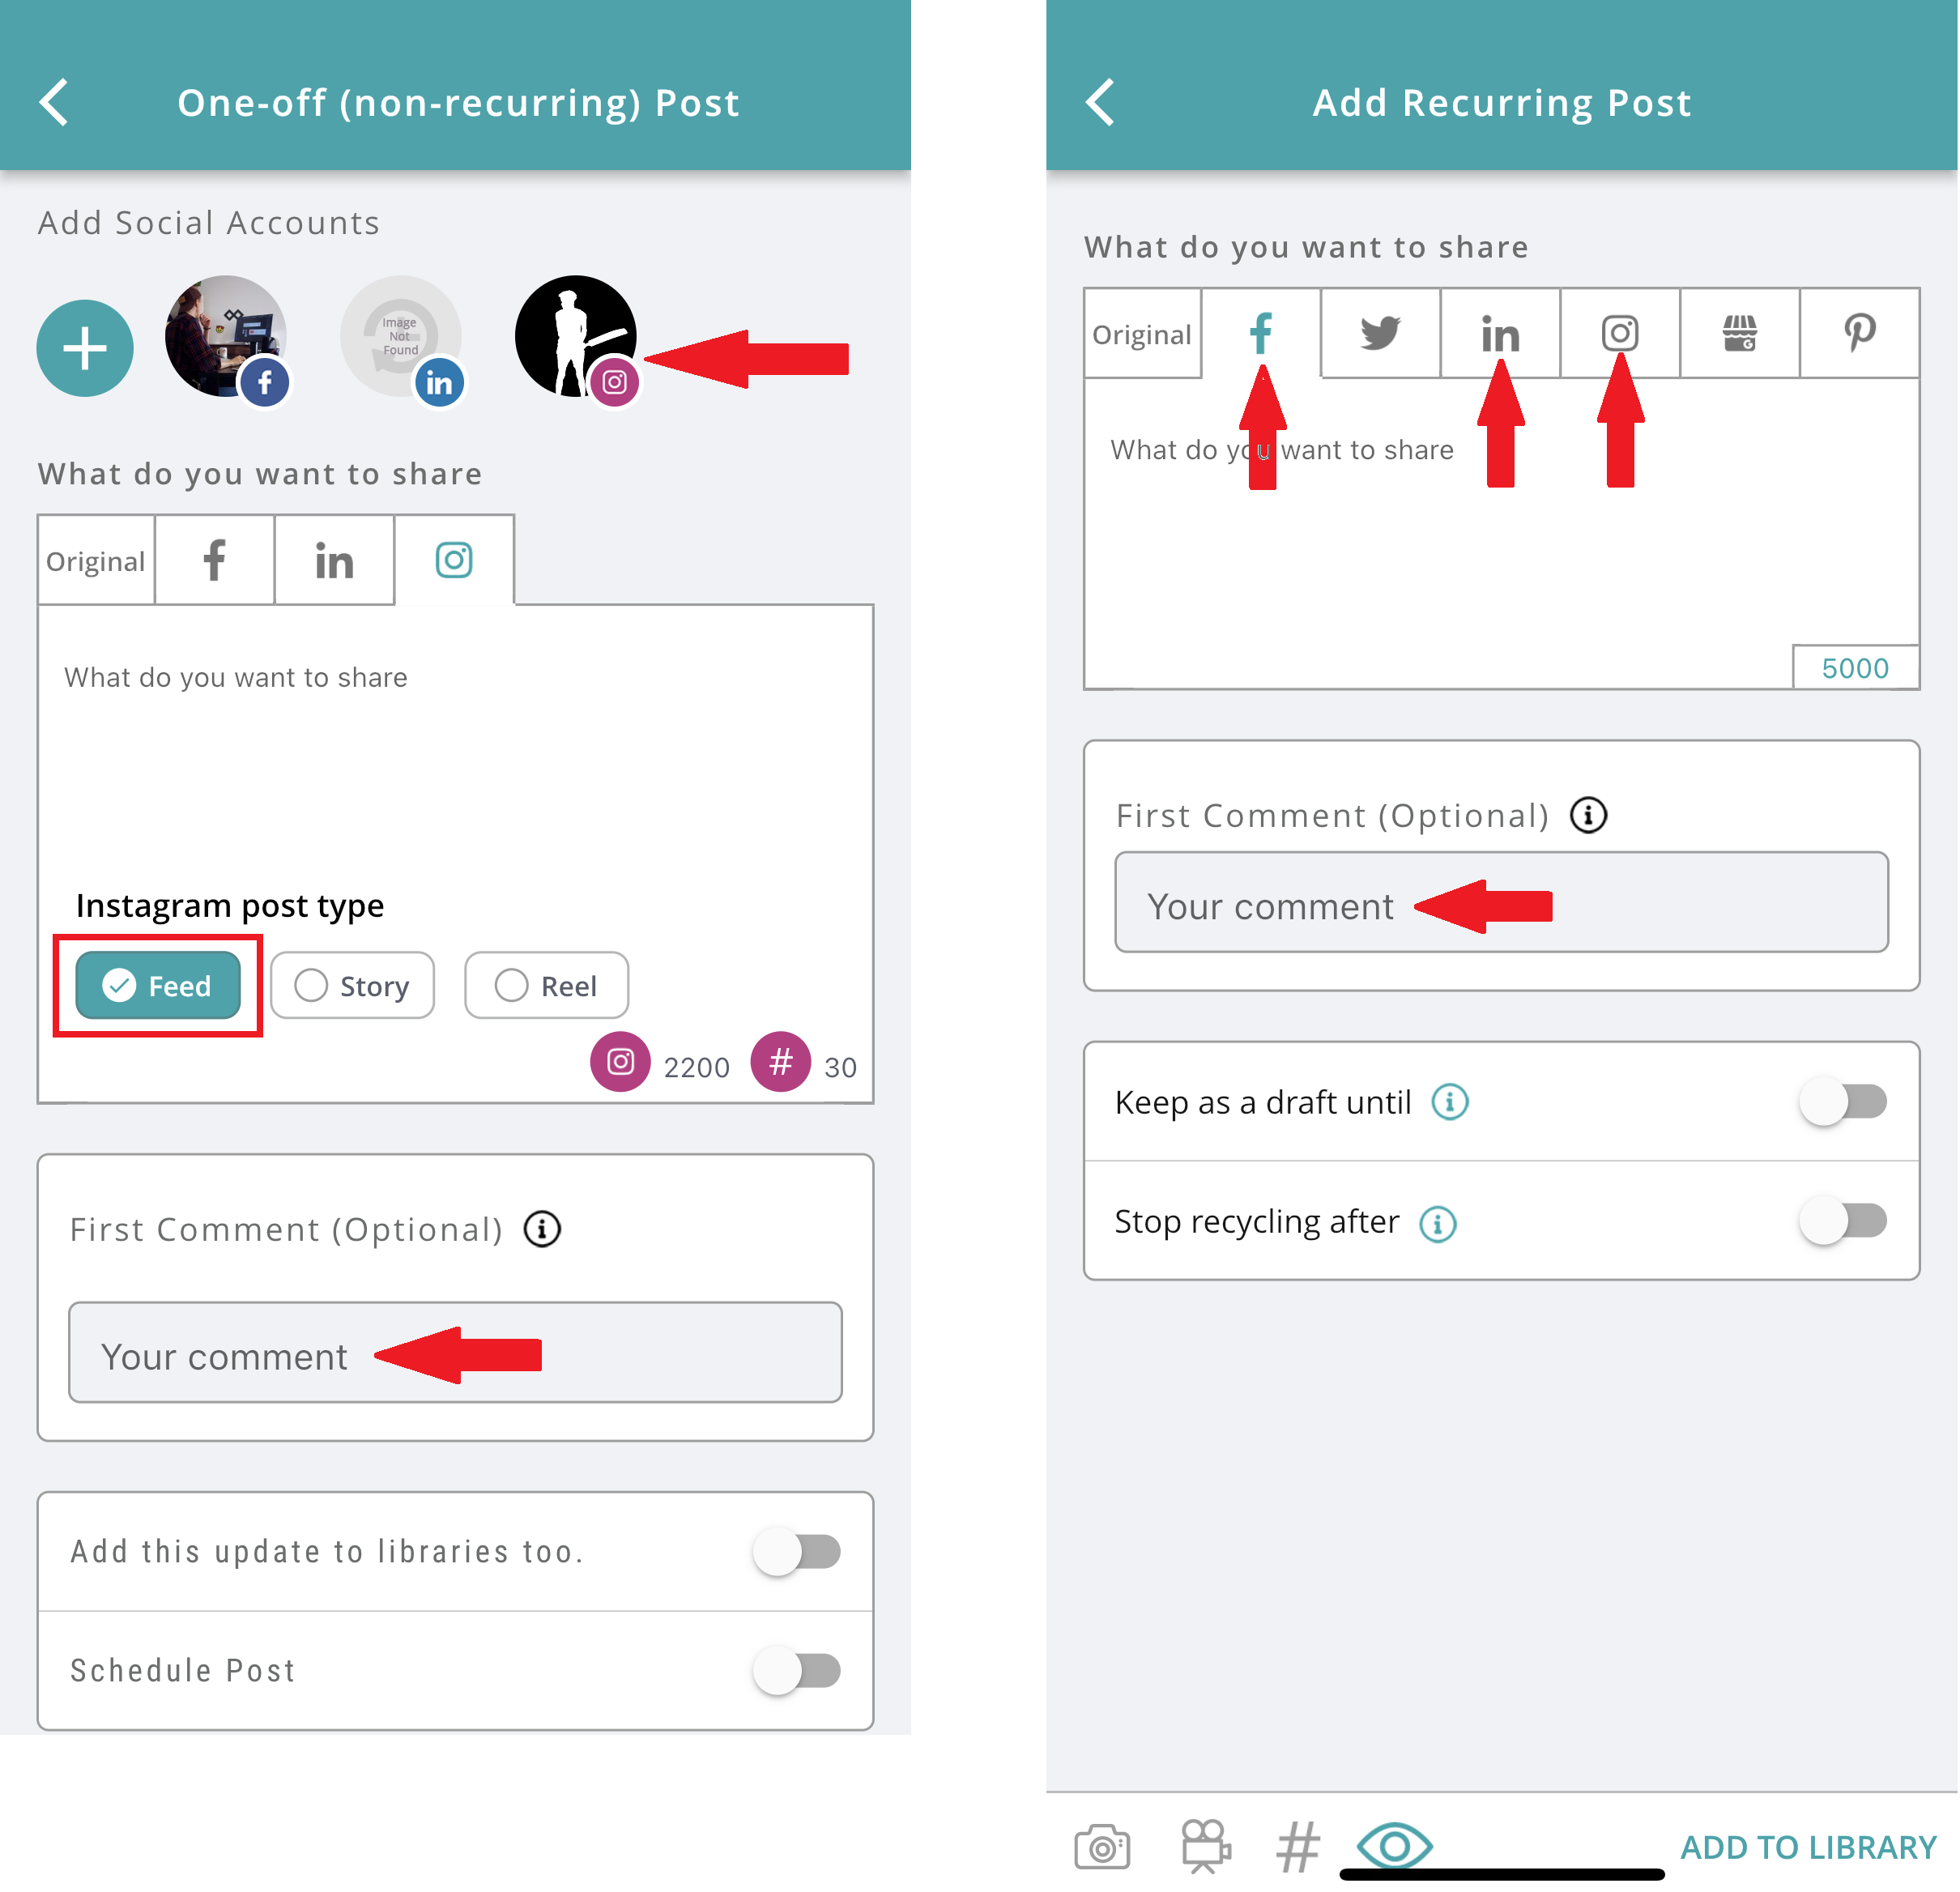
Once you are done adding the first comment then schedule the post as per your convenient date and time (if you are using a one-off post). However, if you are adding the first comment in your post in the library then you need to simply click on “Add to Library” button after adding your first comment.
Note:
- The total number of characters must be 2200 in the first comment as per Instagram limitations.
- Also, you cannot mention more than 10 users in your Instagram comments as per Instagram rules.
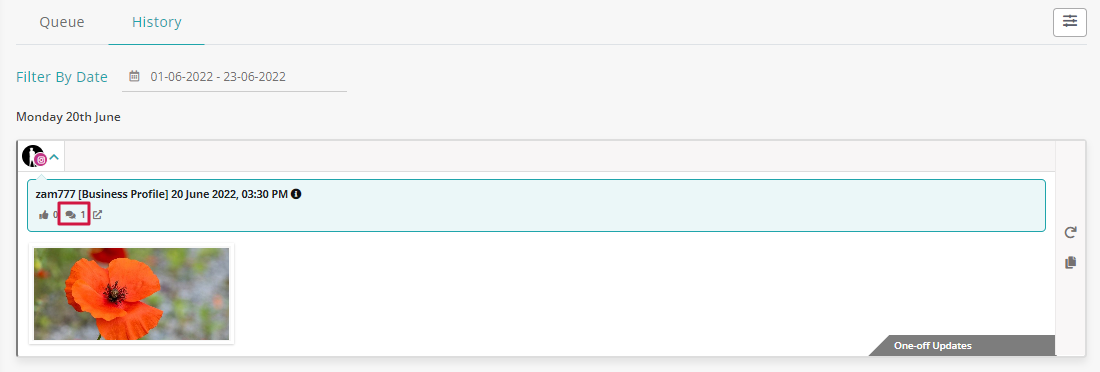
- One comment can be seen right away in the RecurPost History.
Points to Note:
1. When you are posting on Instagram Personal Profile:
You will get a push notification for the RecurPost mobile app on your phone when it is time to post. You need to tap on that notification and you can find your post in the RecurPost mobile app. In the app, if you tap on Post Now then your data will be copied to the clipboard and you will be taken to Instagram mobile app for the posting. Next, select where you wish to share the post – either ‘Feed’ or ‘Story’. Your post will show up and then you can complete the upload process.
2. When you are posting on a Facebook Personal Profile:
If you select ‘Post Now’, your data will be copied and you will be taken to your Facebook profile in a new tab in your web browser instantly. From here, you can add additional details and share your post.
If you have scheduled the post for a later time then, you will get a push notification through RecurPost’s mobile app just like Instagram Personal Profile posting. Tapping on Post Now option in the RecurPost mobile app will take you to Facebook’s mobile app and your data will be copied. You can make your post live when you see your post on the Facebook screen.
3. Automated posting for Instagram Business Profile:
RecurPost has been approved by Instagram to post directly on Instagram business profiles. Once you add your Instagram account and create a schedule for it from different libraries, it will start posting to Instagram feed just fine.
That’s it for creating posts for your social media profiles using RecurPost! If you have any queries, contact us at ‘support@recurpost.com’