
What is a Custom Field?
One of the biggest challenges when managing multiple social profiles is creating unique posts that cater to each profile’s specific needs. While the branding and messaging may remain the same, certain details such as addresses, contact information, taglines, URLs, signatures, ID numbers, email addresses, legal disclaimers, etc., need to be customized to suit each profile’s requirements.
To simplify this process, RecurPost has introduced Custom Fields – a feature that enables you to store account-specific information under separate categories, which can be added to posts later. Custom fields can help eliminate the tedious task of manually adding these details to otherwise similar posts while creating and scheduling posts for each profile.
How to set up Custom Fields in RecurPost?
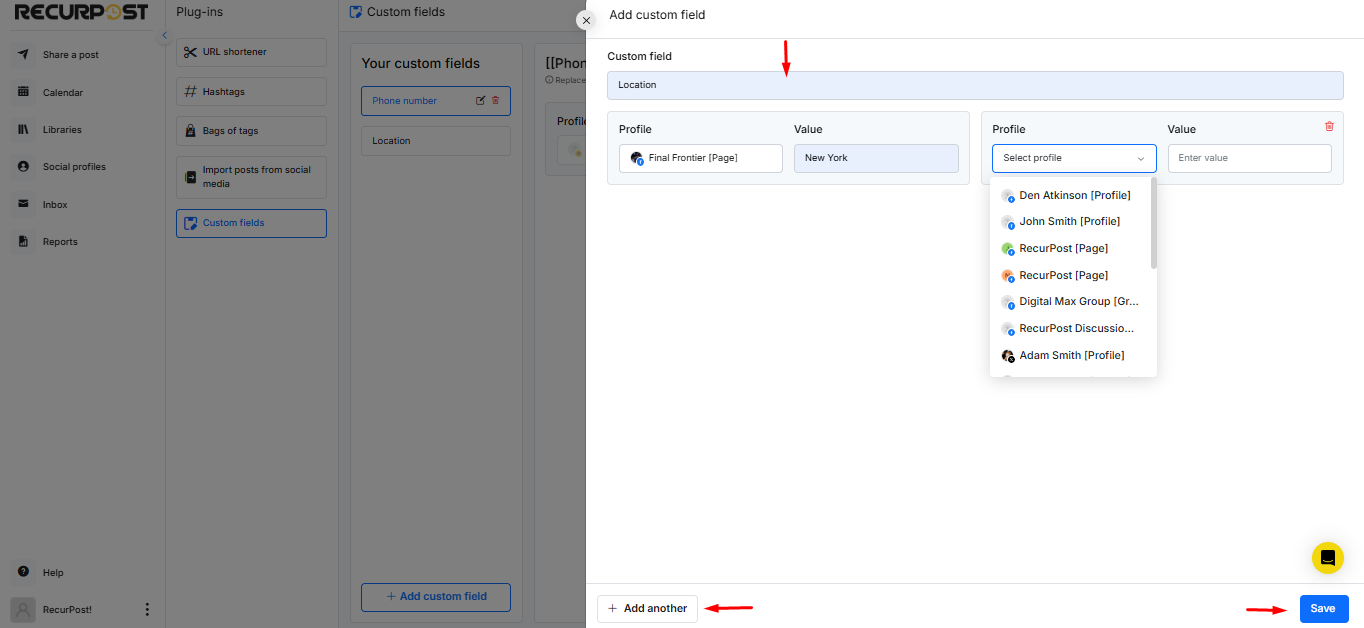
To illustrate, consider a scenario where a business operates two different places that have comparable branding and messaging, and offer the same option. Nevertheless, the business is situated in different locations and possesses distinct contact information. Consequently, these particulars must be entered separately into the social media posts that are otherwise identical.
Here is an example of how to use and manage the custom field feature for your social profiles in RecurPost. There are two ways to access the custom field, which are explained below:
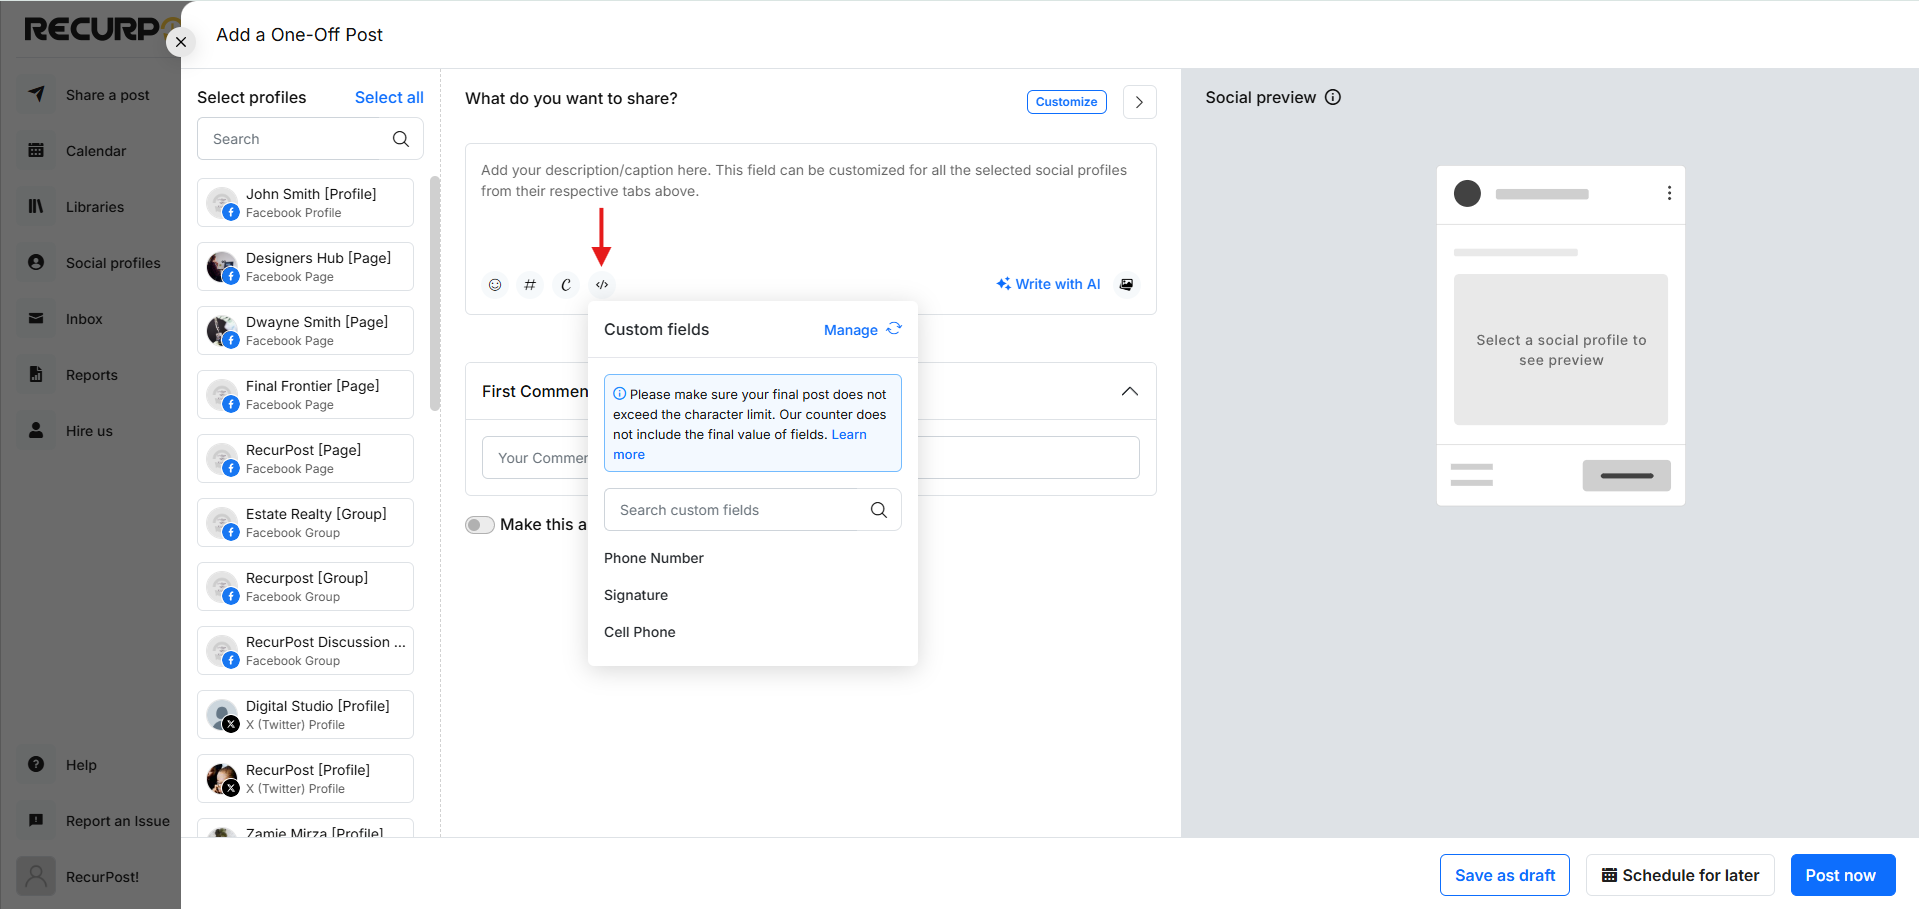
Option 1: The custom field option can be viewed in your post, whether you are creating a one-off post or adding a post to the library.
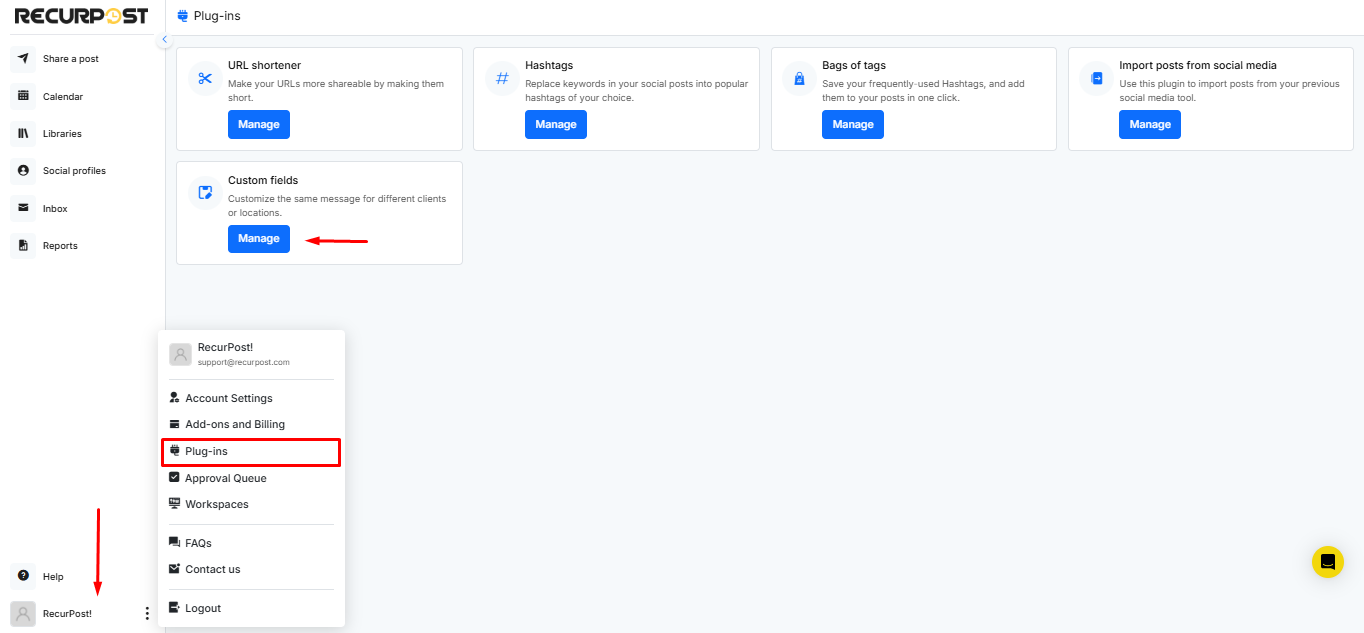
Option 2: You can go to the “Plugins” option by clicking on your name at the bottom-left corner and go to the “Manage” option under Custom Fields.

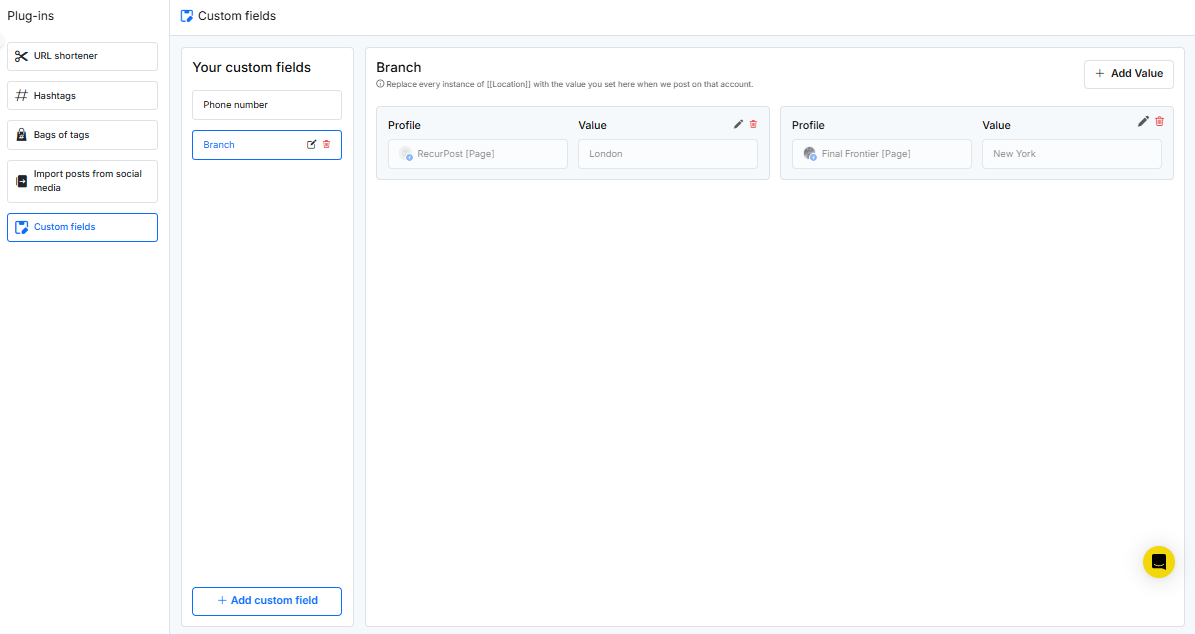
After setting up your custom field values, your custom field page will look like this.
Now, you can easily add these values to your post while scheduling a one-off post from the ‘Calendar‘ or adding a post to the library. Please refer to the screenshot below.

Important points to note:
– While creating a post, the values you entered in the custom field may not appear. However, they should be visible on your social profiles once your post is published through RecurPost.
– RecurPost will count characters of the custom fields, while the social platforms will count the characters of the values of your custom fields. So an error may occur if not used carefully.
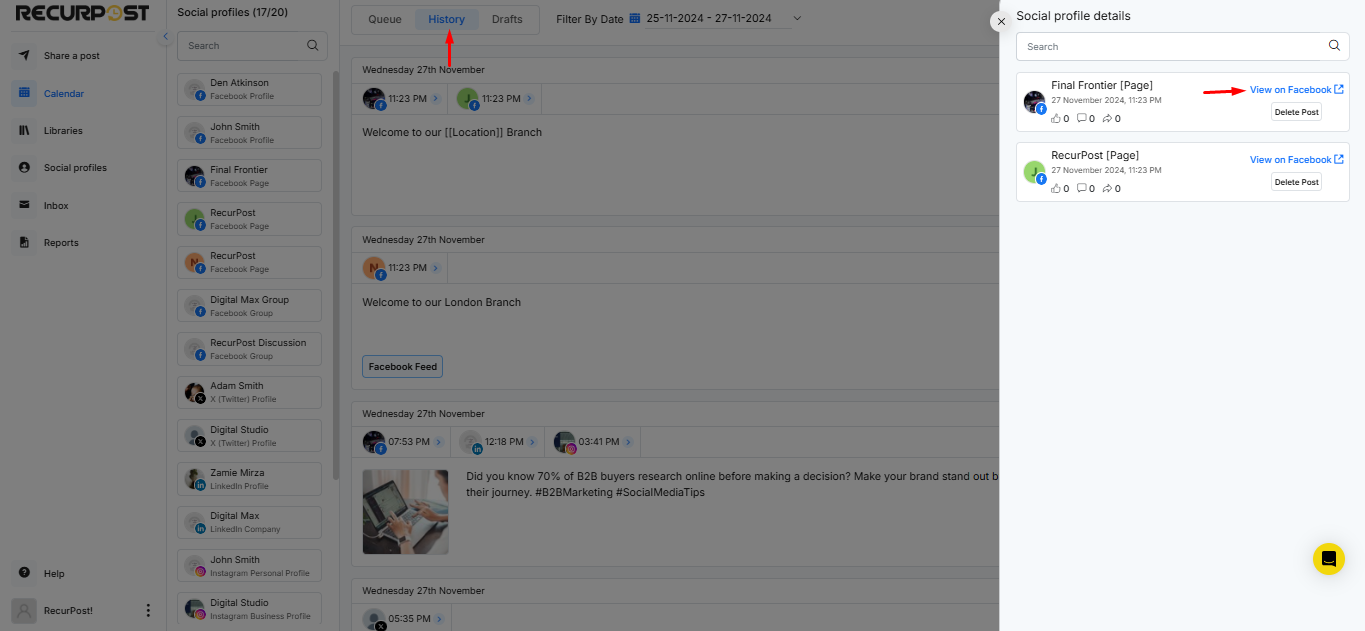
You can now go to the “History” section on the ‘Calendar‘, where you can view your posted content. By selecting the “View in Social Profile” option, you should be able to see that your custom field has been successfully published.
You can also check out our video tutorial here:
We hope that you have found this article to be informative and useful. If you have any further questions or need help, please feel free to reach out to us at support@recurpost.com.