
With RecurPost’s Instagram DM automation feature, you can automatically send a direct message to anyone who comments on your selected Post or Reel. This is a powerful tool for lead generation, customer engagement, and driving traffic to a link.
Before You Set Up Instagram DM Automation
To ensure your DM automation works without issues, please follow these steps first:
1. Reconnect your Instagram profile in RecurPost
This refreshes the required permissions and ensures your account is fully integrated with the latest features. You can reconnect it by going to the ‘Social Profiles‘ page and clicking on Reconnect on your Instagram Profile.
2. Update your Message Settings in the Instagram mobile app
- Go to your Instagram profile > Settings & activity > Messages and story replies > Message requests.
- Make sure to turn on the option: “Allow access to messages.”
- Under “Who can send you message requests,” set it to allow everyone or your preferred audience so your Auto DMs can reach users who comment.
Completing these steps is essential before creating your DM automation to avoid delivery issues.
How to set up Instagram DM Automation
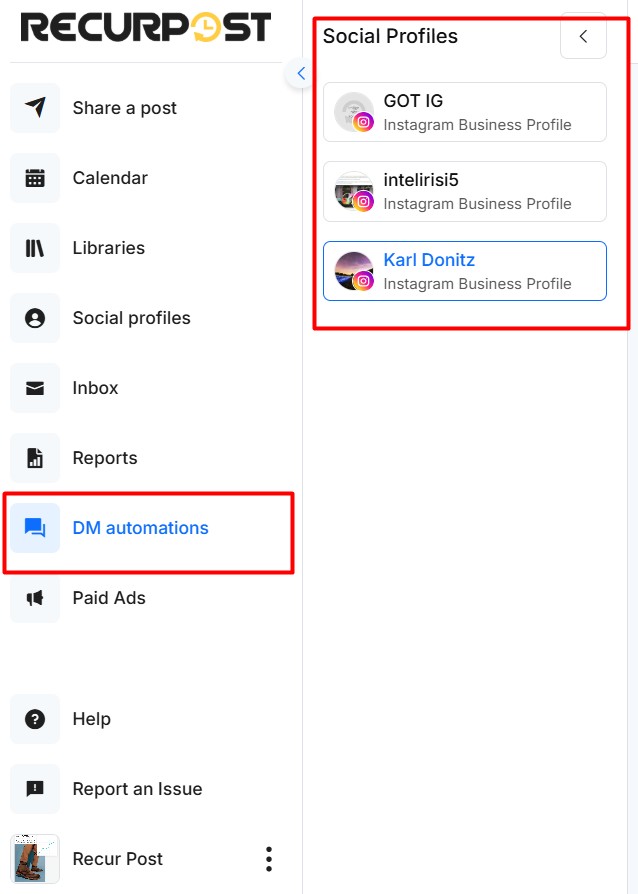
Step 1: Go to the DM Automation
Head over to the DM Automation and select the social profile.
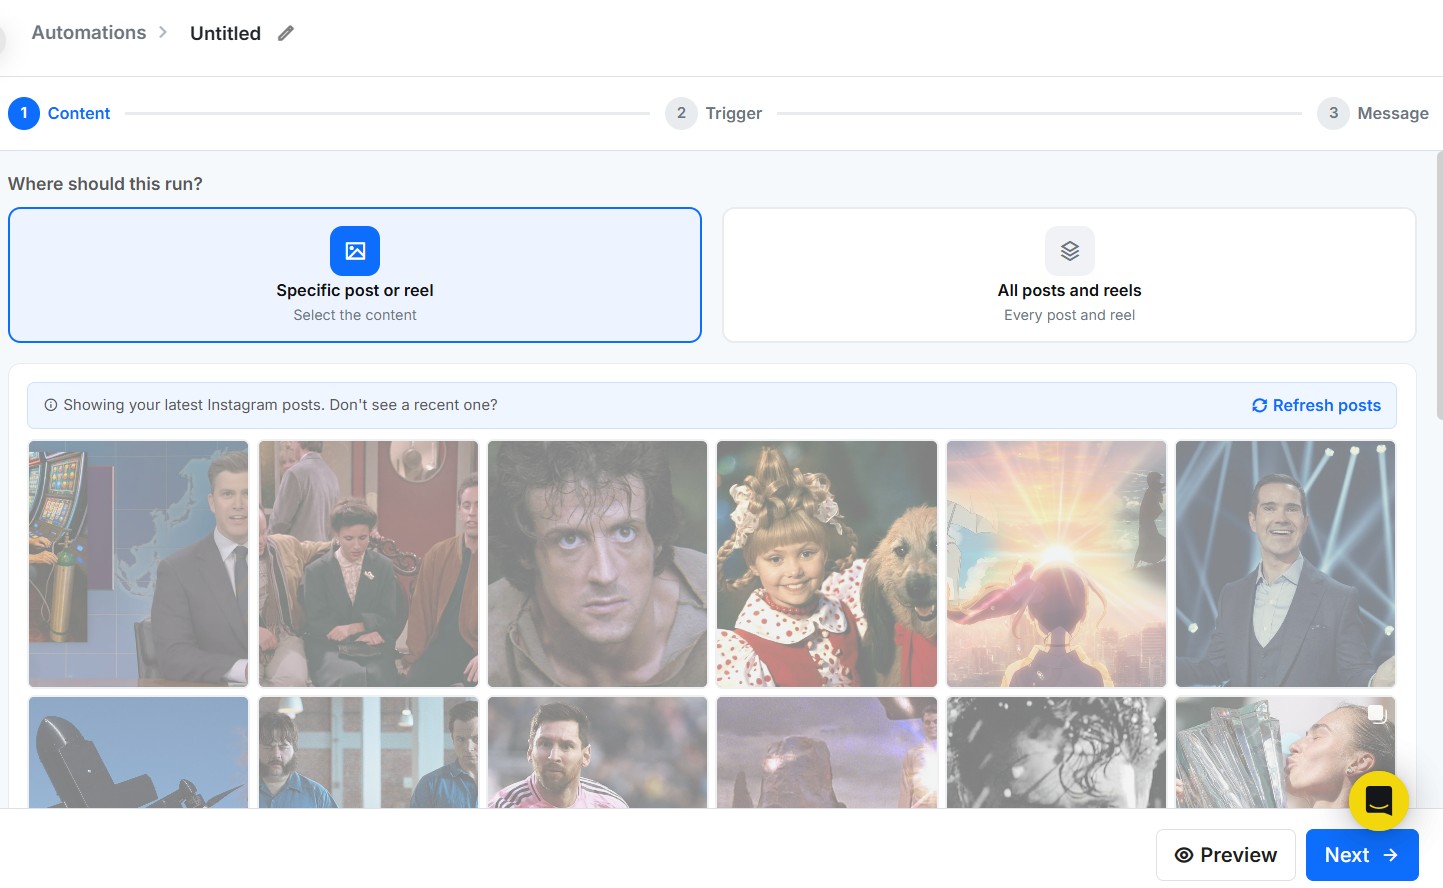
Step 2: Choose the Post or Reel for Automation
You’ll start by selecting the Instagram profile and then selecting a specific Instagram post or reel that will trigger the automation.
You have two options:
- Specific Post or Reel: Click on the thumbnail of the specific post you want to automate.
- All Posts or Reels: Use this if you want to set automation across every post or reel.
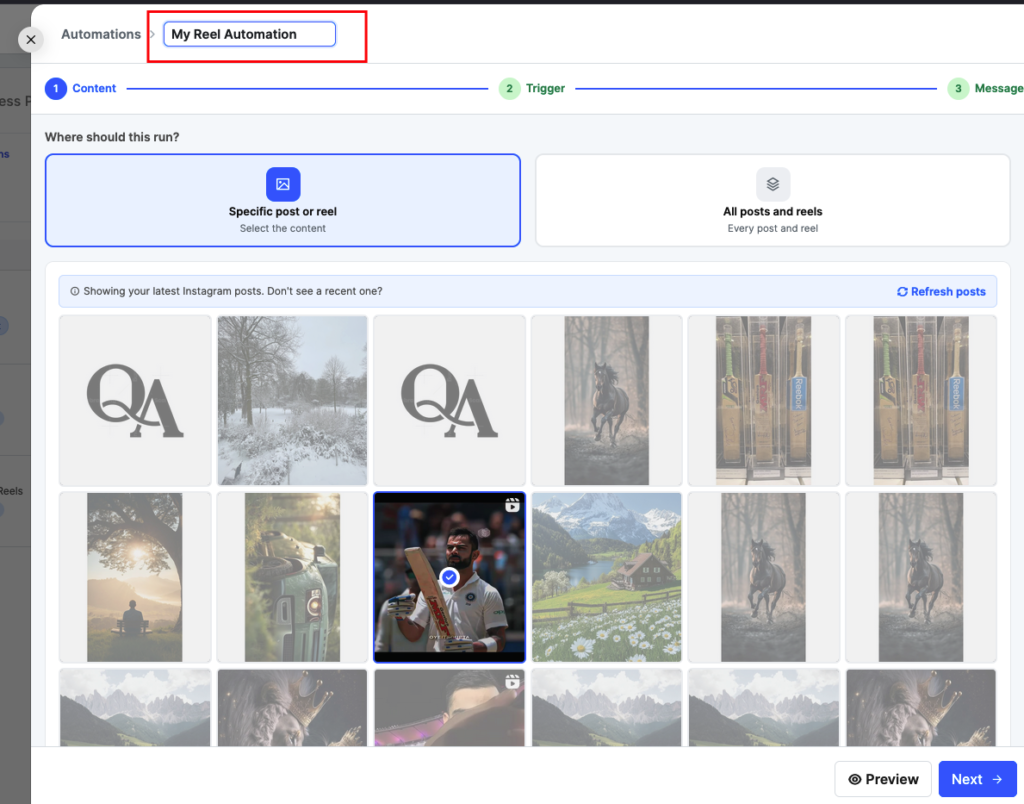
Give Your Automation a Name
Before you pick your content, name your automation. You’ll see an “Untitled” label at the very top of the setup window. Click on it and type something clear.
Good examples: “Summer Sale Reel” or “Free Guide Post.”
This small step saves a lot of time later. When you have several automations running, a clear name tells you exactly what each one does at a glance.
Step 3: Define What Triggers the DM Automation
This step allows you to set the condition that will trigger your DM. You can select any one of the two options:
1. Add Specific Keywords
Type keywords that you want to trigger the DM (e.g., “info”, “link”, “hello”). Press Enter or use commas to separate multiple keywords. The system is not case-sensitive.
Example: “freebie”, “guide”, “discount”
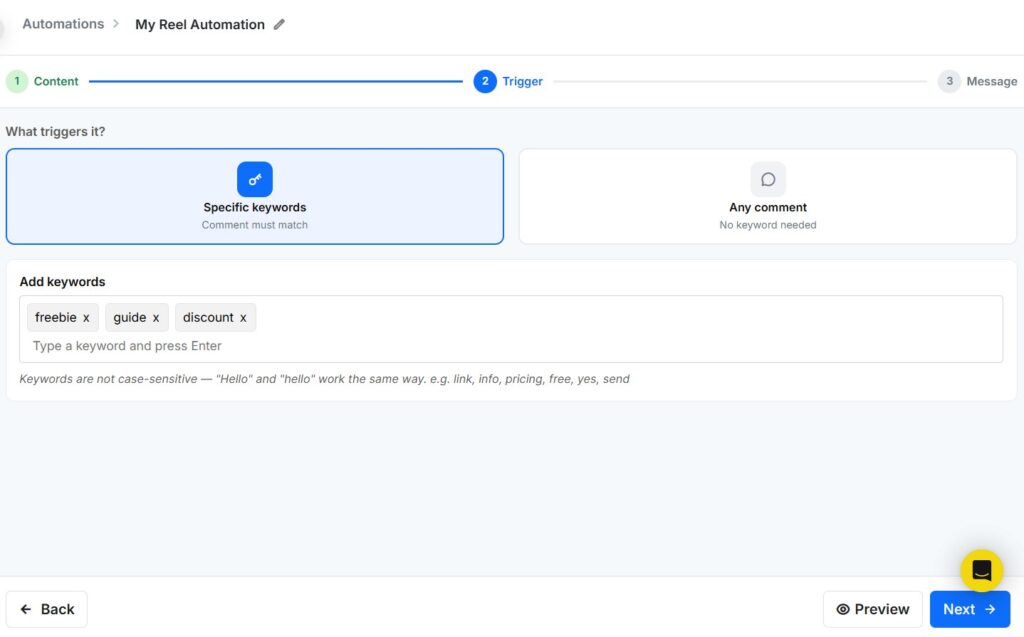
2. Any Comment
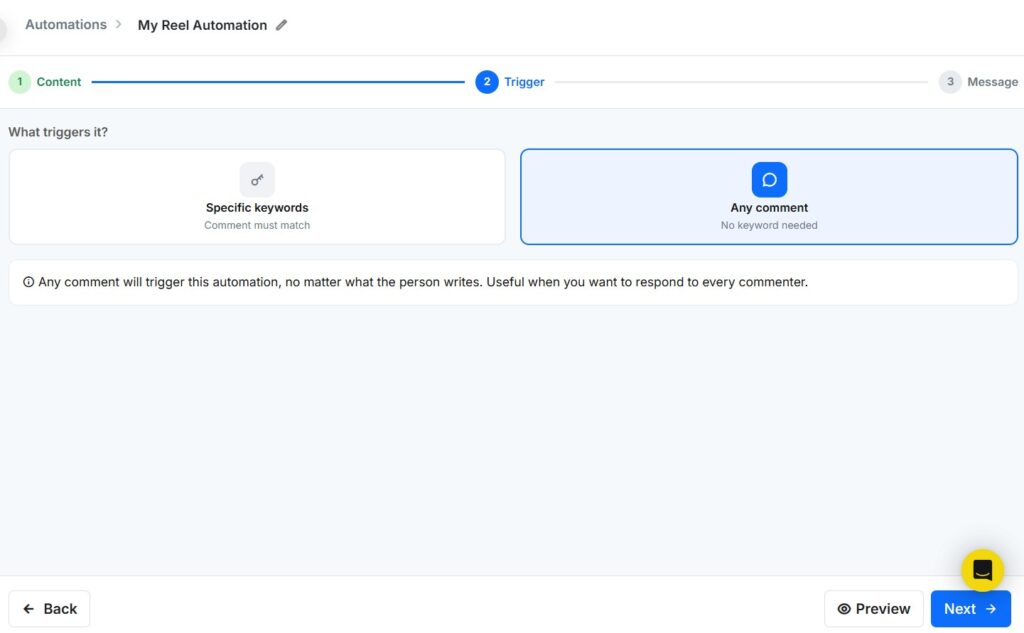
Select this if you want to trigger the DM for any comment, regardless of the content.
Note
- If you have multiple DM automations of ‘All Posts/Reel‘ running at the same time, then, in this case, the direct message (DM) will be sent only from the first automation you created in RecurPost.
- However, the comment you set up in each active DM automation will be posted on your Instagram post from all the active DM automations.
- For example, if you created 3 DM automations for a specific Instagram profile, the DM listed at the bottom of the DM page is the first one you created. This is the automation that will send the DM, while all three will still post their comments on your Instagram post when a trigger (like a comment) happens.
Step 4: Set Up the Automation Message
Now, you’ll define what message to send and how the interaction will appear.
Who Gets the DM?
At the top of this step, you’ll see two options. Pick the one that fits your goal.
Option 1 – Reply & DM Instantly
This sends a DM to anyone who comments on your post. It doesn’t matter if they follow you or not. The message goes out right away.
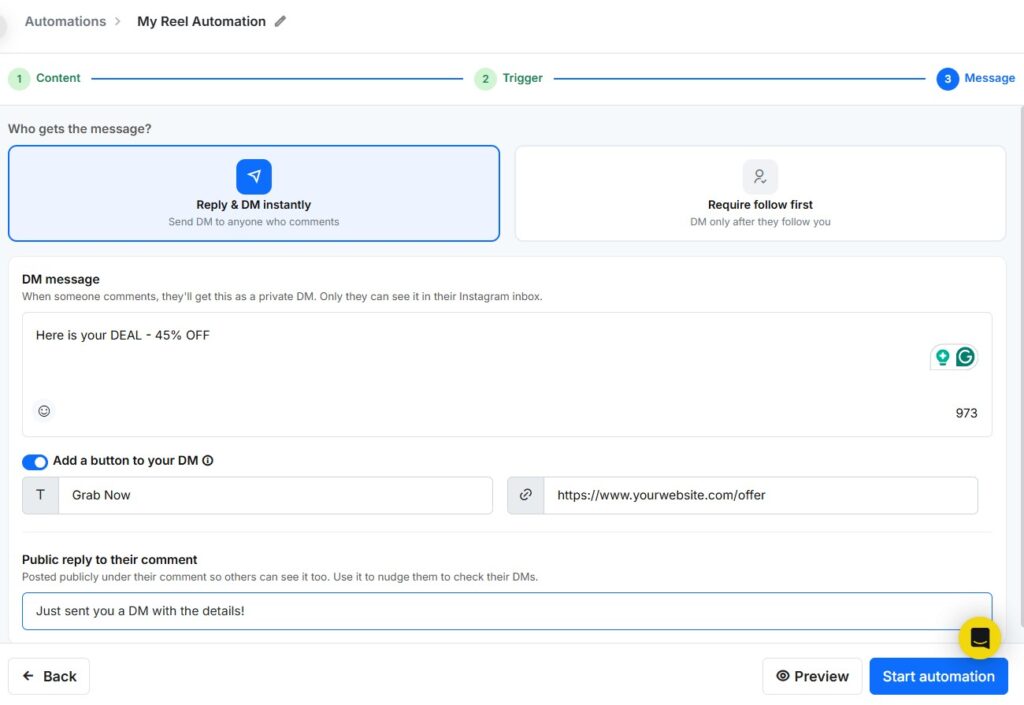
1. DM Message: Type the direct message you want the commenter to receive. You can include emojis and customize the message tone.
Example: Thanks for showing interest! Here’s the free guide: https://recurpost.com/. Let me know if you have any questions!
Note
- Only one DM reply will be sent per comment, even if multiple automations are set.
- Character limit: 1000 characters.
2. Add Button (Optional but Powerful): Turn this toggle on if you want to include a clickable button in your DM.
- Button Title: A short label (e.g., “Download Now”, “Visit Website”).
- Website URL: The link you want the button to redirect to.
This is great for offering downloadable content, product links, booking pages, etc.
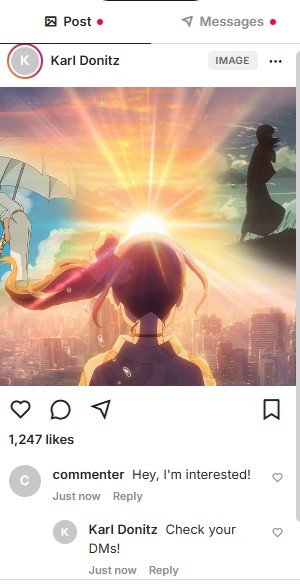
3. Comment Reply (Optional): This message will appear as a public reply to the comment made on your post. Use it to thank them or prompt them to check their DM.
Example: “Thanks for commenting! I’ve just sent you a DM.”
Option 2 – Require Follow First (New)
This sends the DM only to people who follow you.
Here’s what happens behind the scenes: Someone comments on your post. RecurPost checks if they follow you. If they do, the DM lands in their inbox instantly. If they don’t, the message waits. The moment they follow you, it goes out automatically.
This option works really well when you’re sharing something valuable — like a free resource, a discount code, or a product link. People who want it will follow you just to get it. That turns your comments section into a follower growth tool.
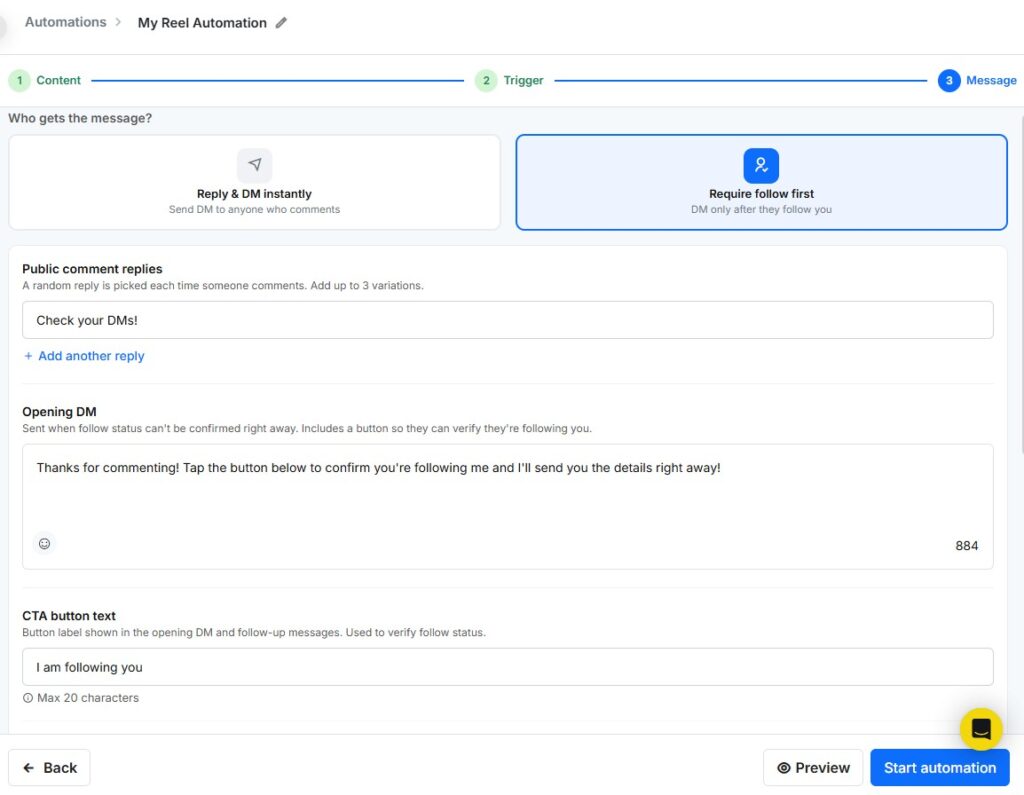
How the “Follow First” Flow Works
When you pick “Require Follow First,” here’s exactly what happens step by step:
- Someone leaves a comment on your post.
- RecurPost posts a public reply under their comment right away.
- The system runs a Check Follow — it checks if that person follows you.
From here, the path splits into two:
If they already follow you → The DM is sent to them instantly.
If they don’t follow you yet → The system sends them an Opening DM with a follow-up prompt. Once they click the call-to-action (CTA), the system re-checks their follow-up status. This loop runs until they follow you — or for up to 24 hours.
Once they follow, the full DM lands in their inbox automatically.
This flow turns every comment into a real chance to grow your follower count without any manual work on your end.
Step 5: Preview and Launch
- Preview: Click to preview how your automation will work.
- Start Automation: Once everything looks good, click the blue “Start automation” button.

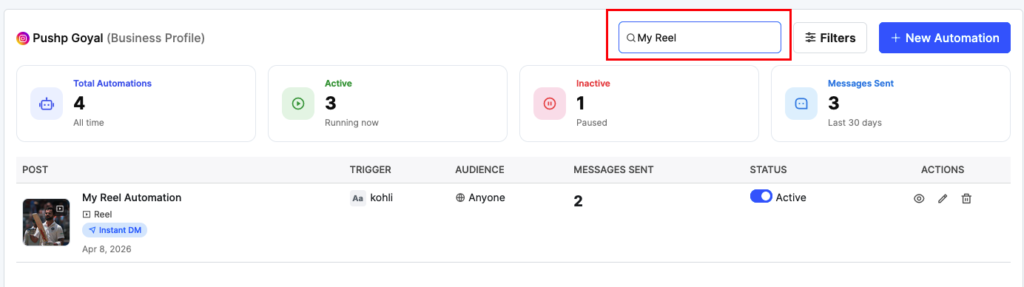
How to Search Your DM Automations
Managing many automations gets messy fast. RecurPost now lets you search them by name.
Just go to your DM Automations page. You’ll see a search bar at the top right. Type the name of the automation you’re looking for, like “My Reel” and it shows up right away.
No more scrolling through a long list. You find what you need and get back to work fast.
Tip: Name every automation before you save it. Search works best when your automations have clear, specific names.
Filter Your Automations
Got a long list of automations? Use the Filters button at the top right to narrow things down fast.
Click on Filters and you’ll see four filter categories:
- Status – Show only Active, Inactive, or Scheduled automations.
- DM Type – Filter by Instant DM or Follow First automations.
- Post Type – Choose between All Posts & Reels, Image, Reel, or Carousel.
- Trigger – Filter by Any Comment or Specific Keywords.
Mix and match filters to find exactly what you need. Hit Clear all to reset and start fresh.
Check Automation Status at a Glance
On the DM Automations page, every automation shows its current status in the Status column. You’ll see one of three labels:
- Active – The automation is running right now. It will fire whenever someone comments.
- Inactive – The automation is paused. It won’t send any messages until you turn it back on.
- Scheduled – The automation is set to run at a future time.
You can toggle any automation on or off directly from this column. No need to open the full setup to make that change.
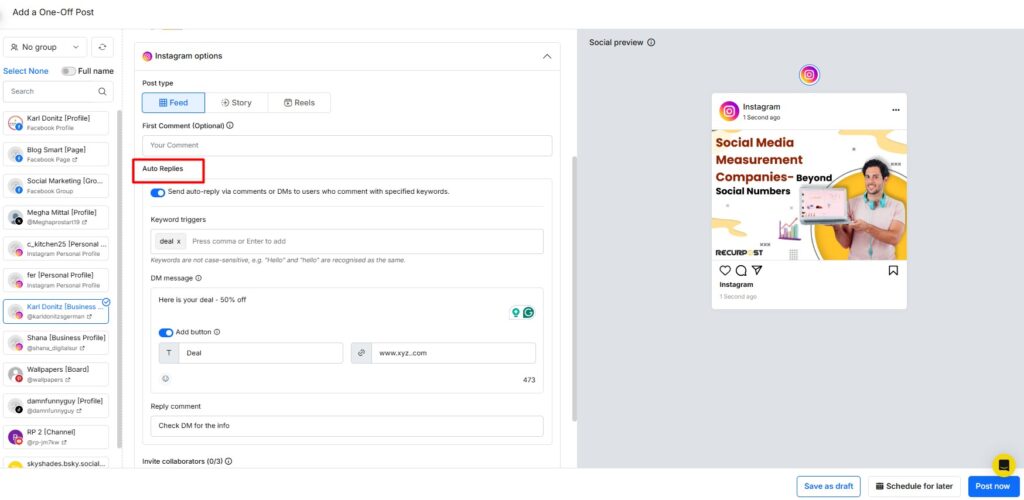
How to add DM automation to New or Future posts?
When creating a new post from RecurPost, you can also set DM automation for that particular post. You can start by creating a One-off Post.

Best Practices
- Avoid spammy language to comply with Instagram’s community guidelines.
- Make your DM personalized and value-oriented.
- Regularly review responses and update automation if needed.
Frequently Asked Questions
1. What is the Instagram Auto DM feature?
The Auto DM feature automatically sends a direct message to users who comment on your Instagram posts, helping you engage instantly and drive actions like downloads, signups, or sales.
2. How does the Auto DM work?
Once set up, anyone who comments on your post will receive a pre-written DM that you configured in RecurPost. It works on both new and old posts, and you can also customize the message for different/specific posts.
3. Can I customize the DM message?
Yes! You can fully customize the message text and include links, discount codes, or any call-to-action you want to share with commenters.
4. Are there any restrictions or best practices for using Auto DM?
Instagram limits the number of DMs that can be sent per hour/day to avoid spam. Keep your messages clear, valuable, and relevant to avoid triggering spam filters or annoying your audience.
| Account Type | Recommended DM Limit (per day) | Notes & Best Practices |
|---|---|---|
| New Instagram Business Account | 50–100 DMs | Start slow; avoid sending too many messages too fast. |
| Established Instagram Business Account | 100–150 DMs | Maintain good engagement and avoid identical bulk messages. |
| All Accounts | Space out messages naturally | Keep DMs personalized and relevant to avoid spam flags. |
5. Does this work on all types of posts (e.g., reels, carousel, etc.)?
Yes, Auto DM works on all types of standard Instagram feed posts, including photos, videos, and reels. However, it does not currently trigger from Stories.
6. What happens if a user comments multiple times?
A user (who commented) will receive the Auto DM multiple times (the number of times the comment is made by that person).
7. Can I turn off Auto DM for specific posts?
Yes, you can choose which posts have Auto DM enabled. It’s easy to toggle the feature on or off for each post individually.
8. What if someone deletes their comment?
If the comment is deleted after your DM has been sent, the message remains in the user’s inbox.
9. Can I track who has received the Auto DM?
Currently, you can monitor the comments and confirm that DMs have been sent by checking your Instagram inbox. You can also check it under Step 3.
10. Does this feature comply with Instagram’s rules?
Yes, the Auto DM feature is designed to work within Instagram’s guidelines. However, always ensure your messages are non-spammy, respectful, and provide value to your audience.
11. My Auto DMs are not sending. What should I check?
First, ensure your Instagram account is properly reconnected in RecurPost and has the required permissions. Double-check that Auto DM is enabled for the post in the Instagram mobile app, and confirm your account is not temporarily blocked from sending DMs by Instagram.
12. Why are some users not receiving my Auto DM?
There are a few possible reasons:
- The user’s privacy settings might prevent them from receiving DMs.
- Instagram may restrict DMs to users who don’t follow you. They may have to go to the ‘Requests‘ section from their ‘Messages‘ and approve your request.
- Your account may have hit Instagram’s daily DM limits.
13. Can I edit the Auto DM after it’s been set up?
Yes, you can edit your Auto DM message at any time in RecurPost. Changes will apply to all future comments, but won’t resend messages to users who’ve already commented.
14. I received a spam warning from Instagram. What should I do?
Immediately pause your Auto DM campaigns and let your account rest for at least 24–48 hours. Make sure your messages are not too aggressive or salesy, and keep them personalized to reduce the risk of being flagged.
15. How do I disconnect or stop the Auto DM feature?
You can easily turn off Auto DM for any post or disconnect the feature entirely from your Plug-ins page inside RecurPost. Your audience will not be notified if you disable it.
16. Can I name my DM automations?
Yes! When creating a new automation, click the “Untitled” field at the top of the setup window. Type any name you like. You can also rename existing automations anytime by editing them.
17. Can I search for a specific automation?
Yes. On the DM Automations page, use the search bar at the top right. Just type the automation name and it filters results instantly. This works best when your automations have been given clear, specific names.
18. Can I send DMs only to people who follow me?
Yes. In the Message step, select “Require Follow First.” RecurPost will hold the DM until the commenter follows your account. Once they follow you, the DM is sent to them automatically. This is a great way to turn comment engagement into real follower growth.
19. Can I filter my automations?
Yes. Click the Filters button on the DM Automations page. You can filter by status, DM type, post type, or trigger. This makes it easy to find a specific group of automations quickly.
20. What happens when someone who doesn’t follow me comments on my post?
If you’ve set up “Require Follow First,” RecurPost sends them an opening message with a follow prompt. The system then checks if they follow you. This loop continues for up to 24 hours. Once they follow you, the full DM is delivered automatically.
21. How do I pause or reactivate an automation?
Go to your DM Automations page and find the automation in the list. Toggle the switch in the Status column to turn it off (Inactive) or back on (Active). You don’t need to edit the full setup to do this.