
There may be times when you have to discontinue or delete your Facebook group or any of your other social handles because things aren’t working out the way you planned, which is pretty common in the world of social media marketing.
The same applies to Facebook Groups. Though Facebook groups are a valuable asset to your company and have the potential for massive engagement, they can also prove to be an obstacle if not managed properly.
You may even need to delete your Facebook group if they are doing more harm than good for your brand.
In this post, we’ll be seeing how to delete your Facebook Groups and if there are any better alternatives available before you knock it off the roof.
Before You Delete Your Facebook Group
Before you finally decide to delete your Facebook Group, consider the following:
- Consider the alternatives before deleting your Facebook Group
(scroll down to see alternatives) - Deletion is permanent; you won’t be able to recover it or the content inside after deleting your Facebook Group.
- Make sure to inform your members beforehand about it; in case they need to extract some valuable info before it’s lost or to connect with someone they found in the group.
- Tell your members why you are deleting the Facebook group in the first place; be brief and explain to them why you think it’s the right course of action.
Once you’re done considering everything, it’s time to pull the plug. Again, keep in mind that you can’t recover data after deleting your Facebook Group. All the images, videos, text updates, events, and polls will be gone, as well as your connection with the people inside that group.
Note that only the creator of the group can delete the group. In case the creator has already left the group, the authority transfers over to the remaining admins.
Steps to delete a Facebook group
How to delete a Facebook group using the mobile app when you are the admin
- Open the “Facebook” application. It has a dark blue icon with a white-colored “f”. This will directly open your News Feed only when you are logged into your Facebook account.
(If you are not logged in, the login page will appear. Enter your email or phone number and password to continue.)
- While on the home screen, tap on the last button on the top right corner that indicates three parallel lines. If you are using an iPhone, it will be in the bottom right corner of the screen.
- A complete menu will appear having a lot of options to access from a single place. Your profile icon and name will be on the top. Below it, after 3-4 options, the ‘Groups’ section will be there.
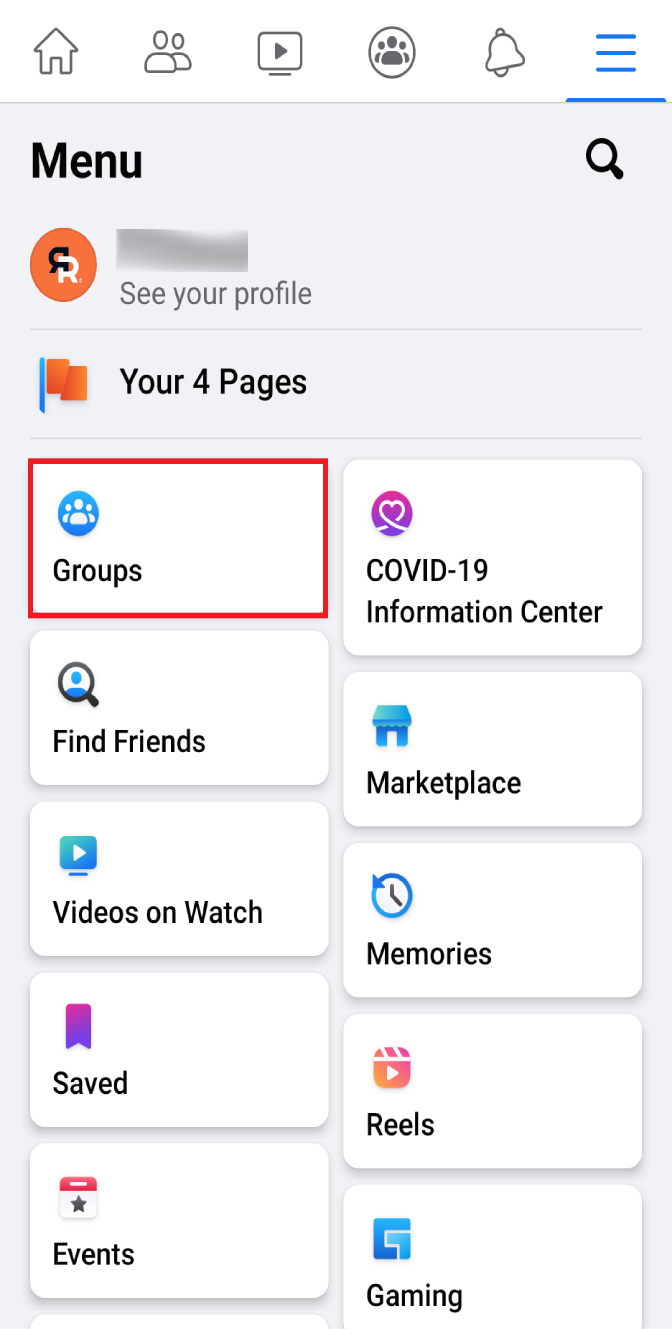
- By clicking on it, you will be taken to your customized group feed. In the beginning, you will see a carousel of all the groups that you have made or are a part of.
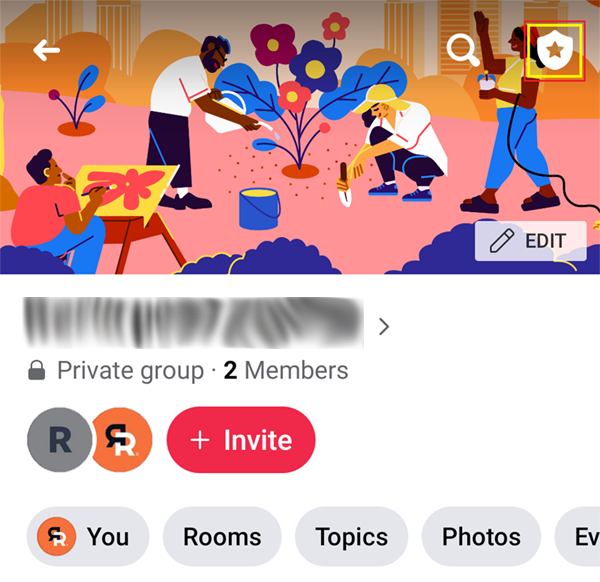
- Select the group that you want to delete.
- On the top right corner, there is a symbol containing a star in the middle. This is the ‘Admin Tools’ section.
- Here, from the ‘Members’ section, remove all the people that are a part of the group, one by one. If it is a large group, you will have to allocate a whole lot of time to do this, as there is no option to remove all the members at once.
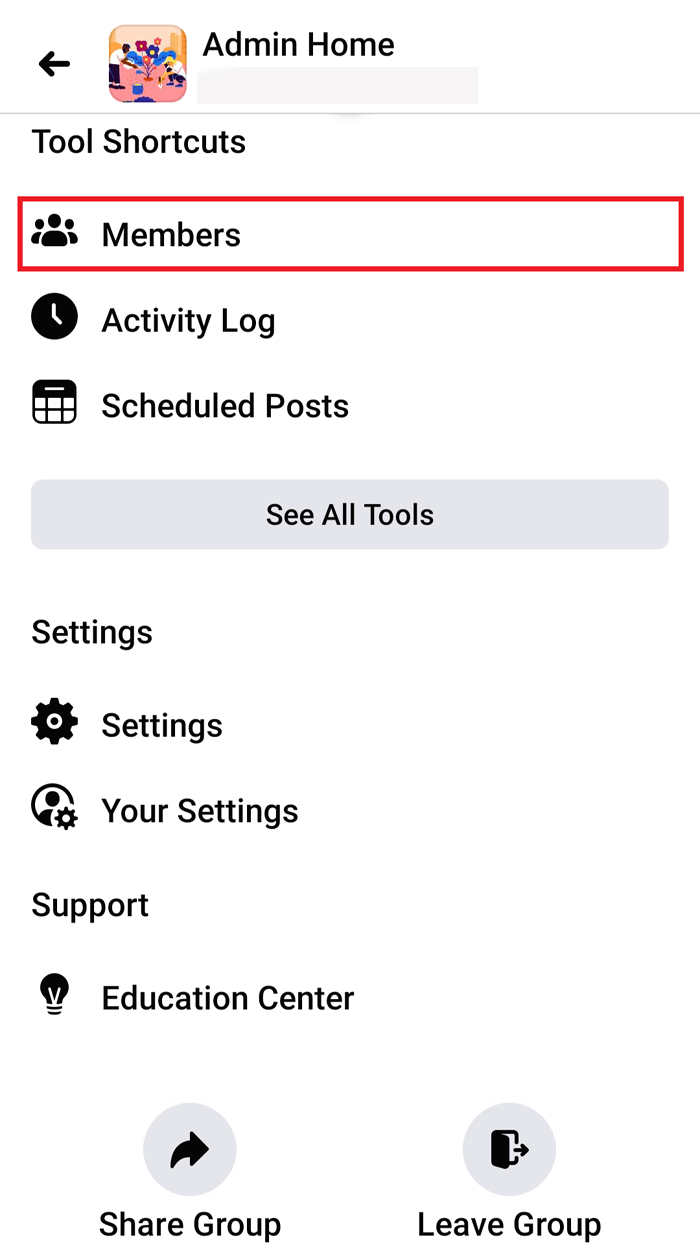
- Come back to the Admin Tools section. In the last, there is a button indicating ‘Delete Group’. A popup will appear asking for your confirmation. Click on ‘Delete Group’, and the Facebook group will be deleted.

Note:
- If you did not remove all the members, leaving the group will result in the transfer of admin rights and the group will continue to exist. If you do not receive the above message of ‘Leave and delete’ when you are leaving the group, that would mean you have not removed all the members.
- Alternatively, if you do not want to delete the Facebook group completely, you can even archive it. Group admins can archive a group, meaning that the group will no longer be seen in Facebook search to non-members, and no new members can join it.
- Group owners can delete Facebook groups, whereas group admins can only archive it (unless the owner leaves).
How to delete a Facebook group using a web browser when you are the admin
- Login to your Facebook account by going to Facebook’s website (https://www.facebook.com). This will load your News feed, if you are already logged in. (If not, enter your email address or phone number and password to log in)
- On the home page itself, on the left-hand side, there is a panel. In the ‘Explore’ section, you will see ‘Groups’. From here, you can access all your groups on Facebook.
- Now, again on the left-hand side, you can see a list of all the groups in which you are a member and the ones you manage.
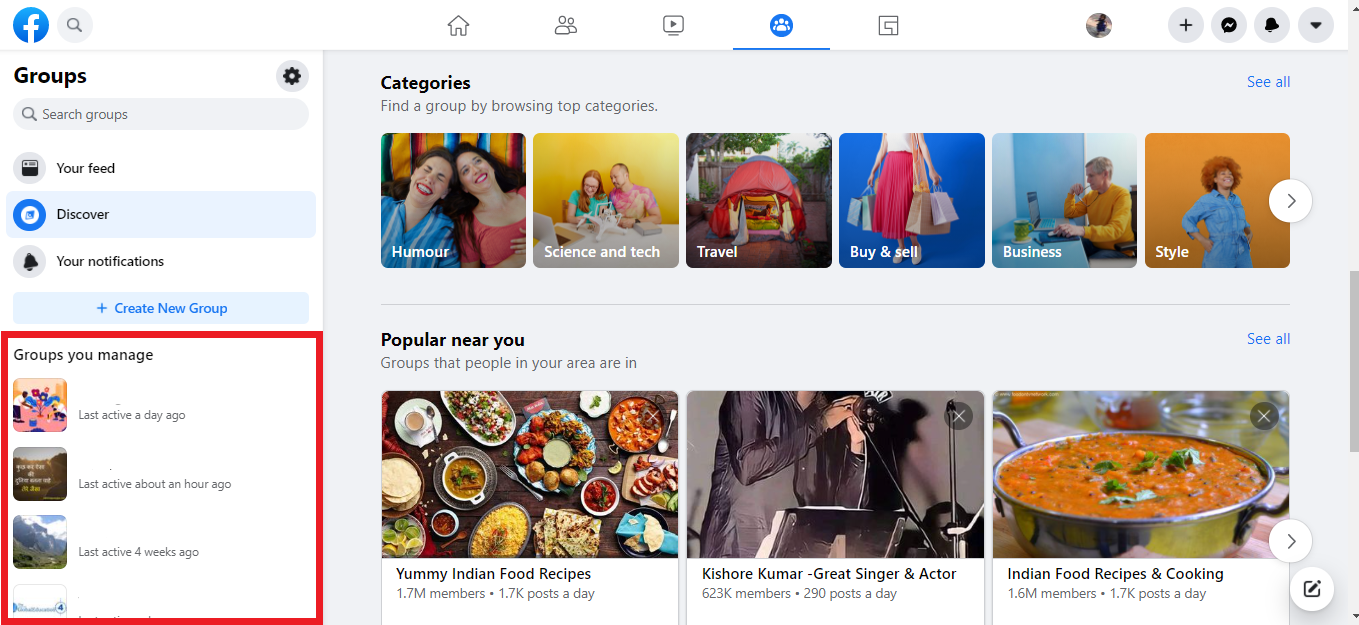
- Select the Facebook group that you wish to delete (in which you are the admin).
- Navigate to ‘Members’ section and you will see the list of people who are added in the group.
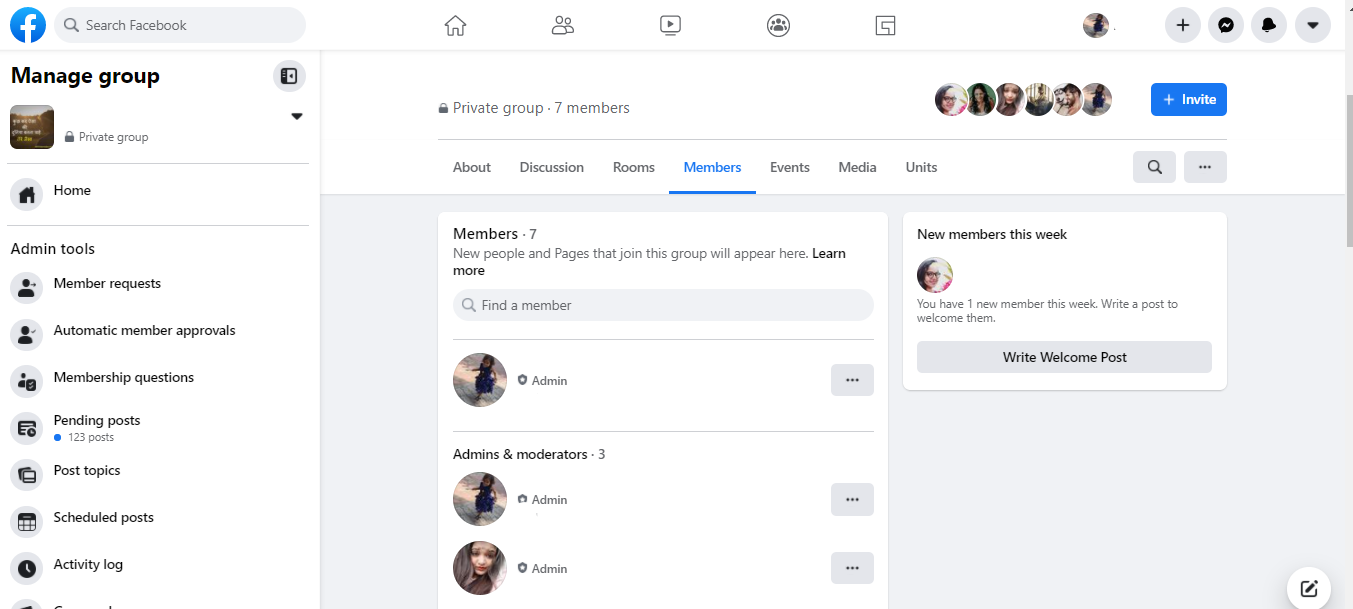
- Next to each member’s name, there will be a ‘more’ button. Click on it and select ‘Remove member’. Repeat the same until every member is removed from the group.
- Now, you will be the only person left. So select the more button next to your name and click on ‘Leave group’. A pop-up notification will ask for your confirmation. Hit “Delete group”.
Note:
When you are not the admin and simply want to leave, select the group and click on the three dots that appear on the right-hand upper corner (when you are using a phone). A menu will appear from which you can select ‘Leave Group’ and confirm.
Alternatives To Consider Before You Delete Your Facebook Group
1. Re-brand and Change the Group Name
Sometimes changing the name can be a way to set things straight instead of closing the Facebook group. You can change it to your brand name to remind the members of the purpose of the group and to indirectly ask them to stay professional.
Along with changing the group name, you could also change the cover photo to give out a more visual and direct message. Here’s how to do it.
How to change a group name on Facebook
To change your group settings, simply select the group and select the ‘Group settings’ tab from the left-hand side panel.
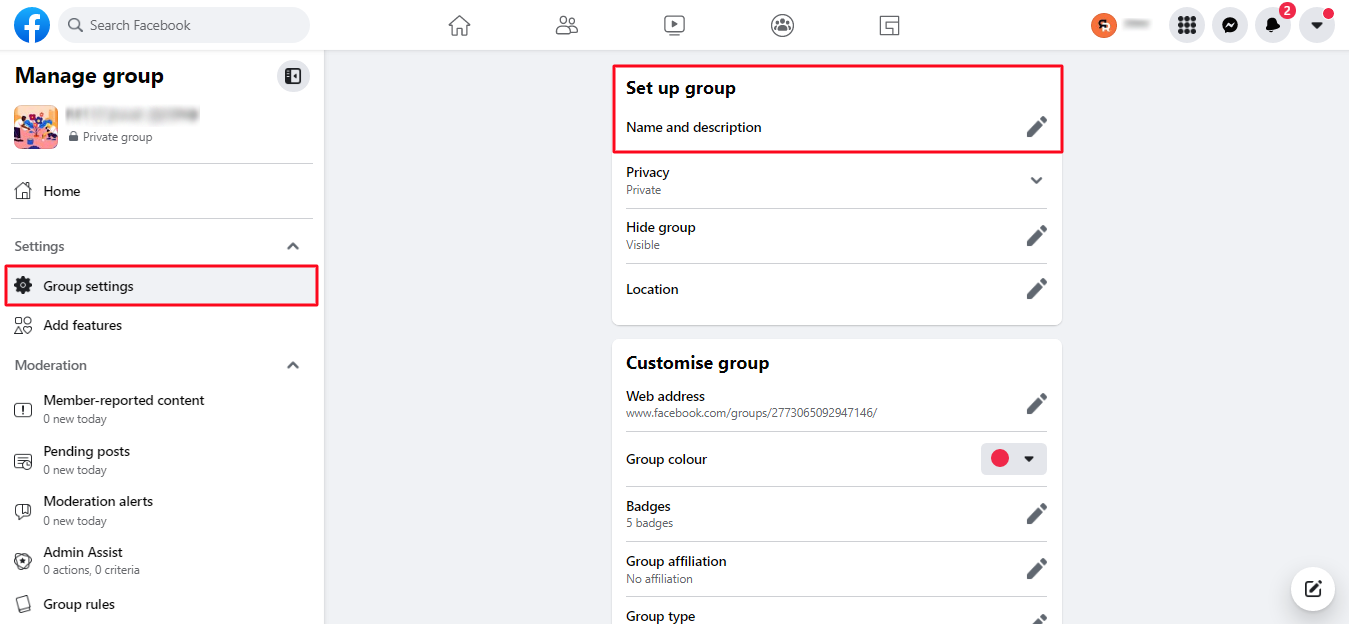
Under the ‘Set up group’ section, the first option is to edit the name and description of the group, from where you can make the necessary changes.
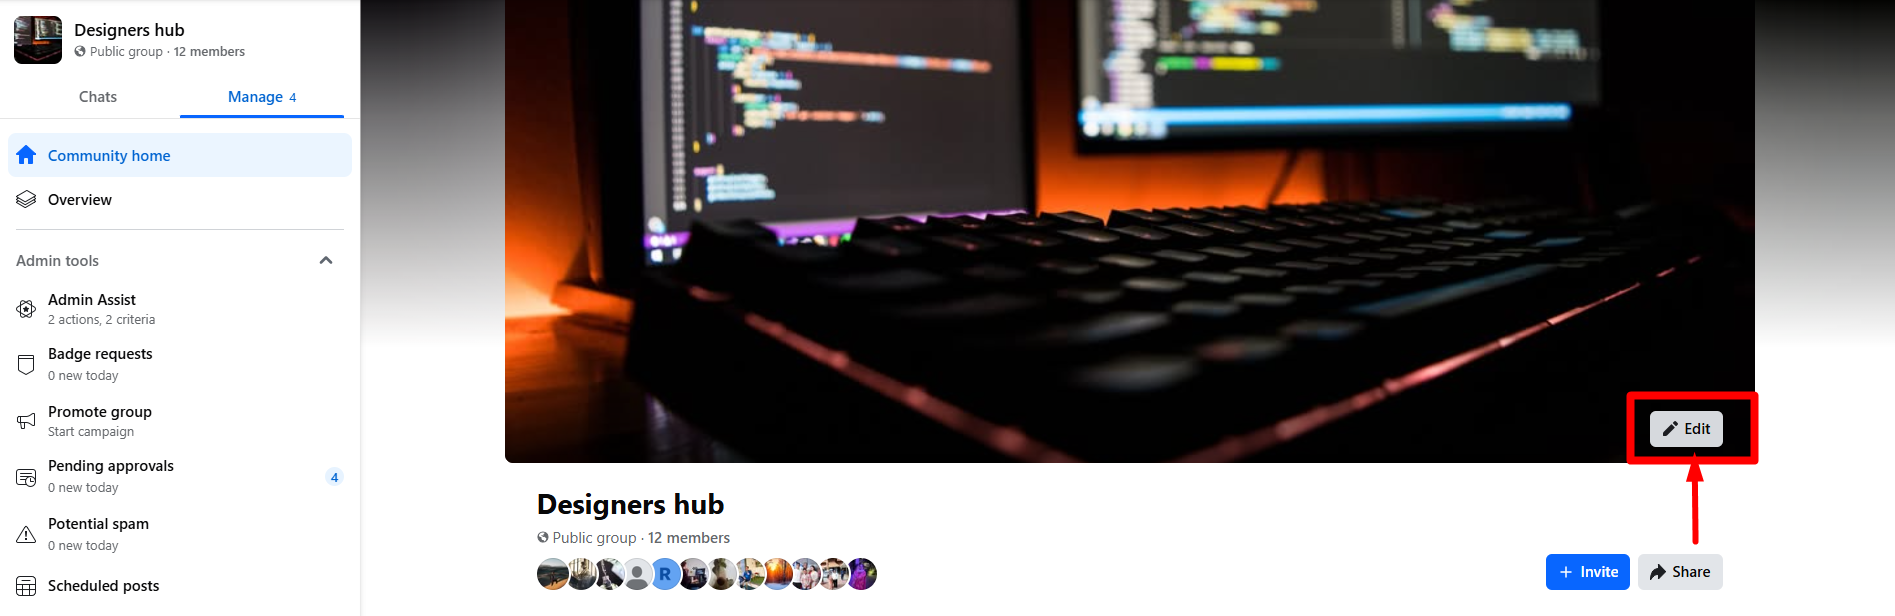
You can edit your cover photo by clicking on the pencil icon on the bottom right corner of the image:
How to add branding to the cover photo
Use Canva or any other graphic tool to create a cover photo for your Facebook Group that includes your brand logo.
Keep in mind that your cover photo should be at least 820px wide and 312px tall. Any less than that and Facebook will stretch it, making it look blurry.
How to link the group to your page
Linking your Facebook Page to your group allows you to engage as your page within your Facebook group i.e. whenever you post, like, or comment within the group, it will appear as if the page did it.
Here’s how to do it:
- Click on the ‘Group settings’ tab on the left-hand side panel
- Scroll down to find ‘Linked Pages’ under the ‘Manage advanced settings’ section
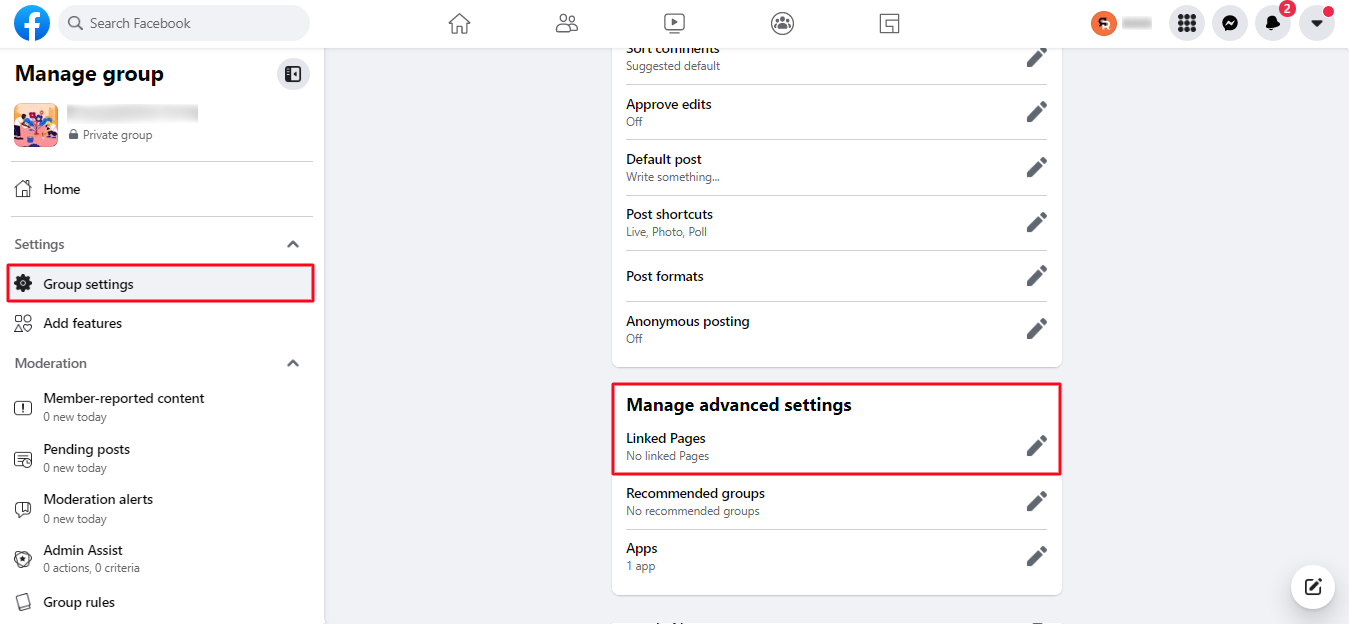
- Click on the edit icon and select ‘Link’ beside the page you want to link to your Facebook Group from the menu.
2. Assign New Admins
Deleting your Facebook Group without considering the emotional influence of the people involved can hurt the reputation of your brand.
Instead, try appointing new admins or assigning the role to the most active and competent members of your group who would want to take the responsibility.
To make it official and to give out a message of change, create a post about the same welcoming the new admins and declaring their purpose in the group.
This not only saves the relationships that members of your group have built but also creates room for improvement.
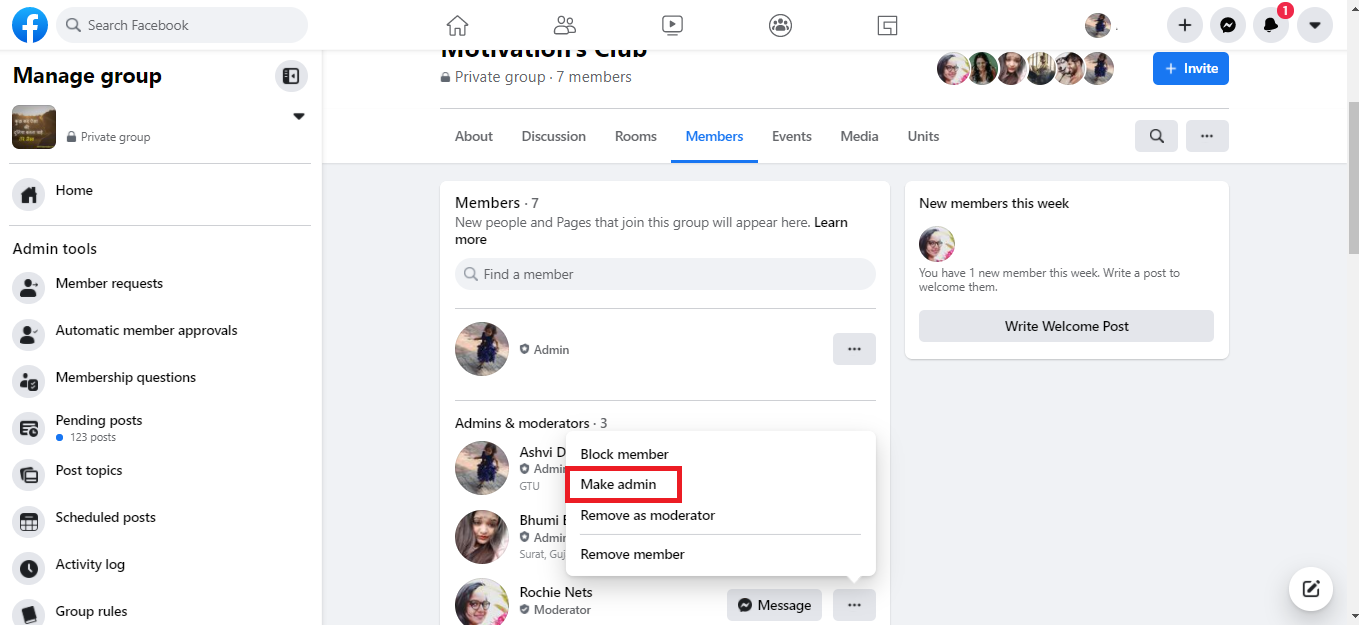
Here’s how to assign new admins:
- Go to the ‘Members’ tab
- Click on the three dots beside the member(s) you want to appoint as admin(s)
- Select ‘Make Admin’ from the drop-down menu
- Select ‘Send Invitation’ on the pop-up to invite that member to become an admin
- Once the member accepts the invitation, they are assigned the role of admin
3. Archive Your Group
Instead of closing your Facebook group entirely which is an irreversible action, you can also consider archiving it which you can later unarchive if you wish.
In an archived group:
- no new members will be able to join
- no new posts or comments can be made
- the group itself will not be searchable by non-members
However, members will still be able to read all the posts, comments, and threads. The content inside the group including all the photos, videos, events, etc will stay intact but not editable.
In case you change your mind, you can unarchive your group at any time and the group will start functioning like normal.
This is one of the best alternatives to deleting your group because even though the group is inactive, all the content and the data inside it is still safe and readable by the existing members.
Here’s how to archive your group:
- Go to the ‘More’ tab
- Select ‘Archive Group’ from the drop-down menu
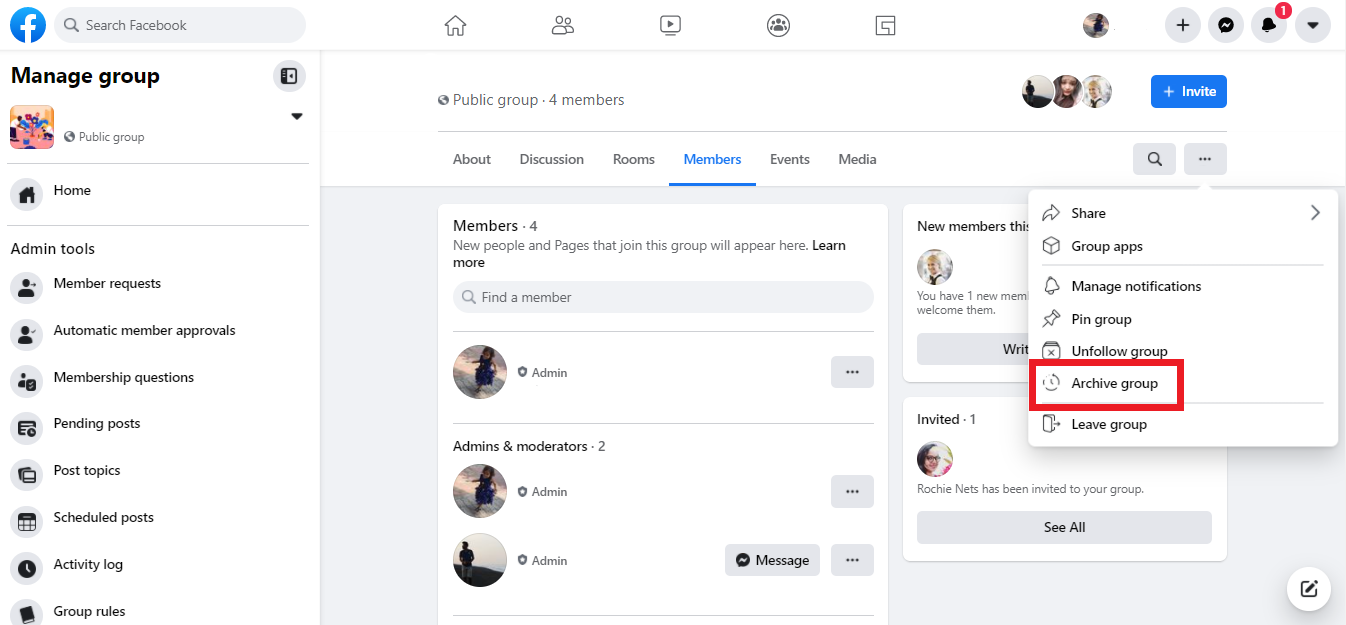
- Click ‘Confirm’ on the pop-up to archive your Facebook Group.
How to delete a Facebook group as an admin
If you want to delete a group on Facebook being the group admin, you will have to remove all the group members and then yourself. When all the members have left the group it will automatically be deleted. Here are the steps you need to follow to delete a group on Facebook as an admin:
- Go to your Facebook feed where on the left hand side menu you will see “Groups”. Click on it and choose your group.
- Below the name of the group, you will see the option saying Members. Select that.
- To remove each member, you will have to click on the three dots next to each member’s name.
- Then select “confirm”
- Once all the members have been removed, you will have to click on the three dots next to your own name and choose “Leave group”.
How to delete a private group on Facebook
A private group on Facebook cannot be accessed without permission. The users can see the group but non-members cannot see or access the content that is shared on the group. The steps for deleting a group on Facebook that is private will remain the same as above. You will simply have to delete all the members from the group first. If you are not the group’s creator, you will have to remove the original creator first. You will then become the creator. At the end, you will have to leave the group yourself and the private group will automatically be deleted.
How to delete a group on Facebook messenger
If you want to know how to cancel a group on Facebook messenger, you can follow these steps from your desktop browser:
- Open your preferred browser and then open Facebook.com in the browser
- Next, login to your Facebook account
- Choose the messenger icon from the top right corner
- From the search, look for the group that you want to delete
- Once you find the group, open the group conversation
- You will find “settings” in the top right corner when you click on your group name.
- Click on the three dots next to the user’s name on the right side
- Amongst the options presented, select “remove from group”
- Remove all the users by following the same process
- When you are the only one left, select the “leave group” option and click on Leave again to confirm. The messenger group will then be deleted.
How to delete a group page on Facebook
In order to be able to delete a group page on Facebook, you will have to be the creator of that page. Next, these are the steps that you will have to follow:
- Go to your Facebook page and click on “settings”
- Amongst all the general tabs under “settings” , scroll to the bottom and pick “remove page”
- Select “delete” and then click on “Ok”
- You are done! Note that Facebook will take upto 14 days to delete your page
How to delete a Facebook group on iPhone
If you want to delete a Facebook group on your iPhone, you need to follow these steps:
- Open the Facebook app on your iPhone. Then choose the “menu” tab and next select “Groups”
- Pick “see all” next to “your groups” and then choose “See all” from underneath “Groups you manage” to view all the groups managed by you
- Open the group that you want to be deleted
- Now, click on the name of the group, and then choose “See all” to view all the members
- Click on every person’s name and choose “Remove member” to eliminate them all from the group
- Once every single member is removed from the group, click on your name and choose “Leave group”. After that, Facebook will delete the group by getting your confirmation
How to delete a Facebook group without administrator
There could be times when you are a member of a Facebook group and the admin of that group has left the group. Now, there is no admin left and if you want the group to be dissolved, every member of the group will have to leave it. Once all the members leave, it will automatically be dissolved. If you cannot get the members to leave, you or another group member will have to claim the admin responsibilities.
Conclusion
Deleting your Facebook Group is a big decision, especially if it’s an old one with lots of members. Regardless, deleting your group could be the right decision for your business based on the returns you receive (or don’t) on your time and effort.
But do so only and only if you are absolutely sure that it’s the right decision. As we discussed, there are a number of better alternatives that you can consider before deleting your group, which might just be the best route to go.
If not, try to visualize what went wrong and how to avoid something like this from happening in the future.
Also, if you are deciding to grow your group, keep it alive by using our social media scheduler! It lets you schedule Facebook group posts both as an admin or as a member!
Read “How to create a Facebook Group” here: [Click here].