
- How to add content in bulk to your library using CSV
- How to schedule multiple one-off posts in bulk using CSV
RecurPost allows you to efficiently upload and manage content through Excel or CSV files, simplifying the process of adding and scheduling multiple posts in bulk. This guide will walk you through the two methods of using CSV files to streamline content management on RecurPost.
1. How to add content in bulk to your library using CSV
With RecurPost, uploading content using an Excel spreadsheet or a CSV file is as easy as any other process. Here are the steps that will help you do the same.
Step 1: Select Your Library
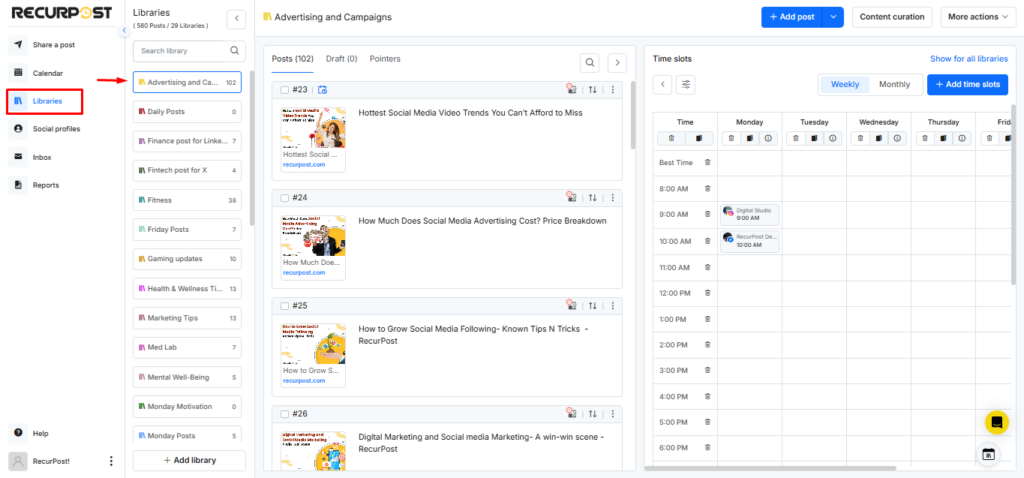
The first step is to select the library that you want to add content to. You can easily find all your libraries on the Libraries page.
Step 2: Click on “Import from a CSV”
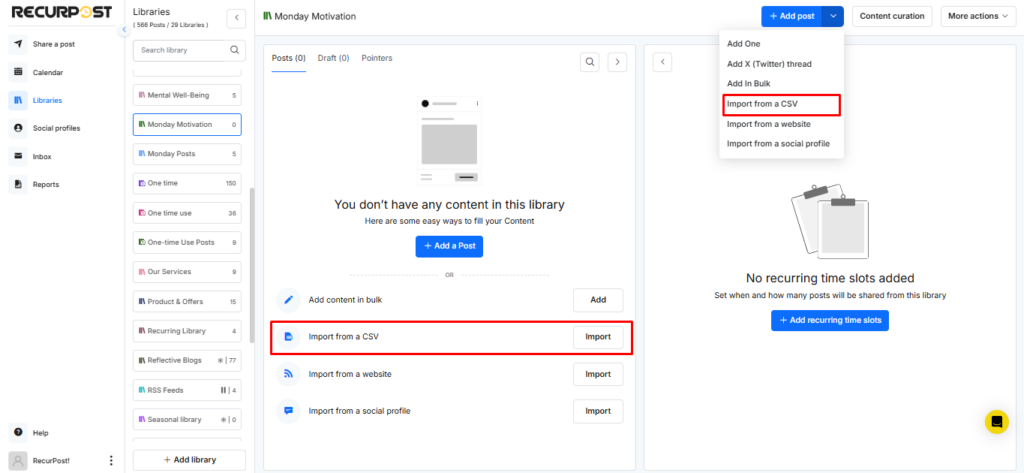
Once you’ve selected your library, you’ll see a lot of options to upload content from the drop-down menu. Select the option of ‘Import from a CSV’.
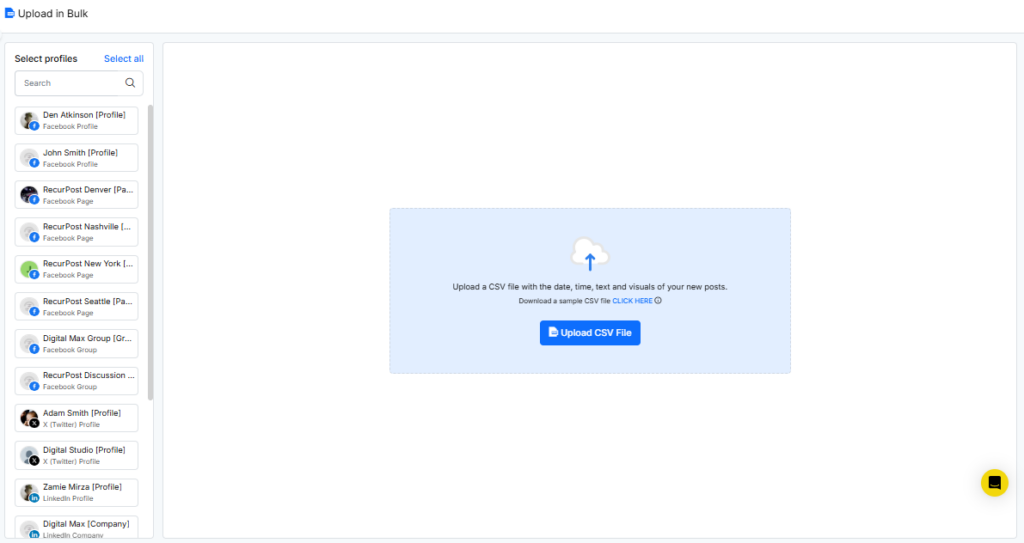
Step 3: Click on “Upload CSV File”
When you click on the ‘Import from a CSV’ option, a pop-up window will appear.

If you would like, you can also download our FREE sample CSV file. The sample file shows you the format for your Excel file. When you’re done preparing that, click on ‘Upload CSV File’, select your file, and you’ll see a pop-up window with the following in the next step.
Note: The CSV upload is now faster, so your file should import with reduced waiting time.
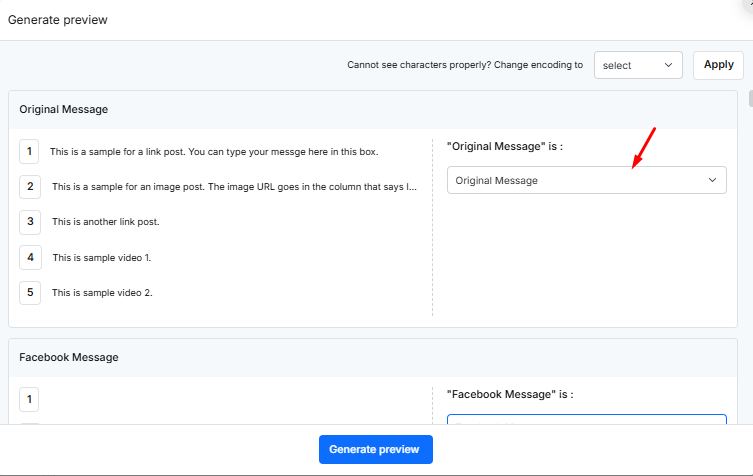
Step 4: Click on “Generate Preview”
Next, the window takes all the columns from your Excel or CSV file and visualizes them in front of you. You can select multiple columns of your choice and skip the ones that you don’t want.
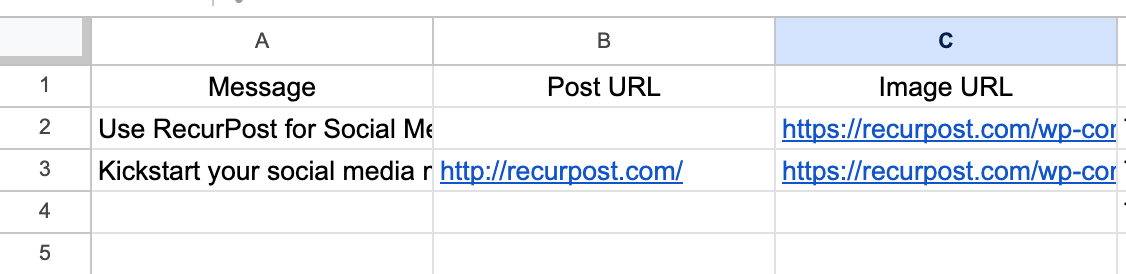
You can create the following columns in your CSV file:
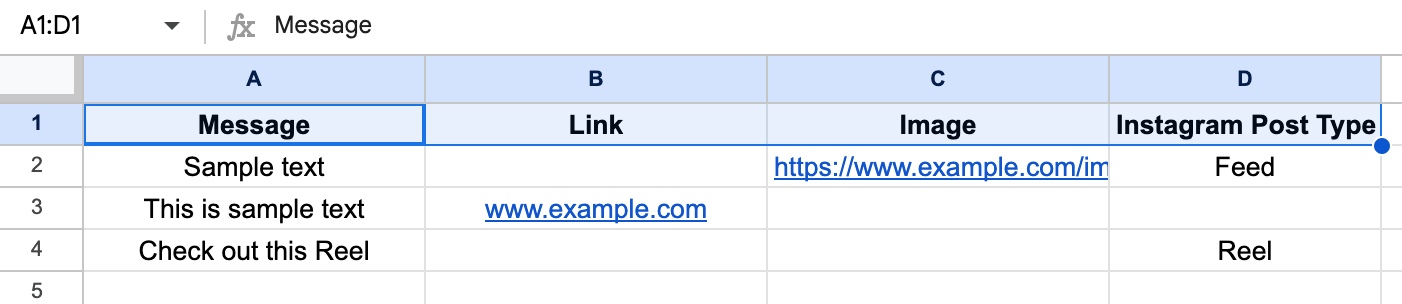
- 3 basic options for the post are – Message, Post URL, Image URL
- For Customized Message for each platform – Add columns like Original Message (This message applies to all the social profiles), Facebook Message, Twitter Message, LinkedIn Message, Instagram Message, Google Business Profile Message, Pinterest Message, and YouTube Message.

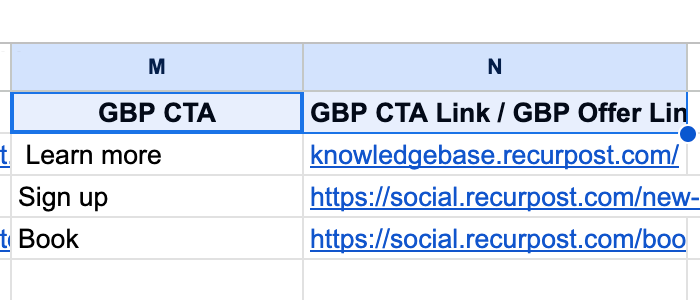
- Add CTA options in Google Business Profile post – You can add these columns in your CSV.
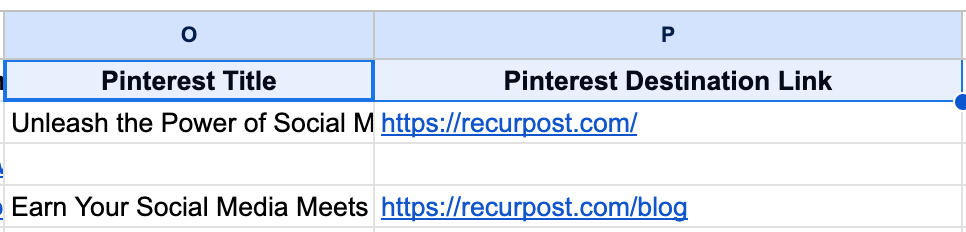
- Add more posting options for Pinterest – These are the ‘Title’ and ‘Destination Link’ columns.
- Add more posting options for YouTube – These are Title, Category, Privacy, Thumbnail Image, and Tags columns.

- Add Video Thumbnail for social posts – For Facebook, Instagram, and LinkedIn, you can add a
Video Thumbnail URLcolumn to set a custom thumbnail for each video post.
Add Video Thumbnails via CSV Upload
We’ve introduced a new Video Thumbnail URL column in the CSV upload feature for Facebook, Instagram, and LinkedIn. You can now define a custom thumbnail for each video post directly through your CSV file before uploading. This gives you better control over the look and consistency of your video posts across platforms.
How to use this feature:
- In your CSV file, add a new column labeled “Video Thumbnail URL”.
- For each video post, paste the URL of the thumbnail image you want to use.
- Make sure the thumbnail image is accessible online (publicly available).
- Upload your updated CSV file as usual.
RecurPost will automatically apply the specified thumbnail to the corresponding video post on Facebook, Instagram, or LinkedIn.
Tip: Use a thumbnail that visually represents your video content. A clear, engaging image helps improve your post’s performance and viewer engagement.
- Add First Comment in the post – These are Facebook, LinkedIn, and Instagram columns.

- Add a Column for IG posting types such as Feed, Reel or Story.
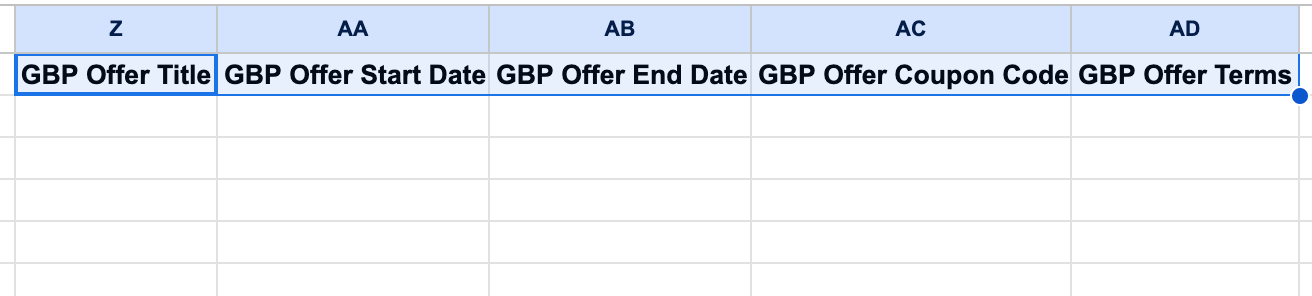
- Add “Offer” posting option for Google Business Profile – These are Title, Start Date, End Date, Coupon Code and Terms columns.
- For Single or Multiple Images – You can add columns like below in your CSV.

Please note that the title of the columns will be taken from your file. The titles mentioned in the image above are for simplicity.
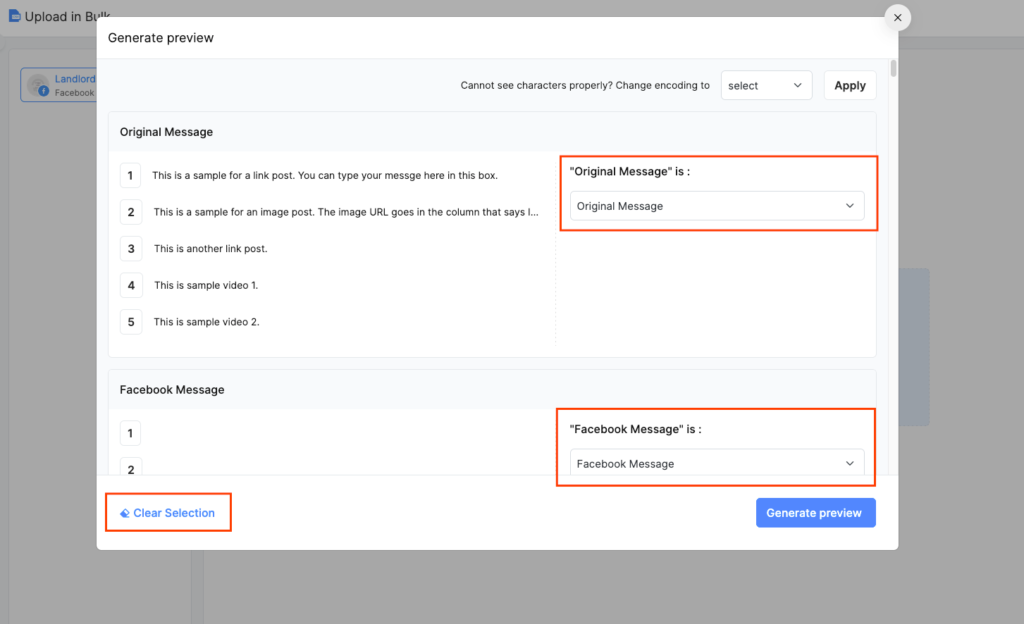
After uploading the CSV, RecurPost shows a field-mapping screen where the CSV columns appear on the left, and each column can be mapped to a RecurPost field (example: Original Message, Facebook Message, Post URL, Image URL).
- Auto Field Selection (works with the demo CSV template)
If the uploaded file is based on RecurPost’s demo/sample CSV template, the required fields are selected automatically. Review the selected fields and adjust only if needed.
- Clear Selection button
Use Clear Selection to reset all selected fields in one click. This is useful when the wrong column was mapped and the setup needs a quick reset.
Steps
- Upload the CSV file. (The mapping screen opens)
- Check the auto-selected fields (demo template files only).
- Change any field mapping using the dropdown beside each section (example: “Original Message is”).
- To reset everything, click Clear Selection, then map the fields again.
- Click Generate Preview to view how posts will look before adding them to the Library.
Once you’ve selected the respective fields, you are good to go. Click on the Generate Preview button and from there on, you’ll be able to visualize how your content will look on social media. Here’s a little screenshot of how it will look:
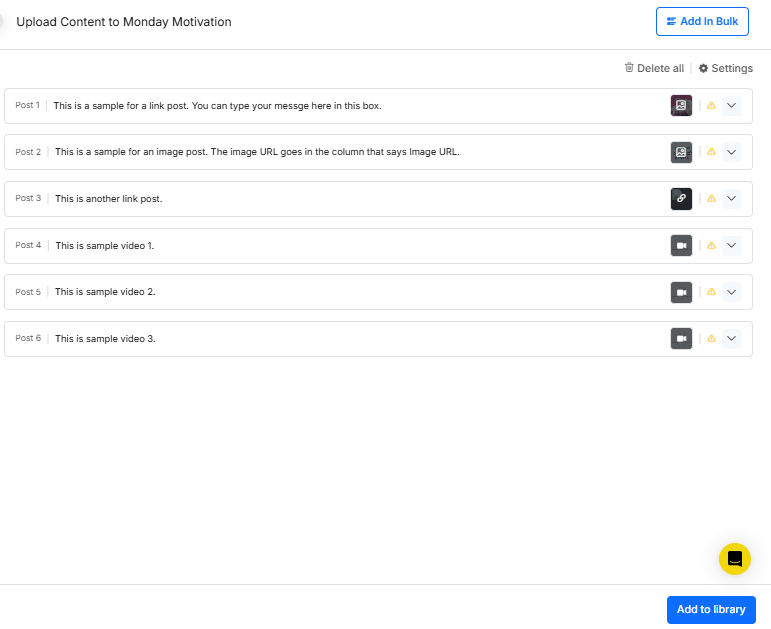
In the preview, you can add all sorts of changes. You can add captions and save your content as a draft. You can also select when you want to stop recycling your content.
Bulk Actions
After generating the preview, a Bulk Actions panel appears with extra tools. You can now:
- Add images to all posts: Attach selected images to all chosen platforms in one step. (See screenshot below.)
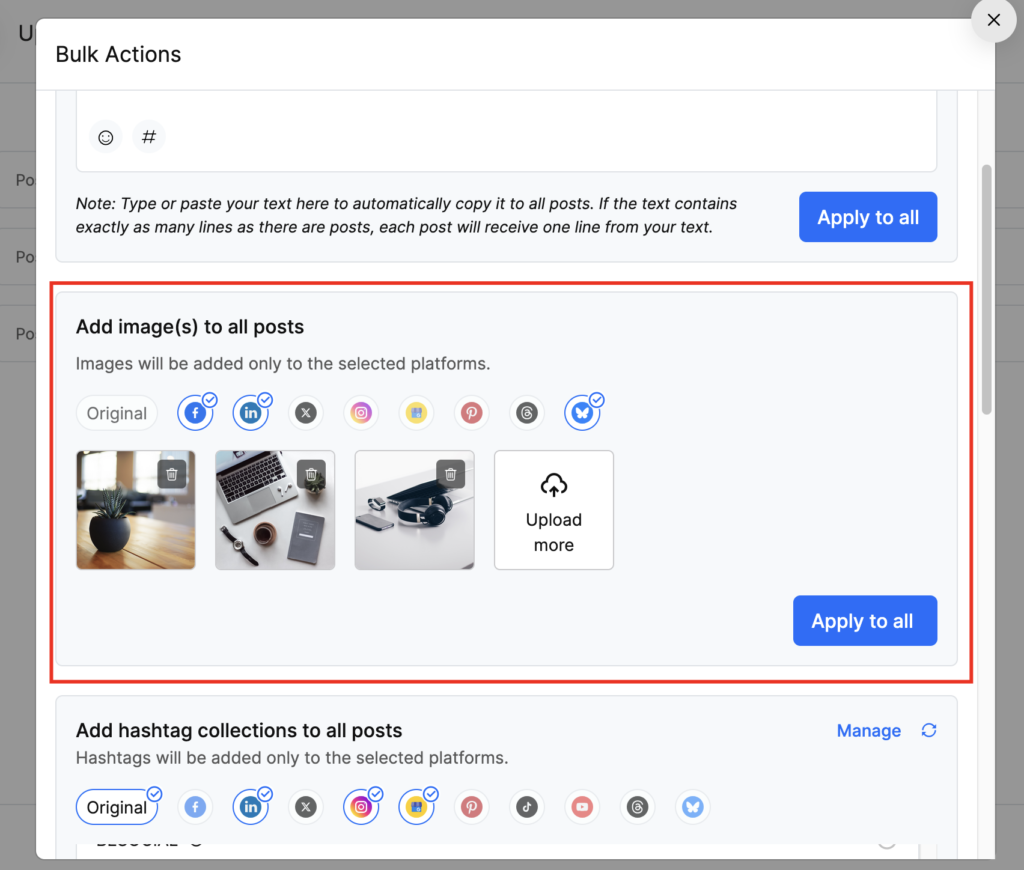
- Add hashtag collections to all posts: Apply a saved hashtag group only to the platforms you tick in Bulk Actions.

Step 5: Click on ‘Add To Library’
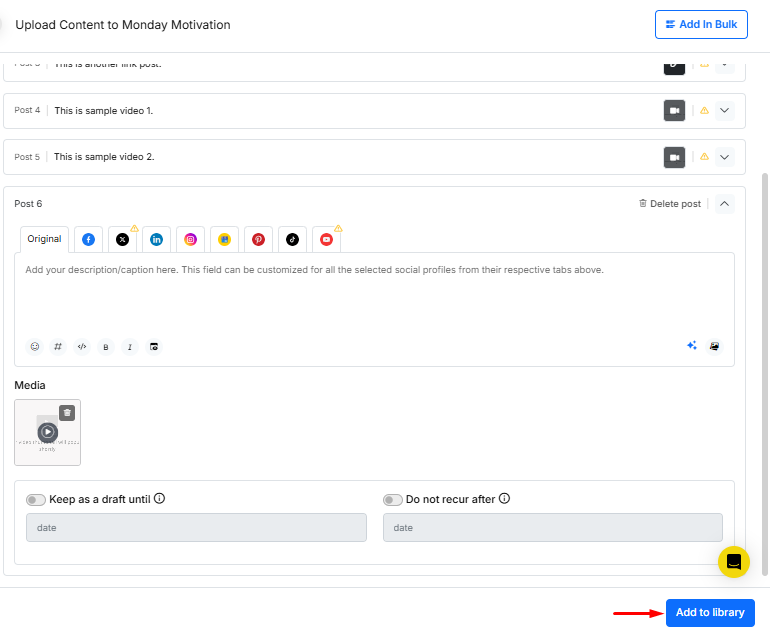
After making all the necessary changes, you can add everything to your selected library. Scroll down to the bottom of the page and click on ‘Add To Library’. It will then show up in the exact form that you saved it.
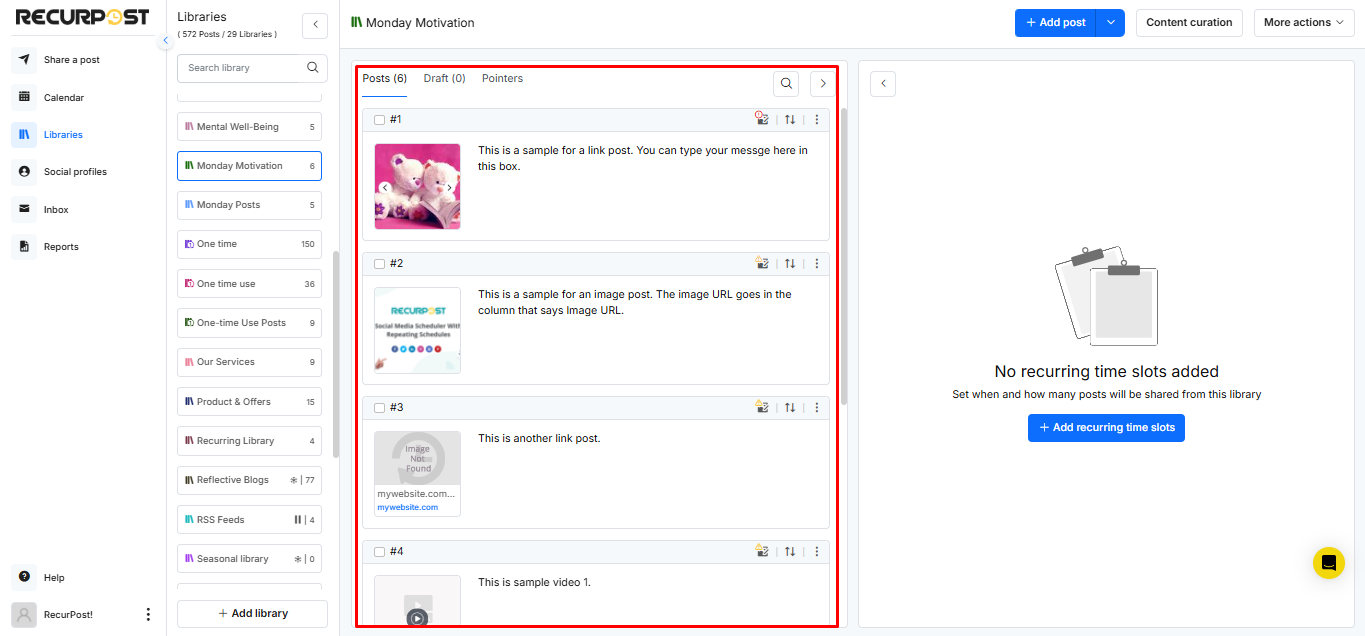
That’s it! Go to your library and all the posts will appear there.
For a more detailed look, you can also take a look at our video tutorial below.
2. How to schedule multiple one-off posts in bulk using a CSV file?
You can use the same CSV file to schedule multiple one-off posts in bulk. You just need to add the date and time columns in your CSV file that are shown below.

After creating the CSV file, here are the steps you can follow to schedule multiple one-off posts.
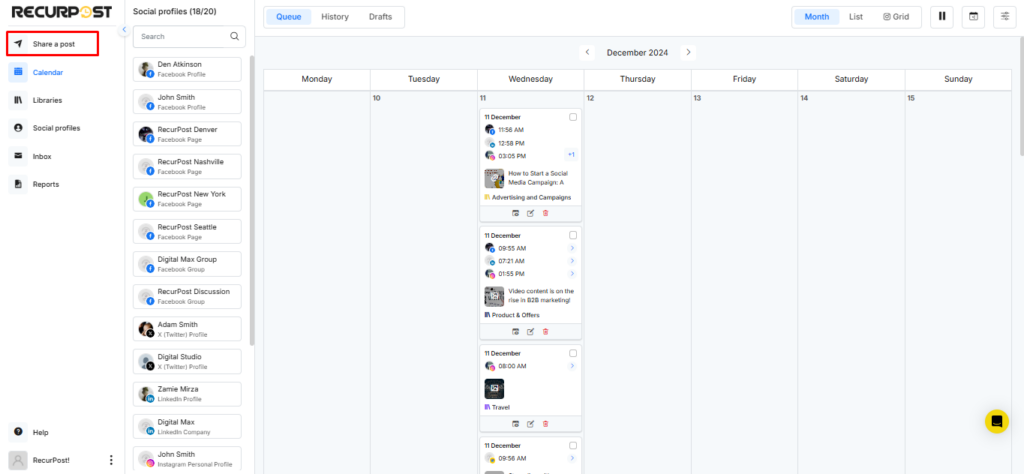
Step 1: Click on the ‘Share a Post’ option from the sidebar menu.
Step 2: Click on the ‘Upload CSV File’ option and upload your CSV file.
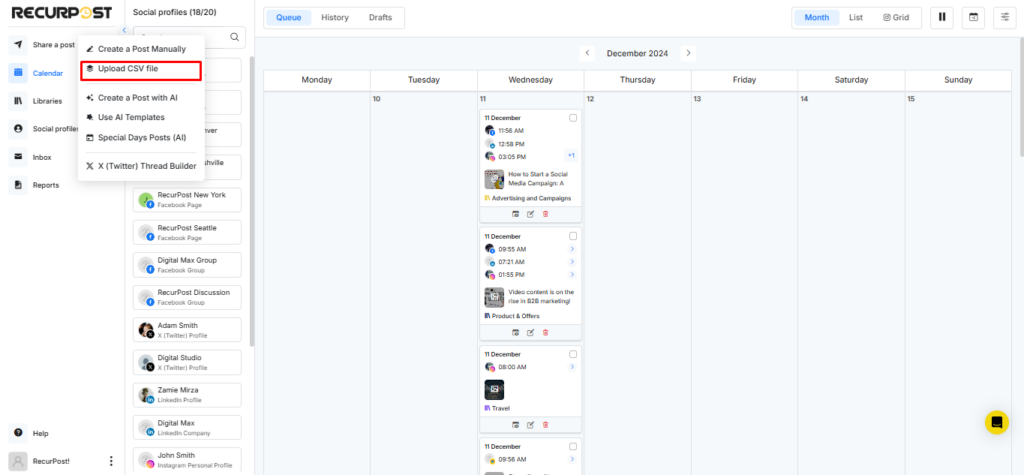
Note: Please select the social profiles on which you want to schedule the one-off posts before uploading the CSV.
Step 3: Select the fields
RecurPost asks to map each CSV column to the right field (example: select Original Message for the message column, Post URL for links, and so on).
Auto Field Selection: When the uploaded CSV uses RecurPost’s demo/sample template, fields are selected automatically. Review the mapping and continue.
Step 4: Check the posts ready to be scheduled and edit (if needed)
After that, you will see all your one-off posts lining up as per your scheduled date and time and now you can edit your posts (if you want to) before scheduling all of them in one go.
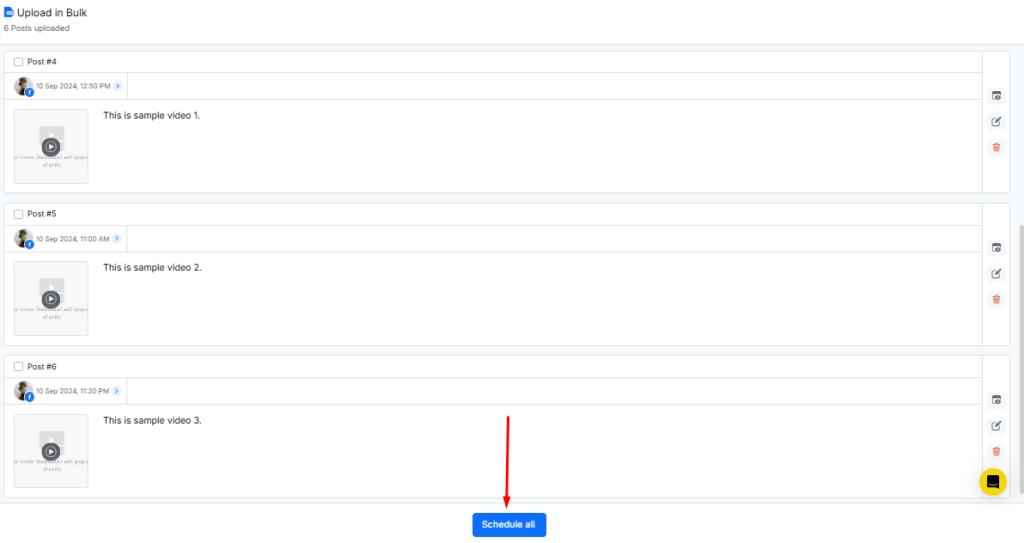
Click on ‘Schedule All‘, and you will see all of them on your Calendar.
In the preview, the Bulk Actions panel lets you add hashtag collections or images to all posts before scheduling.
We hope this article helps you schedule your one-off posts in bulk or add content in bulk to your library using CSV, as mentioned above.
For a more detailed look, you can also take a look at our video tutorial below.
In case you have any further questions or concerns, please feel free to contact us at support@recurpost.com.