
RecurPost’s Paid Ads feature lets you boost your best-performing social media posts directly into paid ads, all without leaving your dashboard. Turn your organic content into powerful paid campaigns to increase reach, engagement, and conversions in just a few clicks.
Why Use Paid Ads in RecurPost?
Running ads through RecurPost saves you time and simplifies your workflow. You can:
- Promote high-performing posts in a few clicks.
- Set custom budgets and durations.
- Reach your ideal audience more effectively.
- Track performance without switching platforms.
You can create ads for your existing posts only on Facebook and Instagram for now. LinkedIn ads are coming soon!
Before You Begin
Please make sure that:
- You reconnect your Facebook Page and Instagram Profiles once in RecurPost by going to Social Profiles page.
- Your Instagram profile is connected via your Facebook profile, not using Instagram directly.
- You have an active Ad Account under your Facebook Business Manager.
- You have admin or advertiser access to that Ad Account.
- A payment method is already added to your Ad Account.
Creating a Paid Ad in RecurPost
Step 1: Go to the ‘Paid Ads’ Menu
To get started, log in to your RecurPost account and go to the Paid Ads menu from your sidebar.
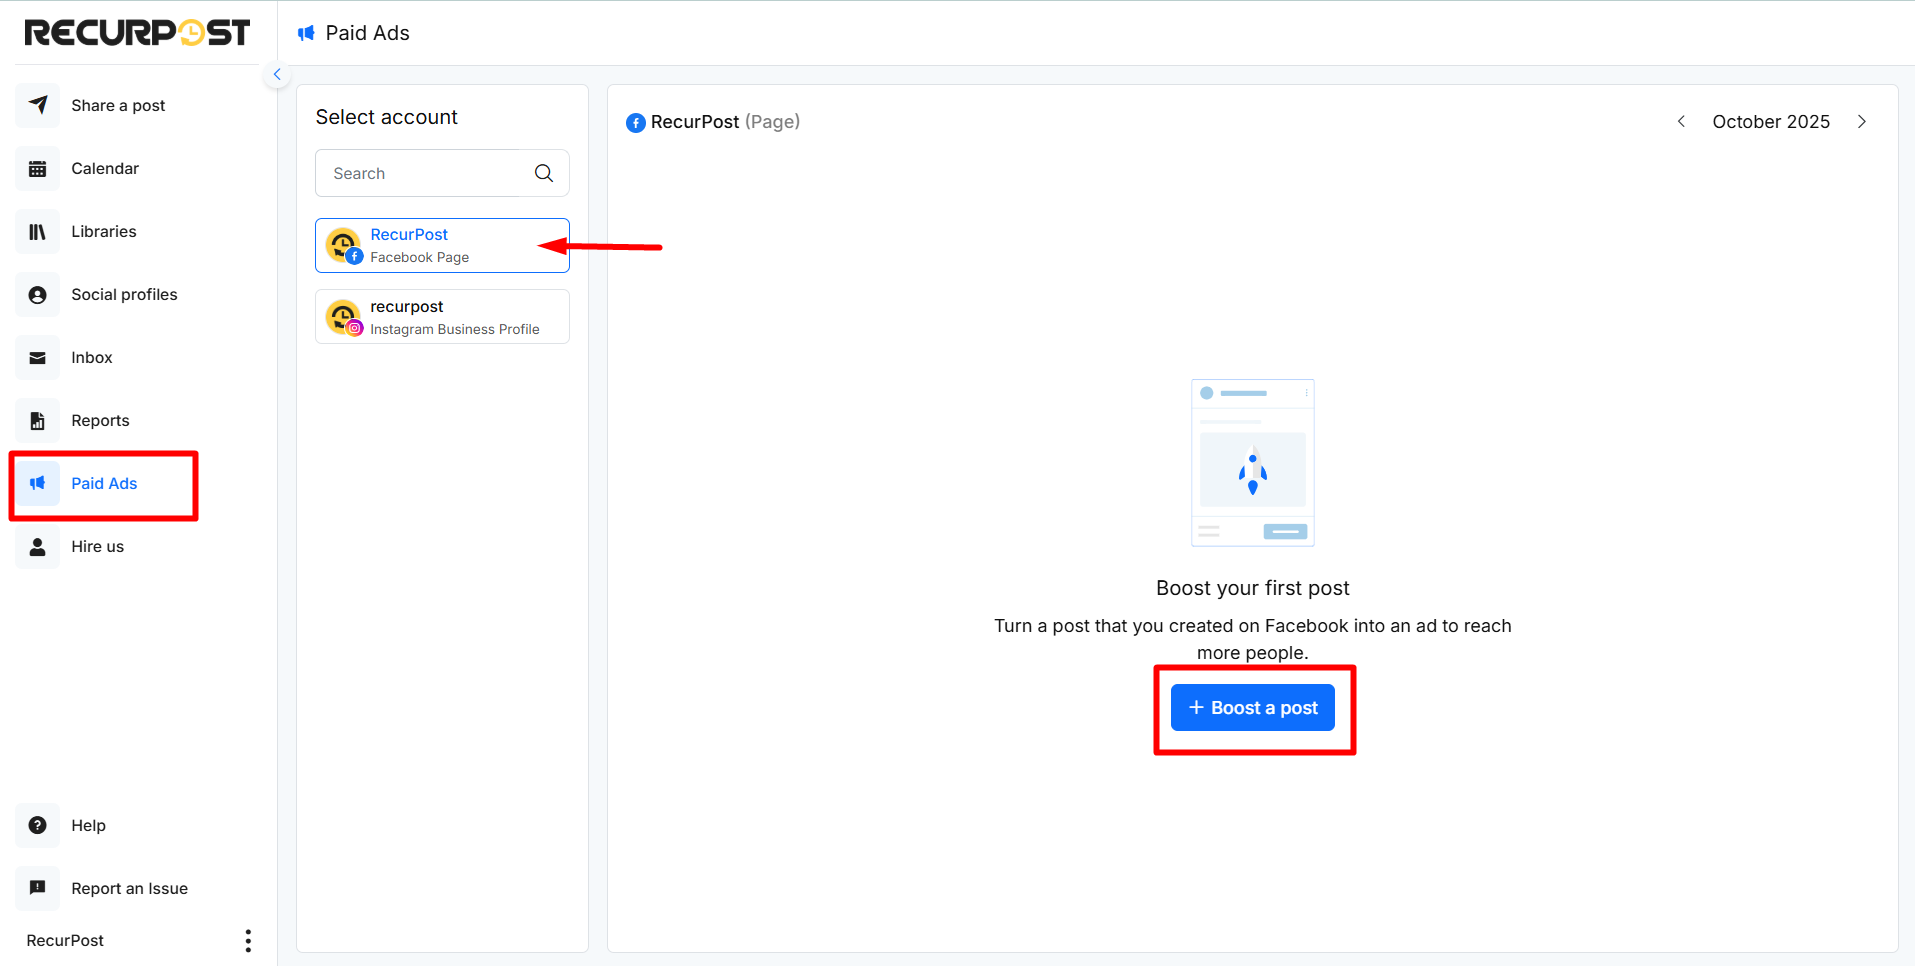
Go to your Social Profile, choose the post you’d like to boost. and click “+ Boost a post”. You can boost both published posts and upcoming scheduled ones (once they go live).
Step 2: Select the Post to Boost
A list of your existing posts will appear on the left. Choose the post or reel you’d like to promote by selecting it. You can preview the caption and media before confirming.
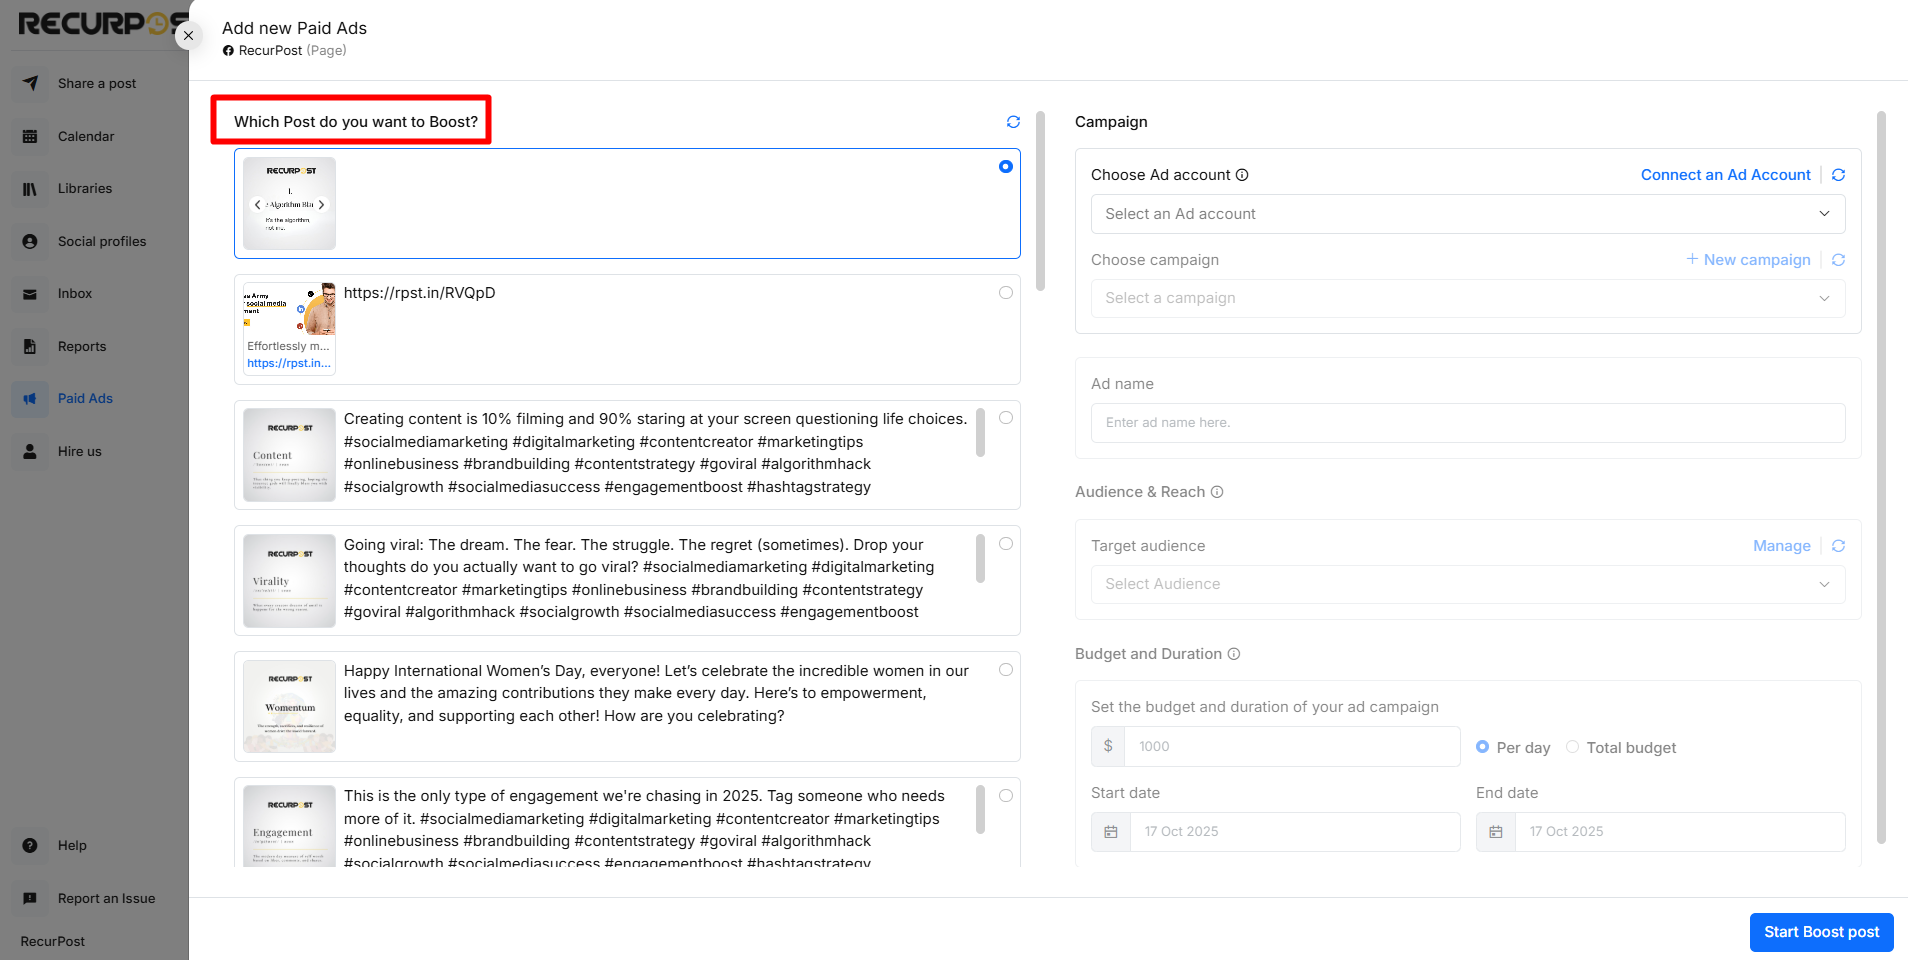
Step 3: Choose Your Ad Account and Campaign
On the right panel:
- Click Connect an Ad Account if you haven’t already linked one.
- Select your Ad Account from the dropdown.
- Choose an existing campaign or click + New campaign to create one.
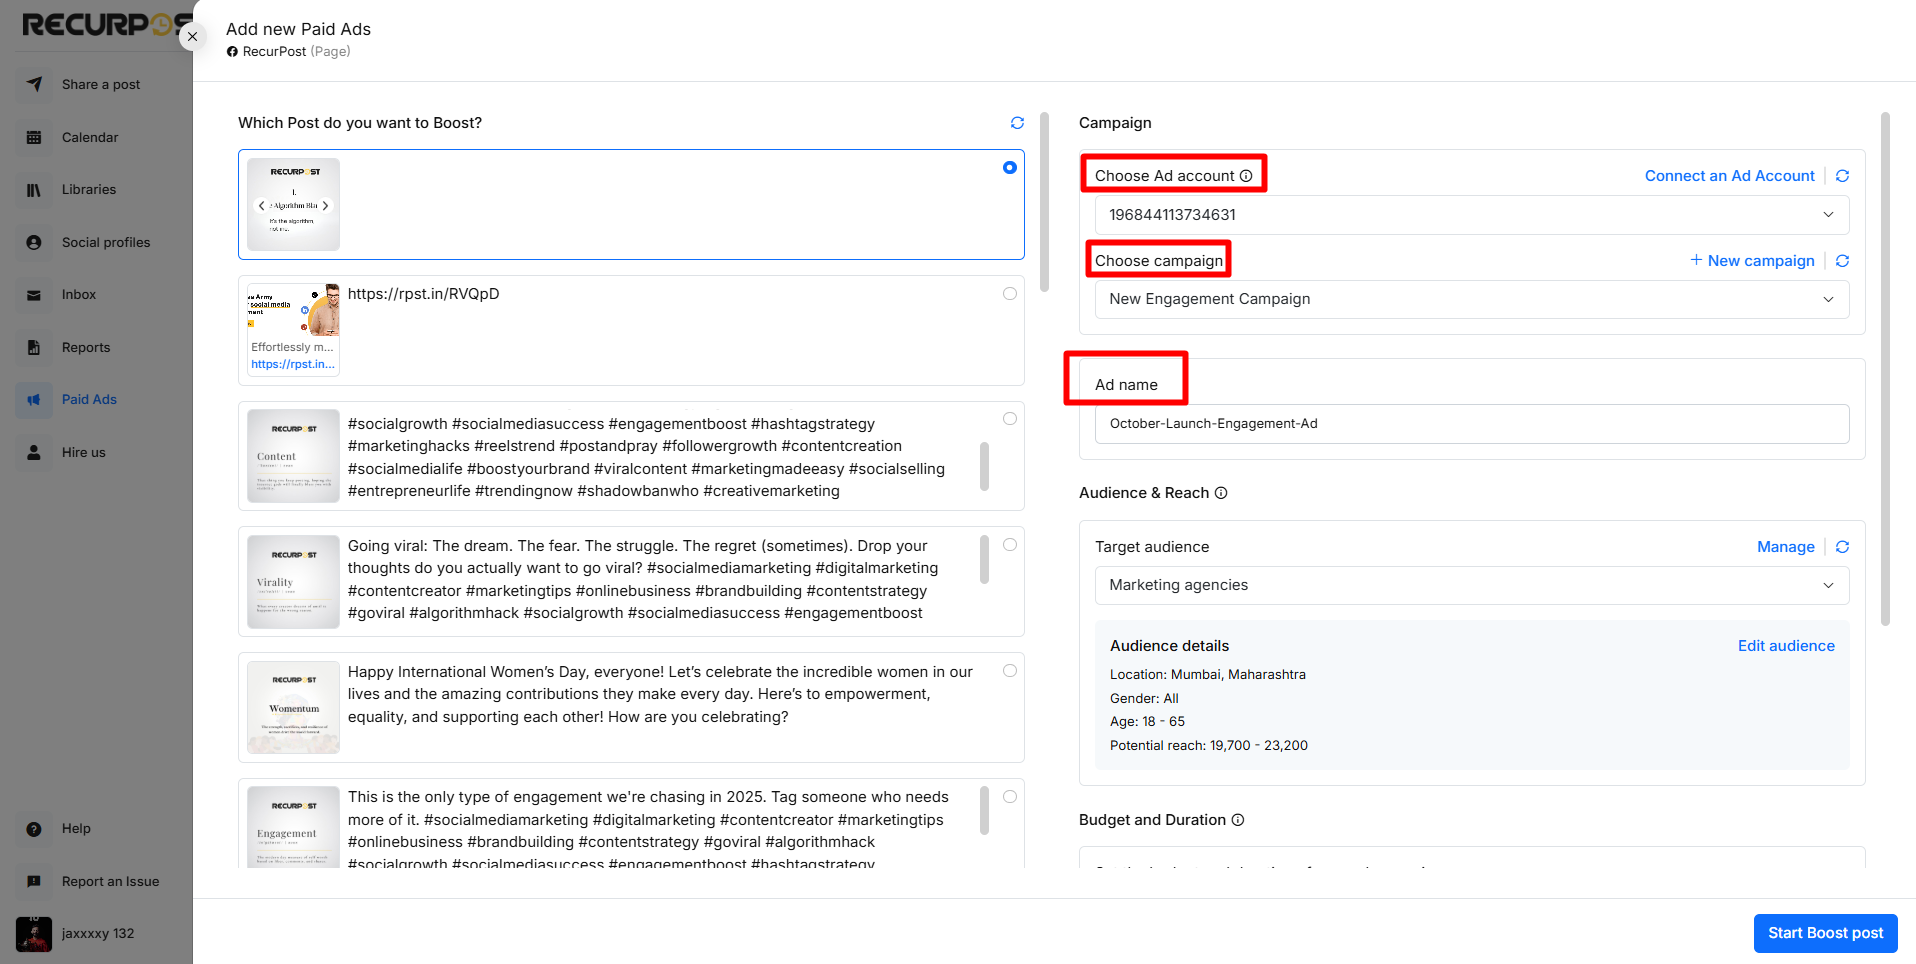
Step 4: Name Your Ad
Enter a descriptive Ad Name to identify this promotion within your campaigns and reports. Example: “October-Launch-Engagement-Ad”.
Step 5: Set Audience & Reach
You’ll see your available audiences listed here. These are imported directly from your connected Meta Ad Account. Click Manage > Target Audience to choose who will see your ad.
You can define:
- Location (country, city, or radius)
- Age range & gender
- Interests & behaviors
- Custom audiences (if available in your Ad Account)

Note: RecurPost currently cannot create new audiences within the tool, as Meta doesn’t allow third-party tools to build or edit audiences.
To create or edit a new audience, please visit your Facebook Ads Manager directly or click ‘Manage‘ button to get there. Once created there, it will automatically appear in RecurPost for selection.
Step 6: Set Budget and Duration
In the Budget and Duration section:
- Enter your budget amount.
- Choose between Per day or Total budget.
- Set your start and end dates for the ad.
Facebook’s minimum daily budget usually starts around $1 per day per ad set.

Step 7: Review and Start Boost
Double-check all the information on the right panel. Post, ad account, campaign, audience, budget, and dates.
When ready, click Start Boost Post at the bottom-right corner.
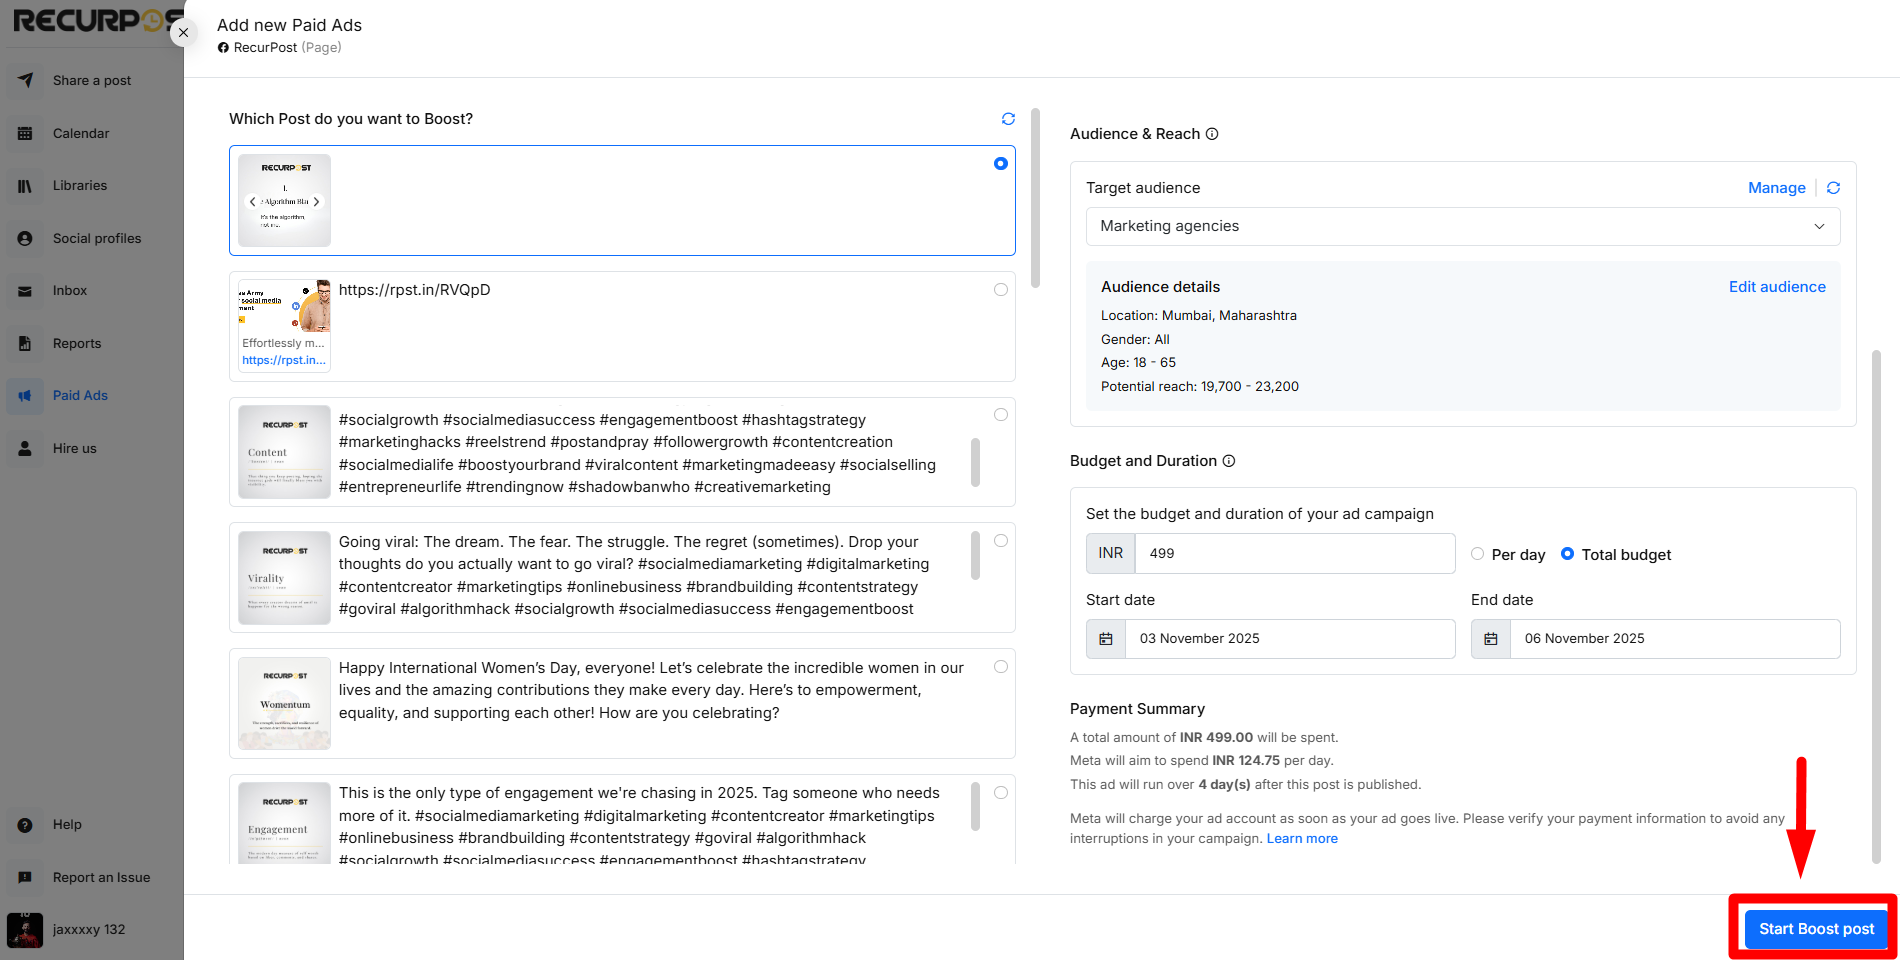
Once the ad is approved by Facebook, it will go live and begin showing to your selected audience.
Tracking Performance
Once your boosted post is live, you can easily track its performance from the Reports section in RecurPost.
RecurPost displays analytics for your organic and paid ads separately, helping you clearly see how much engagement came from your regular posts versus your boosted ads.
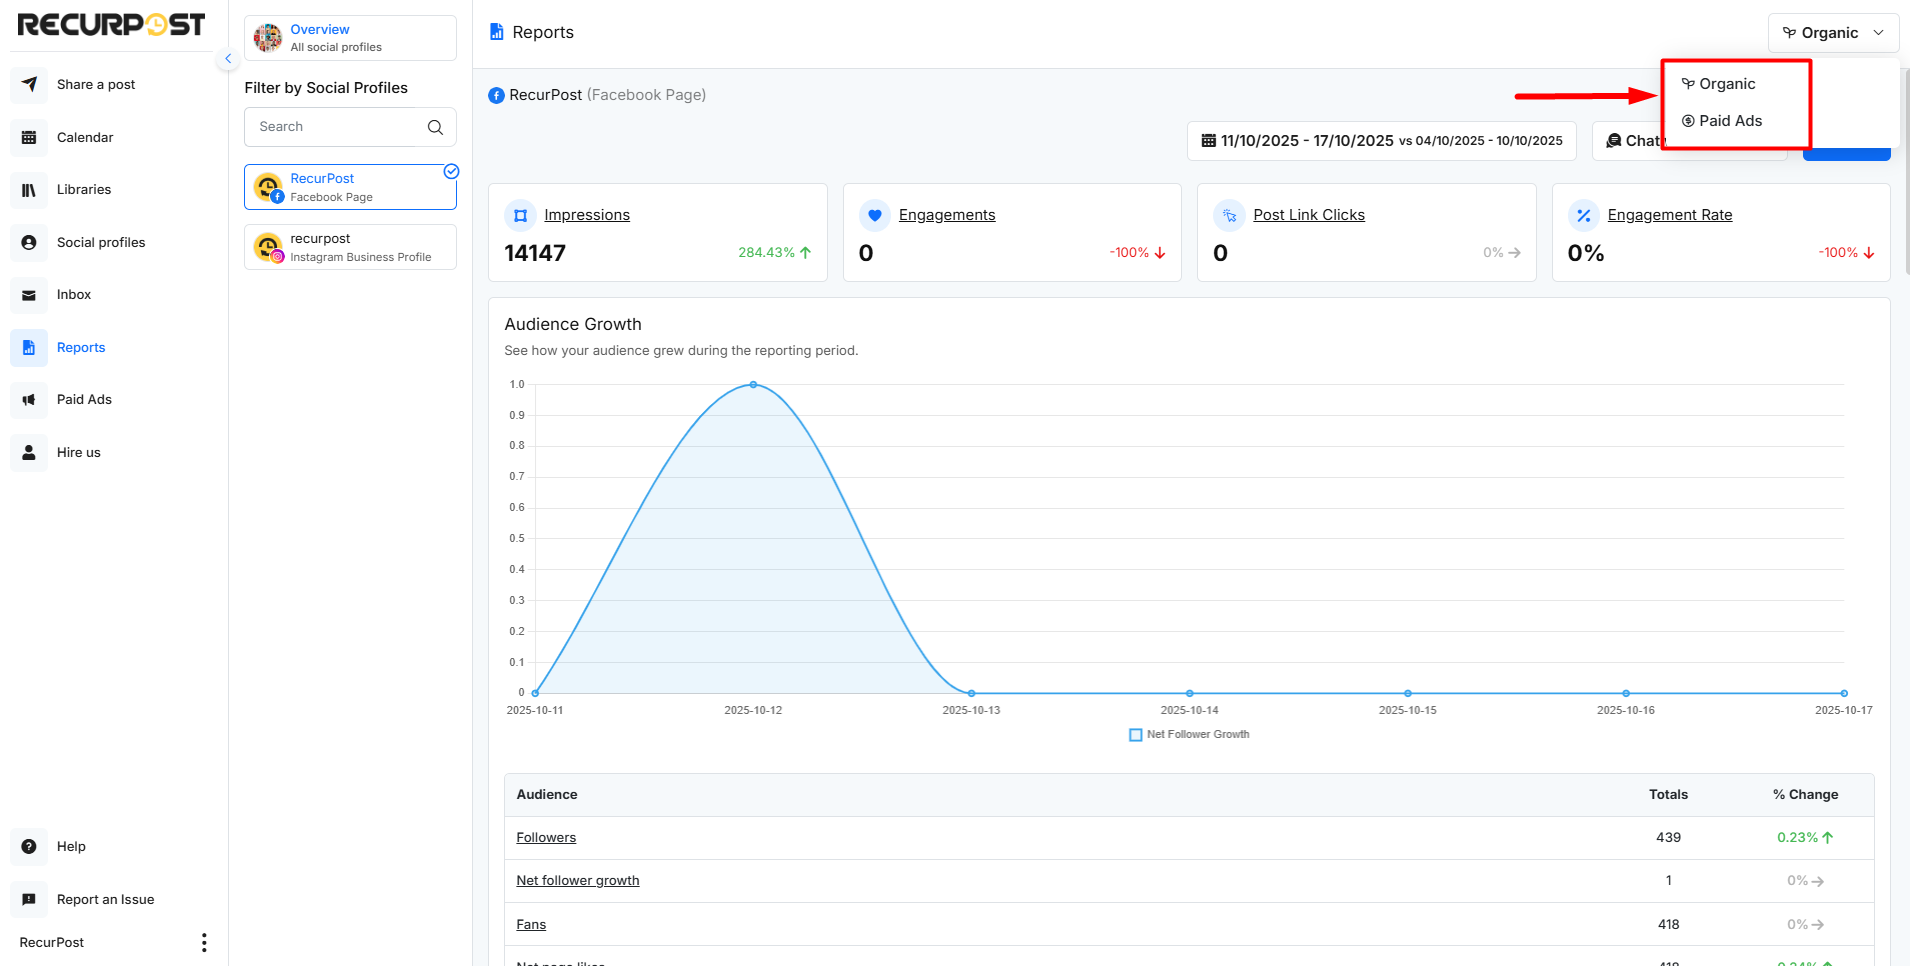
You can toggle between Organic and Paid Ads views in the Reports to compare reach, engagement, and performance metrics side by side.
Metrics update automatically as Facebook reports new data.
Important Notes
- Facebook’s ad approval may take up to 24 hours.
- You can pause or delete any active ad anytime.
- Billing happens through Facebook Ads Manager, not RecurPost.
FAQs
1. Can I run ads for both Facebook and Instagram?
Yes, RecurPost can promote posts across both platforms simultaneously.
2. Do I need to add a payment method in RecurPost?
No, payments are managed by your Facebook Ad Account. RecurPost only helps with setup and management.
3. How do I edit or stop a running ad?
You can pause or stop any ad anytime from your Paid Ads dashboard. Stopping it immediately ends its delivery.
4. What if Facebook rejects my ad?
If your ad violates Facebook’s ad policies, it won’t run. You can edit and resubmit it after reviewing Facebook’s Ad Guidelines.
5. Can I duplicate a previous ad?
Yes, you can reuse or duplicate previous ad setups for faster campaign creation by using our ‘Clone’ button on the expired Ad.
6. Will boosting posts affect organic reach?
No, boosting adds paid visibility, your organic reach stays the same.
7. Where can I find billing or spend details?
All payments and invoices are available in your Facebook Ads Manager.